22
3.3 Playback Screen
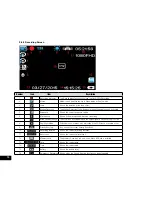
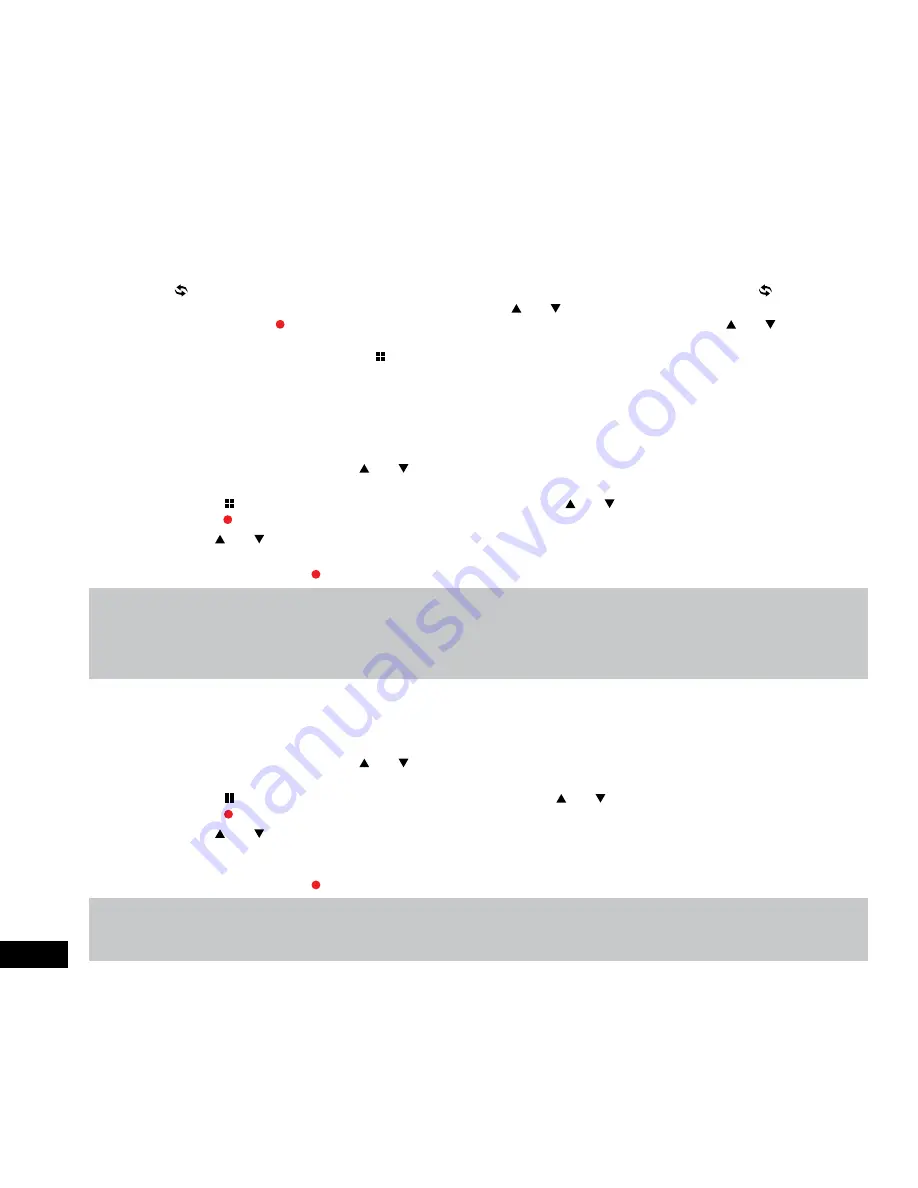
This screen is used to playback photos and videos. To access the Playback screen ensure that the camera is not recording and
press the (Mode) button. This will send the camera to the photo screen. While in the Photo Screen press the (Mode) button
again which will bring you to the Playback Screen. In this screen the and buttons are used to cycle through the recorded
videos and photos and the (Rec/Ok) button is used to play and pause videos. While playing a video the and buttons to
adjust the playback volume. In the Playback Screen photos and videos can also be locked and deleted via the Playback Menu.
This menu can be accessed by pressing the (Menu) in the Photo Screen.
3.4 Playback Menu
3.4.1 Deleting Photos and Videos
To delete an unlocked photo or video follow the instructions below.
1.
Navigate to the playback screen using the instructions in the section labelled
Playback Screen
.
2.
In the
Playback Screen
use the and buttons to select the photo or video that you want to delete (if you want to
delete all unlocked photos and videos select any unlocked Photo or Video).
3.
Press the (Menu) button to enter the
Playback Menu
and use the and buttons to select the Delete setting and
press the (Rec/Ok) button.
4.
Use the and buttons to select either
Delete all
, which will delete all unlocked photos and videos, or
Delete Current
which will delete the selected photo or video.
5.
Select OK and press the (Rec/Ok) button to confirm the deletion.
Note:
1.
Menus cannot be accessed while the camera is recording. Please stop the recording before attempting to access the menu.
2.
You will only be able to delete videos that have not been protected by a
G Sensor
.
3.
To unlock protected files please follow the directions in the section marked
Protect Photos
and
Videos
.
4.
To easily delete all files on the inserted Micro SD Card, please follow the instructions given in the section marked
Format (3.2.6)
.
3.4.2 Locking and Unlocking Photos and Videos
To
Lock or Unlock photos or videos
from being deleted, please follow the instructions below.
1.
Navigate to the playback screen using the instructions in the section labelled
Playback Screen
.
2.
In the
Playback Screen
use the and buttons to select the photo or video that you want to lock or unlock (if you
want to lock or unlock all photos and videos select any Photo or Video).
3.
Press the (Menu) button to enter the Playback Menu and use the and buttons to select the Protect setting and
press the (Rec/Ok) button.
4.
Use the and buttons to select either Unlock All, which will unlock all photos and videos, Unlock Current to unlock the
currently selected photo or video, Lock All to lock all videos and photos to protect them from deletion, or Lock Current to
lock the currently selected to protect the currently selected photo or video from deletion.
5.
Select OK and press the (Rec/Ok) button to confirm your selection.
Note:
1.
Menus cannot be accessed while the camera is recording. Please stop the recording before attempting to access the menu.
2.
To easily delete all file on the inserted Micro SD Card, please follow the instructions given in the section marked
Format (3.2.6)
.
Содержание NCP-DVR1080
Страница 1: ...USER MANUAL FULL HD DASH CAM DVR WITH 2 4 SCREEN NCP DVR1080...
Страница 2: ......
Страница 26: ...26...
Страница 28: ...www nanocamplus com au www nanocamplus co nz NanoCam Plus 2016...


