


NAD
11
GB
trol (section 11 on remote control drawing) to increase
the relative level of mid-frequencies in the sound.
Rotate control 18 on the front panel counter clockwise
or the press the MID - button on the remote control
(section 11 on remote control drawing) to decrease the
relative level of mid-frequencies in the sound.
Changing the mid control has a significant effect on
vocals, trumpets, violins, etc.
5. TREBLE: Rotate control 19 on the front panel
clockwise or the press the button on the
remote control (section 11 on remote control drawing)
to increase the relative level of high-frequencies in the
sound. Rotate control 19 on the front panel counter
clockwise or the press the TREBLE - button on the
remote control (section 11 on remote control drawing)
to decrease the relative level of high-frequencies in the
sound. Changing the TREBLE setting has a significant
effect on cymbals, hi-hats and other percussion instru-
ments.
• Infrasonic, Mid & Treble tone controls.
This DSP function works and operates in the same
manner to the DSP function described above but BASS
has been replaced by a non-adjustable Infrasonic filter.
The infrasonic filter removes very low frequencies
which can sometimes have a disturbing effect on the
overall music quality. These low frequencies, which
often do not have any relation to the music itself, can
emanate from a turntable or recordings made from it
and sometimes even CD players. If these extremely
low frequencies aren’t filtered out they can put a signifi-
cant strain on power amplifiers and loudloudspeakers.
It is relatively easy to check if any of your program
material contains unwanted infrasonic sounds:
1. Remove the grilles from the loudloudspeakers
(check the owner’s manual of the loudloudspeakers
first for the correct procedure; note that not all loud-
loudspeakers have removable grills).
2. Select the Infrasonic & Mid & Treble DSP function
(16; button Infra & tone on remote control, section 3 on
remote control drawing), but do not switch DSP in yet.
3. Whilst playing music at a normal, realistic listening
level observe the loudspeaker cones.
4. Without changing volume, switch DSP in (15; but-
ton IN/OUT on front panel, 10 on remote control draw-
ing). If there is a significant reduction in loudspeaker
cone movement then it is likely that that particular piece
of music does contain unwanted low-frequency energy,
in which case it is recommended you leave Infrasonic
switched on.
• FM
Often stereo FM radio reception is hampered by high
levels of background hiss, caused by poor reception or
the radio transmitter being too far away for clear recep-
tion. Under such circumstances switch the tuner to
Mono. The noise will decrease significantly.
The FM DSP function allows you to reduce this hiss
whilst maintaining a level of stereo or even create a
simulated stereo depending on the level chosen.
1. Select the FM DSP function (16; button FM on
remote control, section 3 on remote control drawing).
2. Switch on DSP (15; button IN/OUT on front panel,
10 on remote control drawing).
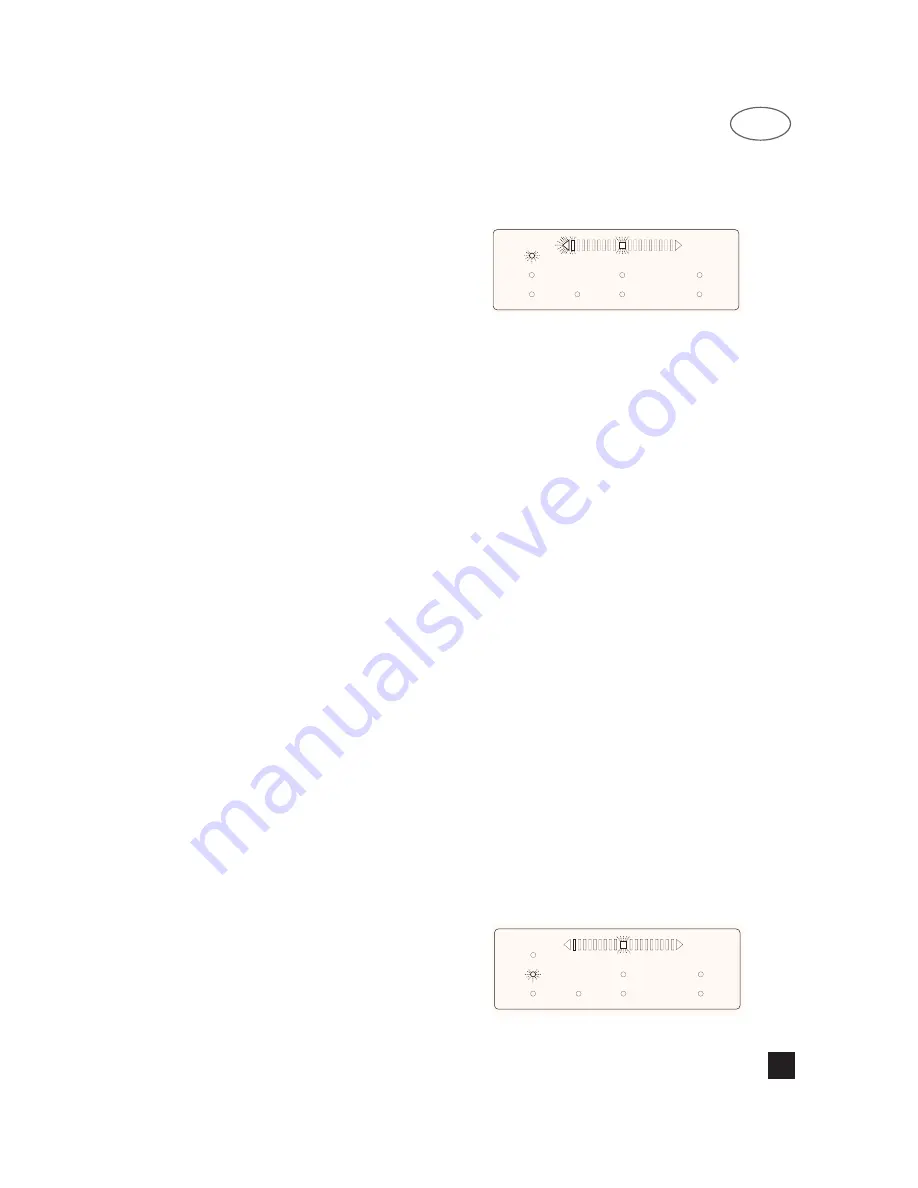
3. Rotate the control (17) fully counter clockwise, or if
you are using the remote control, press BASS Down
(section 11 on remote control drawing) until the LED
bar in the display area (26) indicates minimum level, as
in the drawing below.
4. Turn up control (17) or press the BASS +button on
the remote control until the hiss has been reduced to
an acceptable level. What in fact happens is that from
full stereo (and maximum of hiss) the stereo separation
is reduced more(and thus the hiss) as the setting is
moved towards the maximum position. As stereo sepa-
ration is reduced the FM DSP function generates spa-
ciousness by using stereo simulation. At the maximum
position the source itself is fully mono (no channel sep-
aration) but spaciousness and spread has been
regained thanks to the stereo simulation.
NOTE: The FM DSP function works on all inputs
which can be useful, e.g. to play back a recording of a
broadcast containing a lot of hiss.
NOTE: For the Stereo simulation to work properly it is
important that the perceived volume level from each
speaker is identical.
• Width
Many recordings, although stereo, can still sound
restricted in terms of perceived imaging and sound-
stage, or the correct stereo effect cannot be enjoyed to
the full because of physical restrictions in loudspeaker
positioning (too close together).
Alternatively, on some recordings -particularly older
ones- the Left / Right separation for stereo can be too
severe, making for a very artificial overall sound. Using
the stereo information available on the recording, the
Width DSP function can make the stereo image wider
or narrower.
1. Select the Width DSP function (16; button Width
on remote control, section 3 on remote control draw-
ing).
2. Switch on DSP (15; button IN/OUT on front panel,
10 on remote control drawing).
3. Start from the neutral setting (original stereo
sound, no widening or narrowing) at the 12 o’clock
position for the front panel control knob (17). When
using the remote control, press the BASS + or - buttons
(section 11 on remote control drawing) to adjust to the
neutral position, indicated by the LED bar (only the
square centre LED should light up) in the display panel
(26):
FM
WIDTH
BASS
INFRASONIC
MID
SPREAD
TREBLE
COMPRESSION
FM
WIDTH
BASS
INFRASONIC
MID
SPREAD
TREBLE
COMPRESSION