Users Guide ValueJet 1614
36
AP-75790 Rev 1.4 -22/02/2011,
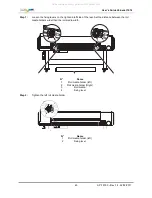
Step 9 :
The plastic bars are installed to both right and left side of the carriage.
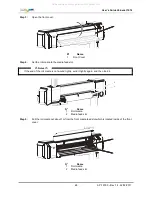
Step 10 :
Remove the scroller.
Step 11 :
Unplug and remove all cables.
Step 12 :
Release the lock of the caster wheels and transfer the printer.
Notes
The casters supplied with the dedicated stand are manufactured for a small transfer on a plain surface.
When moving the printer outdoors, and in places with big step differences, then move the stand and
printer separately. For further details please refer to the Installation guide.
(2) Steps after transfer
Step 1 :
Choose a suitable place to install the printer.
Refer to
Installation guide
Step 2 :
Verify that the butterfly bolts fixing the stand with the printer are well fixed.
Step 3 :
Connect all cables.
Step 4 :
Perform a nozzle check, and verify that there is no clogging in the printer head.
Refer to
Nozzle check
Step 5 :
Perform a head alignment.
Refer to
Adjust print
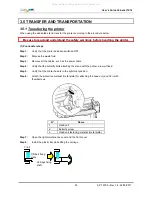
3.5.2 Transporting the printer
Be sure to read and understand the safety warnings before handling the printer.
When transporting the printer, it is necessary to pack the printer as it was shipped, using the protective
materials and packing materials to protect the printer from vibration and shocks.
Notes
When transporting the printer, consult your MUTOH product dealer.
(1) Pre- transport procedure
Step 1 :
Switch ON the printer.
Step 2 :
Verify that the printer is in Normal mode.
Step 3 :
Remove all ink cassettes.
Step 4 :
Switch OFF the printer.
Result: The operation panel displays "Transport Mode", and the printer starts the ink rejecting operation.
The ink rejecting operation takes about 2 minutes.
Step 5 :
Verify that the power light faints when the ink rejection operations has been finished.
Step 6 :
Remove the scroller or the optional winding system.
Step 7 :
Remove all cables.
All manuals and user guides at all-guides.com
all-guides.com


