background image

1
2
3
4
5

6

Communication Management

Checking the Transmission Result (Transmission Report)    6-3

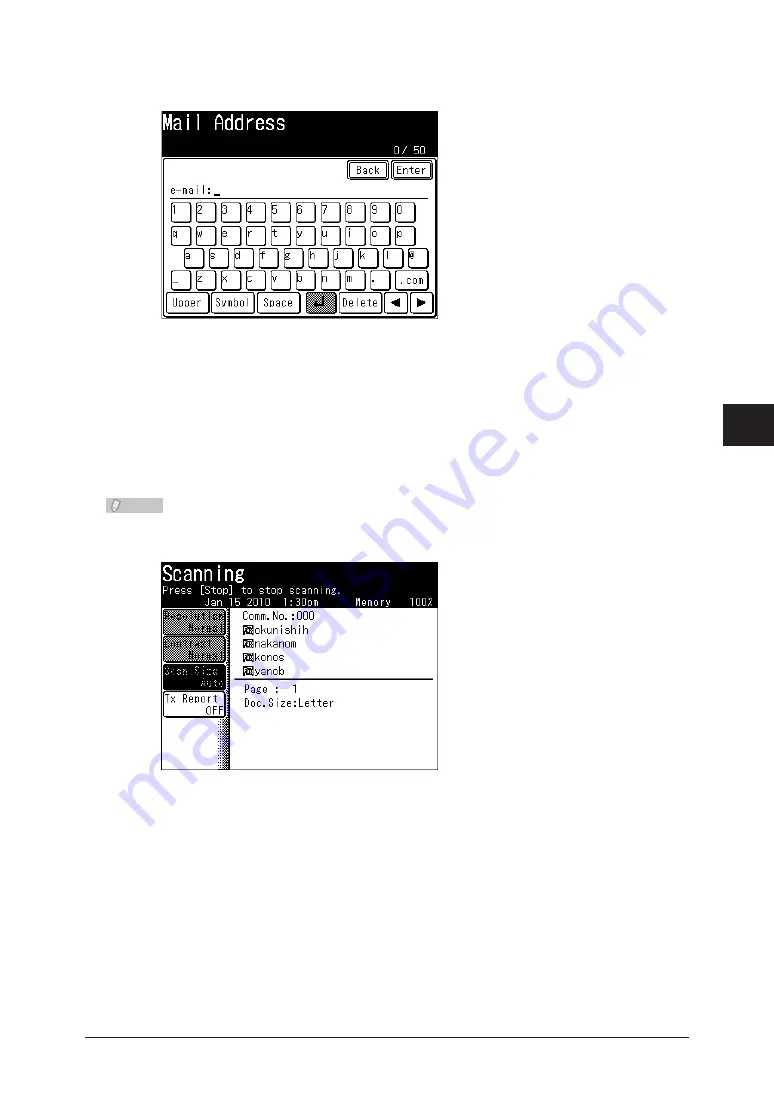
If you selected [e-mail], specify the destination for transmission report, and 

press [Enter].

Up to 50 characters can be entered.

• 

To delete one of the entered characters, press [Clear].

• 

Press [Close] twice.

Specify the destination, and press <Start>.

For details on specifying the destination, refer to “

Specifying Destinations

(See page 5-2.)

Note

You can change the transmission report settings while scanning. Press [Tx Report] on 

the screen displayed while scanning. Continue the procedure from step 5.

Содержание MFX-2550 Guide

Страница 1: ...Scanner and Fax Guide Plain paper digital Fax Copier Printer Scanner Please read this guide before operating this machine After you finish reading this guide keep it handy for easy reference ...

Страница 2: ...pter 1 Basic Scan Functions Chapter 2 Advanced Scan Functions Chapter 3 Basic Fax Functions Chapter 4 Advanced Fax Functions Chapter 5 Specifying Destinations Chapter 6 Communication Management Chapter 7 Device Settings ...

Страница 3: ... Size Scan Size 2 4 Zoom Scanning Zoom 2 6 Transmitting to Multiple Destinations Broadcast 2 7 Scanning the Next Document Next Doc 2 8 Duplex Scan 2 10 Adjusting the Scan Color Color Adjustment 2 12 Editing the Message for Transmission E Mail Subject 2 22 Setting the File Name File Name 2 25 Transmitting Scanned Data as Individual Files Batch Scan 2 27 Attaching a File Attachment 2 28 Selecting th...

Страница 4: ...3 60 Transmitting Internet Faxes 3 60 Receiving Internet Faxes 3 62 Chapter 4 Advanced Fax Functions Introduction to Advanced Functions 4 2 Scan Related Settings 4 4 Transmitting Only Part of the Document Scan Size 4 4 Scanning the Next Document Next Document Setting 4 6 Various Fax Functions 4 8 Setting the Sender Name TTI 4 8 Transmitting a Cover Page with Documents Cover page 4 9 Specifying the...

Страница 5: ...r Server Destinations 5 5 Entering Destinations 5 11 Specifying Using Search Numbers 5 13 Selecting From the History 5 15 Confirming Specified Destinations 5 18 Checking the Specified Destinations 5 18 Checking Destinations with the Confirm Destination Function 5 19 Chapter 6 Communication Management Checking the Transmission Result Transmission Report 6 2 Issuing the Transmission Report 6 2 Readi...

Страница 6: ...il Transmission Settings 7 43 Specifying Default Fax Settings 7 46 Registering Other Settings 7 51 Registering Editing Templates 7 51 Registering Editing File Names 7 55 Registering Editing Document Categories 7 56 Registering Editing Domain Names 7 58 Color Fine Adjustment 7 59 ...

Страница 7: ...jury if you handle the machine incorrectly For safe operation please follow instructions carefully Caution Notes a caution to protect yourself and others from personal injury or damage to properties if you handle the machine incorrectly For safe operation please follow instructions carefully IMPORTANT Describes important conditions or restrictions you should carefully observe to avoid problems cau...

Страница 8: ...el are shown in and the key names on the touch panel are in Keys on the control panel Enclosed in for example Job Confirm Fax Cancel Touch panel keys Enclosed in for example Contrast Screens This manual uses the screens of the MFX 2550 standard model unless otherwise stated The screens you see may differ depending on the options installed ...

Страница 9: ...viii How to Read This Manual ...

Страница 10: ...2 Scanning to a Shared PC Folder 1 4 Scanning to a User 1 7 Scanning to USB Memory 1 10 Scanning to an FTP Server 1 13 Scanning to a Printer 1 17 Basic Scan Settings 1 20 Setting the Document Type 1 20 Setting the Contrast 1 21 Setting the Resolution 1 23 Setting the Scan Format 1 24 ...

Страница 11: ... loading documents refer to Chapter 1 Loading Documents in the User s Guide Set the document type contrast and resolution as necessary See page 1 20 Change the file format 22 see page 2 30 and specify advanced settings such as entering a message see page 2 22 as necessary Press the e mail tab 33 Specify the destination 44 For details on specifying the destination refer to Specifying Destinations S...

Страница 12: ... loaded the document in the ADF this concludes the procedure If you loaded the document on the document glass load the next document and 66 press Next Doc To finish scanning press Complete Repeat step 6 to scan all the documents 77 To finish scanning press Complete Note You can register often used destinations in the Faves tab See page 7 36 ...

Страница 13: ...egister must have shared folder settings specified on the computer you are using in advance Load the document and press Scan 11 For details on loading documents refer to Chapter 1 Loading Documents in the User s Guide Set the document type contrast and resolution as necessary See page 1 20 Specify advanced settings such as changing the file format as necessary 22 See page 2 4 ...

Страница 14: ...then Folder 33 Press Browse 44 The list of computers or networks is displayed If the target folder has been registered as a shortcut in advance select it from the list of shortcuts If the target folder is registered in the Faves tab you can select it from the Faves tab ...

Страница 15: ... shared box as destinations To confirm a specified destination press Location For details on confirming destinations refer to Confirming Specified Destinations See page 5 18 Press Start 77 If you selected a destination from the list of shortcuts this step is not required If you loaded the document in the ADF this concludes the procedure If you loaded the document on the document glass load the nex...

Страница 16: ...ls on registration refer to Registering a Browsed Folder See page 7 23 Scanning to a User You can store a scanned document in a box in the memory of the machine Registered users can download the data from a computer using a Web browser and transmit it via e mail There are two types of boxes that scanned documents can be saved to User boxes These are the boxes that belong to each registered user Sh...

Страница 17: ...2 4 Press the PC USB tab and then User 33 Specify the destination 44 To specify a user group press the Group and then specify the group If destinations are registered in the Faves tab you can also select a destination from the Faves tab If you loaded the document in the ADF this concludes the procedure ...

Страница 18: ...ocument on the document glass load the next document and 55 press Next Doc To finish scanning press Complete Repeat step 5 to scan all the documents 66 To finish scanning press Complete Note You can register often used destinations in the Faves tab See page 7 36 ...

Страница 19: ... USB standards are all unsupported If the USB memory becomes full while the data is being saved the data that is being written is all deleted Therefore make sure that the USB memory has enough free space in advance If you want to connect the USB memory via an extension cable use a cable that is shorter than 3 meters Load the document and press Scan 11 For details on loading documents refer to Chap...

Страница 20: ...ormat as necessary 44 See page 2 4 Press Start 55 If you loaded the document in the ADF this concludes the procedure If you loaded the document on the document glass load the next document and 66 press Next Doc To finish scanning press Complete Proceed to step 8 Repeat step 6 to scan all the documents 77 To finish scanning press Complete ...

Страница 21: ... Ready is displayed on the screen remove the USB 88 memory Note If you connect USB memory when the machine is in the ready state the Scan To USB and USB To Print buttons are displayed Press Scan To USB and perform the procedure in steps 4 to 7 ...

Страница 22: ...col server FTP Server Network Load the document and press Scan 11 For details on loading documents refer to Chapter 1 Loading Documents in the User s Guide Set the document type contrast and resolution as necessary See page 1 20 Specify advanced settings such as changing the file format as necessary 22 See page 2 4 Press the PC USB tab and then FTP 33 ...

Страница 23: ...om the list of shortcuts If the target FTP server is registered in the Faves tab you can select it from the Faves tab Press Link 55 Enter the link to the FTP server and press Enter 66 Start the link with two slashes For details on entering characters refer to Chapter 1 Entering Characters in the Administrator s Guide ...

Страница 24: ... and press Enter 111 Up to 28 characters can be entered For details on entering characters refer to Chapter 1 Entering Characters in the Administrator s Guide Press Enter 111 Repeat steps 4 to 11 to specify all the destinations 111 You can also specify e mail addresses shared folders user boxes and the shared box as destinations To confirm a specified destination press Location For details on conf...

Страница 25: ...plete Note You can register often used destinations in the Faves tab See page 7 36 For details on registering shortcuts refer to Registering Editing FTP Server Shortcuts see page 7 24 or Registering Shortcuts in Chapter 3 of the OfficeBridge Guide You can press Add Edit on the screen in step 3 to register edit or delete shortcuts For details on registration refer to Registering from an Operation S...

Страница 26: ...rint Monitor For details refer to Registering a Color Printer See page 7 30 Even if the Scan to Print Monitor is not started you may be able to use the Scan to Print function In this case the printed documents will be printed again when the Scan to Print Monitor is started If you press Scan to Print the scan format is automatically set to color Load the document and press Scan 11 For details on lo...

Страница 27: ...ent as necessary 22 See page 2 4 Press the Apps tab and then Scan to Print 33 Select the printer 44 To sort the output press Sort 55 Enter the number of copies to print using the numeric keys 66 Press Start 77 If you loaded the document in the ADF this concludes the procedure ...

Страница 28: ...Basic Scanning 1 19 If you loaded the document on the document glass load the next document and 88 press Next Doc To finish scanning press Complete Repeat step 8 to scan all the documents 99 To finish scanning press Complete ...

Страница 29: ...e Set the document type to scan with according to the document Text Select this when you want to scan text Auto Select this when you want to set the document type automatically Photo Select this when you want to scan photos Load the document and press Scan 11 For details on loading documents refer to Chapter 1 Loading Documents in the User s Guide Press Doc Type 22 If Doc Type is not displayed pre...

Страница 30: ... To finish scanning press Complete Setting the Contrast Set the contrast to scan with according to the document Lightest Select to scan with the lightest contrast Lighter Select to scan with a contrast between the normal contrast and the lightest contrast Normal Select to scan with the normal contrast Darker Select to scan with a contrast between the normal contrast and the darkest contrast Darkes...

Страница 31: ...s Enter 33 Lightest Darker Lighter Normal Darkest Specify the destination and press Start 44 For details on the procedure refer to Basic Scanning See page 1 2 If you loaded the document in the ADF this concludes the procedure If you loaded the document on the document glass load the next document and press Next Doc To finish scanning press Complete ...

Страница 32: ...ocument will be scanned clearly but the size of the created data will be large Load the document and press Scan 11 For details on loading documents refer to Chapter 1 Loading Documents in the User s Guide Press Resolution 22 If Resolution is not displayed press Advanced and then select Resolution Select the desired resolution and press Enter 33 ...

Страница 33: ... color or monochrome Load the document and press Scan 11 For details on loading documents refer to Chapter 1 Loading Documents in the User s Guide Press Color 22 Scan format switches between Mono and Color each time you press Color If Color is not displayed press Advanced and then select Color Specify the destination and press Start 33 For details on the procedure refer to Basic Scanning See page ...

Страница 34: ...t 2 22 Setting the File Name File Name 2 25 Transmitting Scanned Data as Individual Files Batch Scan 2 27 Attaching a File Attachment 2 28 Selecting the File Format File Format 2 30 Receiving File Path Notification E mail Scan Path Notification 2 33 Setting Document Categories Category 2 35 Setting the Hold Time Hold Time 2 38 Adding Comments Comments 2 39 Using ScanTag 2 40 Scanning Documents Usi...

Страница 35: ...documents such as an invoice and a map together See page 2 8 Duplex Scan You can transmit or scan both sides of a document See page 2 10 Color Adjustment When performing color scanning you can adjust the image to suit your requirements See page 2 12 E mail Subject When transmitting a scanned image via e mail you can edit the body and subject of the e mail you re sending You can also enter the body...

Страница 36: ...in a box and enables you to search for documents via their category See page 2 35 Hold Time You can set the storage period hold time for documents saved in a box See page 2 38 Comments You can enter comments for documents saved in a box See page 2 39 Using ScanTag The ScanTag feature allows you to enter and send a metadata tag automatically to a network computer See page 2 40 TWAIN You can use app...

Страница 37: ...cument glass only an area from the reference setting position equal to the set scan size is scanned When you scan using the ADF only an area from the center with a width equal to the set scan size is scanned The whole length of the document is scanned Document glass Reference setting position ADF A A4 A5 F4 A Reference setting position A Legal Letter Half letter Half letter Letter Legal A Referenc...

Страница 38: ... Advanced Scan Features 2 5 Press Advanced 22 Press Scan Size 33 Select the scan size and press Enter 44 Press Close 55 Specify the destination and press Start 66 For details on the procedure refer to Basic Scanning See page 1 2 ...

Страница 39: ...400 when using the document glass and between 50 and 100 when using the ADF Depending on the selected zoom ratio some of the image may be left out or there may be extra blank areas on the paper Load the document and press Scan 11 Press Advanced 22 Press Zoom 33 Select an enlargement ratio or reduction ratio and press Enter 44 You can press and to set a free zoom ratio You can use the numeric keys ...

Страница 40: ...ion If you want to specify destinations using other methods you can specify multiple destinations even if the Broadcast function is disabled You can change the default value to always have broadcast transmission enabled See page 3 8 The number of destinations that can be transmitted to for a single broadcast is indicated below Destinations Number Address book destinations and groups 2000 Manually ...

Страница 41: ...again Press Location to confirm or delete the specified destinations For details refer to Confirming Specified Destinations See page 5 18 Press Start 77 Scanning the Next Document Next Doc You can transmit or save separate documents scanned in a row as a single set of data Since you can scan using both the document glass and the ADF this is useful for transmitting saving a combination of documents...

Страница 42: ...4 If you select OFF the next document setting is disabled Press Close 55 Specify the destination and press Start 66 For details on the procedure refer to Basic Scanning See page 1 2 When the loaded documents have been scanned the message Set next document is displayed Load the next document to scan 77 ...

Страница 43: ...o sided document using this mode Just load page one of the duplex document in the ADF and press Start The machine will prompt you on the following steps The machine will automatically sort the pages into the correct order 1 6 1 5 1 4 1 3 2 6 4 1 Scan the front side 2 Turn over the document and scan the backside 3 The scanned data temporarily saved in the memory will be sorted and transmitted or sa...

Страница 44: ...ge or Short Edge and press Enter Press Close 55 Specify the destination and press Start 66 For details on the procedure refer to Basic Scanning See page 1 2 When the front side scan is over the machine shows the following screen Set 77 the backside of the duplex document and press Start or Start ...

Страница 45: ...or other landscape document Long edge Short edge Adjusting the Scan Color Color Adjustment When performing color scanning you can adjust the image to suit your requirements Note The color can only be adjusted when the scan format is set to Color For details on setting the scan format see Basic Scanning See page 1 24 Images shown in this manual are sample data which may be different from the actual...

Страница 46: ...e between light and dark to seven different levels from 3 low to 3 high The difference between brightness and darkness reduces and the whole image becomes dark The light parts become lighter and the dark parts darker 3 2 1 0 1 2 3 Load the document and press Scan 11 Press Advanced 22 Press Color Adjust 33 Press Contrast 44 ...

Страница 47: ...For details on the procedure refer to Basic Scanning See page 1 2 Adjusting the Sharpness You can set the image sharpness the sharpness or softness to seven different levels from 3 low to 3 high Softens texts and lines Sharpens texts and lines 3 2 1 0 1 2 3 Load the document and press Scan 11 Press Advanced 22 Press Color Adjust 33 ...

Страница 48: ...ctions Advanced Scan Features 2 15 Press Sharpness 44 Select the sharpness and press Enter 55 Press Close twice 66 Specify the destination and press Start 77 For details on the procedure refer to Basic Scanning See page 1 2 ...

Страница 49: ...on light orange to seven different levels from 3 red to 3 green Turns the color tone red Turns the color tone green 3 2 1 0 1 2 3 Note To Adjust hue set the contrast to Normal See page 1 21 Load the document and press Scan 11 Press Advanced 22 Press Color Adjust 33 Press Hue 44 Select the hue and press Enter 55 ...

Страница 50: ...turation You can set the image saturation the color vibrancy to seven different levels from 3 low to 3 high Lessens the color to make the image closer to grayscale Enhances the color to make the color of the image more vibrant 3 2 1 0 1 2 3 Note To Adjust saturation set the contrast to Normal See page 1 21 Load the document and press Scan 11 Press Advanced 22 Press Color Adjust 33 Press Saturation...

Страница 51: ...er to Basic Scanning See page 1 2 Adjusting the Lightness You can set the image lightness brightness and darkness to seven different levels from 3 low to 3 high Darkens the entire image Lightens the entire image 3 2 1 0 1 2 3 Note To Adjust lightness set the contrast to Normal See page 1 21 Load the document and press Scan 11 Press Advanced 22 Press Color Adjust 33 ...

Страница 52: ...ctions Advanced Scan Features 2 19 Press Lightness 44 Select the lightness and press Enter 55 Press Close twice 66 Specify the destination and press Start 77 For details on the procedure refer to Basic Scanning See page 1 2 ...

Страница 53: ... 2 3 You can set the ratio of G green to seven different levels from 3 to 3 Lessens green and enhances magenta Enhances green and lessens magenta 3 2 1 0 1 2 3 You can set the ratio of B blue to seven different levels from 3 to 3 Lessens blue and enhances yellow Enhances blue and lessens yellow 3 2 1 0 1 2 3 Load the document and press Scan 11 Press Advanced 22 Press Color Adjust 33 ...

Страница 54: ... Advanced Scan Features 2 21 Press RGB 44 Select R G or B select the color ratio and press Enter 55 Press Close twice 66 Specify the destination and press Start 77 For details on the procedure refer to Basic Scanning See page 1 2 ...

Страница 55: ...ng You can also enter the body of the e mail using a template registered in advance Note For details on registering e mail templates refer to Registering Editing Templates see page 7 51 or Setting Templates in Chapter 3 of the OfficeBridge Guide This function can be used with Scan to e mail Load the document and press Scan 11 Press Advanced 22 Press e mail Subject 33 Press Template 44 ...

Страница 56: ...late select a box with nothing registered in it If all the boxes already have a template registered select any box from 01 to 10 If you selected Auto Subject Text you cannot edit the subject and mail text Proceed to step 10 If you selected Auto Subject you can only edit the mail text Proceed to step 8 Press Subject 66 If you do not want to edit it proceed to step 8 ...

Страница 57: ...ext and press Enter 99 Up to 1024 characters can be entered for the message Press to enter a line break A line break takes up two characters Press ViewText to confirm the mail text that has been entered After confirming press Edit to return to the entry screen For details on entering characters refer to Chapter 1 Entering Characters in the Administrator s Guide Press Enter 111 Press Close 111 Spec...

Страница 58: ...me for a TIFF file created at 1 30 30 pm on the 15th of January 2010 will be 20100115133030 tif For details on registering filenames refer to Registering Editing File Names see page 7 55 or Setting Templates in Chapter 3 of the OfficeBridge Guide Entering a New File Name Load the document and press Scan 11 Press File Name 22 If File Name is not displayed press Advanced and then select File Name En...

Страница 59: ...or details on the procedure refer to Basic Scanning See page 1 2 Using a Registered File Name Load the document and press Scan 11 Press File Name 22 If File Name is not displayed press Advanced and then select File Name Press List 33 Select the file name you want to use 44 ...

Страница 60: ... it proceed to step 6 Specify the destination and press Start 66 For details on the procedure refer to Basic Scanning See page 1 2 Transmitting Scanned Data as Individual Files Batch Scan When the Batch Scan function is on it means that all scanned pages will be saved as one file If you turn this function off each scanned page will be saved as an individual file Load the document and press Scan 11...

Страница 61: ... For details on the procedure refer to Basic Scanning See page 1 2 Attaching a File Attachment You can attach a file on the network Word Excel etc when transmitting or scanning a document Note This function can be used in the following cases Scan to e mail Scan to PC Folder Scan to FTP Server Load the document and press Scan 11 Press Advanced 22 Press Attachment 33 ...

Страница 62: ...display detailed information for the file To close the detailed information screen press Close To continue to attach files press Shortcut and repeat steps 4 to 5 of the 66 operation If you do not want to attach another file proceed to step 7 Press Close twice 77 Specify the destination and press Start 88 For details on the procedure refer to Basic Scanning See page 1 2 Note The limits on the files...

Страница 63: ...eated PDF file Up to 28 alphanumeric characters and symbols can be entered for the password Set the password after pressing Start Permissions Password If you set this password the password must be entered when printing or editing the created PDF file The operations for which the password is required can be set in Printing Allowed Editing Allowed and Copying Allowed Up to 28 alphanumeric characters...

Страница 64: ...ss FileFormat 33 Select the file format 44 The selectable file formats differ according to the selected scan format color or monochrome If you selected encrypted PDF in step 4 press PDF w Password to change the 55 encryption settings Otherwise proceed to step 8 ...

Страница 65: ...canning See page 1 2 If you selected a file format other than encrypted PDF the procedure is complete To set a password for opening the document enter the password and press 111 Enter If you do not want to set a password for opening the document press Enter without entering a password Enter the password set in step 11 again and press Enter 111 If you did not enter a password in step 11 this screen...

Страница 66: ...assword in step 13 this screen is not displayed Receiving File Path Notification E mail Scan Path Notification You can receive an e mail regarding the location that the scanned document was saved to Note Perform a user login before using this function For details on logging in refer to Chapter 1 Logging In Logging Out in the Administrator s Guide This function can be used with the Scan to PC Folde...

Страница 67: ...on and press Start 66 For details on the procedure refer to Basic Scanning See page 1 2 Note The notification e mail is sent to the e mail address registered in the user information This function can only be used if an e mail address is registered in the user information For details on registering user information refer to Chapter 3 Registering Users in the OfficeBridge Guide ...

Страница 68: ... You can also set the document category using a document category registered in advance Note This function can be used with Scan to Box The data is not classified unless you enter a document category The document category can also be changed after saving the data For details on registering document categories refer to Registering Editing Document Categories see page 7 56 or Setting Templates in Ch...

Страница 69: ...entering characters refer to Chapter 1 Entering Characters in the Administrator s Guide Press Close 55 Specify the destination and press Start 66 For details on the procedure refer to Scanning to a User See page 1 7 Using a Document Category Load the document and press Scan 11 Press Advanced 22 Press Category 33 Press List 44 ...

Страница 70: ...ment category as necessary and press Enter 66 For details on entering characters refer to Chapter 1 Entering Characters in the Administrator s Guide If you do not want to edit it proceed to step 7 Press Close 77 Specify the destination and press Start 88 For details on the procedure refer to Scanning to a User See page 1 7 ...

Страница 71: ... data is saved is not included in the storage period This means that if you set a storage period of one day the data will be stored until the day after the data was saved Load the document and press Scan 11 Press Advanced 22 Press Hold Time 33 Select ON to set the storage period or OFF to not set it 44 If you selected OFF press Enter and proceed to step 6 Enter the storage period and press Enter 5...

Страница 72: ...ocuments saved in a box Note This function can be used with Scan to Box Load the document and press Scan 11 Press Advanced 22 Press Comments 33 Enter the comments and press Enter 44 Up to 1024 characters can be entered Press ViewText to confirm the mail text that has been entered Press Edit to return to the entry screen For details on entering characters refer to Chapter 1 Entering Characters in t...

Страница 73: ...ta indicating the attributes and processing method of the image file in a single scan The image data and metadata will be sent automatically to a network computer Note Set ScanTag before using this function For details refer to Chapter 3 Setting ScanTag in the OfficeBridge Guide Entering a tag metadata at the machine Load the document and press Scan 11 Press the Apps tab and then ScanTag 22 Select...

Страница 74: ...r s Guide If the tag entry was set to List Input the defined text strings will appear askeys Select a value from the list If the text string is defined as editable the character entry screen will appear Change the value if needed and then press Enter If the tag entry was set to character entry enter the appropriate text string manually and then press Enter Confirm the entered values and press Ente...

Страница 75: ...atures Press Yes to scan another document using the tag settings in step 4 77 Press No to complete the operation or specify different tag settings When you are logged in the log out screen is displayed Press Yes to log out ...

Страница 76: ...stored in a TWAIN box and then imported by the application software Note Install the TWAIN driver to the computer in advance For details on installing the driver refer to Chapter 2 Installing to Windows in the Printer Guide You can also connect the computer and the machine with a USB cable to retrieve data Storing Documents in a TWAIN Box Load the document and press Scan 11 Press Advanced 22 Press...

Страница 77: ... store the document 55 If an I D code is set for the TWAIN box enter the I D code and press Enter 66 If an I D code has not been set proceed to step 7 Press Yes or Start 77 Note Up to 99 files can be stored in a single box Up to 9 999 pages of documents can be stored as a single file ...

Страница 78: ...ed Documents Press Scan 11 Press Advanced 22 Press TWAIN Box 33 Press Delete 44 Select the TWAIN box in which the documents you want to delete are stored 55 If an I D code is set for the TWAIN box enter the I D code and press Enter 66 If an I D code has not been set proceed to step 7 ...

Страница 79: ...Box Select the data you want to delete 77 To delete all the data stored in the box press All Clear Press Yes 88 Press No to close the screen without deleting the data Press Close 99 To continue deleting data repeat the operation from step 5 ...

Страница 80: ...Box You can register a name and I D code for a TWAIN box Press Setting 11 Press Register 22 Press TWAIN Box 33 Select the TWAIN box you want to register or edit the name or I D code for 44 If an I D code is set for the TWAIN box enter the I D code and press Enter 55 If no I D code is set proceed to step 6 ...

Страница 81: ...he name proceed to step 8 Register or edit the name and press Enter 77 Up to 16 characters can be entered For details on entering characters refer to Chapter 1 Entering Characters in the Administrator s Guide To register or edit the I D code press I D Code 88 If you do not want to register or edit the I D code proceed to step 10 ...

Страница 82: ...n software that supports TWAIN The procedure for using Microsoft Office Document Scanning is described here as an example Since the operation procedure differs according to the application software you are using refer to the documentation for the application software for details Note Install the TWAIN driver to the computer in advance For details on installing the driver refer to Chapter 2 Install...

Страница 83: ...ck Scan and select Muratec MFX 25xx NW Scan 22 If you connected the computer and the machine with a USB cable select Muratec MFX 25xx Scan Click OK 33 Start scanning 44 Select the TWAIN box 55 If an I D code is set enter the I D code and press OK ...

Страница 84: ...anner to connect to when the IP address of the machine has changed etc This is for network scanning only Refresh Updates the list of files Save Saves the current settings This cannot be clicked unless the settings have been changed Default Returns the settings to the factory defaults Exit Closes Muratec MFX 25xx NW Scan Resolution Pixel type Fixed image size These settings may be required dependin...

Страница 85: ...2 52 2 52 ...

Страница 86: ... 24 Canceling Checking Faxes 3 30 Receiving Faxes 3 36 Operations During Reception 3 39 Storing Received Documents 3 40 Making a Phone Call 3 43 Making a Phone Call 3 43 Receiving a Phone Call 3 44 Adjusting the Speaker Volume 3 44 Transmitting Faxes from a Computer 3 46 Transmitting With the Simple Mode 3 46 Transmitting With the Advanced Mode 3 52 Internet Fax Transmission Internet Fax 3 60 Tran...

Страница 87: ...g and faxing cannot be performed See page 3 6 Automatic daylight saving time detection Adjust the clock automatically in the summer time period See page 3 7 Broadcasting Set the broadcast transmission option See page 3 8 Fax reception mode Select the desired reception mode from the Fax mode Tel Fax mode Fax Tel mode Answering Fax mode or Tel mode options See page 3 9 For details on reception modes...

Страница 88: ...ny See page 3 17 These settings can be changed at any time Note You can also register or edit User Install using a web browser For details refer to Chapter 3 Specifying Device Settings in the OfficeBridge Guide Print out the Settings List to insure that your settings are correct For the procedure for printing refer to Chapter 1 Checking the Machine Information in the Administrator s Guide Register...

Страница 89: ...l 33 Press Language 44 Select the language and press Enter 55 If The language was changed Try to turn on power is displayed on the screen 66 turn the power of the machine OFF and then ON again If the message is not displayed this step is not required ...

Страница 90: ...month 2 digits day 2 digits hour 24 hour clock 2 digits and minutes 2 digits Press Setting 11 Press Management 22 If an administrator password is set enter the password and press Enter Press User Install 33 Press Time Setting 44 Select AM or PM and enter 55 the current date and time and press Enter You can use and the numeric keys ...

Страница 91: ...he dialing type needed for the fax machine either Tone or Pulse Press Setting 11 Press Management 22 If an administrator password is set enter the password and press Enter Press User Install 33 Press Communication Line 44 Select the dialing type and press Enter 55 ...

Страница 92: ... Daylight Savings Time Select the validity for the daylight saving time Press Setting 11 Press Management 22 If an administrator password is set enter the password and press Enter Press User Install 33 Press Set Daylight Saving 44 Select ON or OFF and press Enter 55 ...

Страница 93: ...selected OFF or when Start is pressed with all destinations selected ON Note The broadcast setting is enabled for both scan transmission and fax transmission Press Setting 11 Press Management 22 If an administrator password is set enter the password and press Enter Press User Install 33 Press Broadcast 44 Select ON or OFF and press Enter 55 ...

Страница 94: ...ception Mode Select the reception mode that best matches the machine usage Press Setting 11 Press Management 22 If an administrator password is set enter the password and press Enter Press User Install 33 Press Fax Reception Mode 44 Select the reception mode and press Enter 55 ...

Страница 95: ...y Press Setting 11 Press Management 22 If an administrator password is set enter the password and press Enter Press User Install 33 Press Dial 44 Tone Detect Select ON 55 or OFF to detect or not detect the dial tone and press Enter If you select ON you cannot transmit the faxes through a line that cannot acquire a dial tone ...

Страница 96: ...stering Your Name or Company Name TTI You can register three TTI s Transmit Terminal Identifier Press Setting 11 Press Management 22 If an administrator password is set enter the password and press Enter Press User Install 33 Press TTI Enter Edit 44 Press TTI 1 55 ...

Страница 97: ...pany name and press Enter 66 You can enter up to 22 characters for the sender name For details on entering characters refer to Chapter 1 Entering Characters in the Administrator s Guide To register TTI 77 2 and TTI 3 press TTI 2 or TTI 3 and repeat the operation in step 6 ...

Страница 98: ...13 Selecting the Default TTI Select the TTI that will be used most often Press Setting 11 Press Management 22 If an administrator password is set enter the password and press Enter Press User Install 33 Press Default TTI 44 Select the TTI and press Enter 55 ...

Страница 99: ... 33 Press TTI Number 44 Use the numeric key to enter the TTI number and press Enter 55 This number can contain up to 20 characters To enter symbol before your country code press To make long numbers easier to read press to enter it To erase a number press Clear To change just one number press or to move the cursor then press Clear to erase the number Then re enter the correct number ...

Страница 100: ... time up to 12 hours between countries from the Greenwich Observatory in England which is taken to be standard time and to regions that use the same difference Press Setting 11 Press Management 22 If an administrator password is set enter the password and press Enter Press User Install 33 Press Time Zone 44 ...

Страница 101: ... GMT 07 00 Mountain Time US Canada GMT 06 00 Central Time US Canada GMT 05 00 Eastern Time US Canada GMT 04 00 Atlantic Time Canada GMT 03 30 Newfoundland GMT Greenwich Mean Time Dublin Edinburgh Lisbon London GMT 01 00 Amsterdam Berlin Bern Rome Stockholm Vienna GMT 01 00 Belgrade Bratislava Budapest Ljubljana Prague GMT 01 00 Brussels Copenhagen Madrid Paris GMT 09 00 Osaka Sapporo Tokyo Seoul G...

Страница 102: ...isplay while the machine is being called This is an optional service provided by your telephone company Consult your telephone company for the serivece details Press Setting 11 Press Management 22 If an administrator password is set enter the password and press Enter Press User Install 33 Press Caller ID 44 Select ON or OFF and press Enter 55 ...

Страница 103: ... 1 Loading Documents in the User s Guide Set the resolution and contrast as necessary See page 3 24 Enter the number of the destination 22 Dialing options can be inserted See page 3 27 Destinations can also be selected from the address book For details on specifying other destinations refer to Specifying Destinations See page 5 2 Press Start 33 If you loaded the document in the ADF this concludes ...

Страница 104: ...ting The reserved transmission will start when the current job is completed Up to 100 transmissions can be reserved Manual Transmission Use this method when the other fax machine uses manual reception or when you want to transmit after having a telephone conversation Note The optional handset is required when picking up the handset to transmit Manual transmission cannot be performed from the docum...

Страница 105: ...andset of the external phone Specify the destination 33 For details on specifying the destination refer to Specifying Destinations See page 5 2 If the other party is using manual reception ask them to start the fax reception 44 procedure When you hear the beep from the other fax machine press Start 55 Press Monitor If you picked up the optional handset to dial hang up the handset If you picked up ...

Страница 106: ...al History Redial See page 5 15 Automatic Redialing When transmission was not successful during automatic transmission because the line was busy the number is automatically redialed at regular interval If the transmission was not successful even after the set number of redials the document stored in the memory will be deleted and the error message will be printed Note Redialing cannot be performed...

Страница 107: ... if the Broadcast function is disabled You can specify up to 2 000 fax destinations and 2 000 e mail destinations including both address book destinations and groups You can specify up to 30 fax destinations using the numeric keys and 30 e mail addresses entered manually You can change the default value to always have broadcast transmission enabled See page 3 8 Load the document and press Fax 11 F...

Страница 108: ...Repeat step 3 to specify all the destinations 44 If you specify a destination in the address book that destination will be canceled if you select it again Press Location to confirm or delete the specified destinations For details refer to Confirming Specified Destinations See page 5 18 Press Start 55 If you loaded the document in the ADF this concludes the procedure ...

Страница 109: ...in accordance with the document and its text and insert a dial number Note You can also change the default settings as necessary See page 7 48 Setting the Resolution Set the resolution to scan with according to the document Normal Select to scan a document with normal text Fine Select to scan a document with small text such as a newspaper S Fine Select to scan a document with detailed illustration...

Страница 110: ...ination refer to Selecting from the Address Book See page 5 2 If you loaded the document in the ADF this concludes the procedure If you loaded the document on the document glass load the next document and press Next Doc Press Tx Start to start transmission Note The Super Fine mode may not be supported by the destination machine In this case the optimal resolution will be automatically selected The...

Страница 111: ...th the darkest contrast Load the document and press Fax 11 Press Contrast 22 If Contrast is not displayed press Advanced and then select Contrast Select the desired contrast and press Enter 33 Lightest Darker Lighter Normal Darkest Specify the destination and press Start 44 For details on specifying the destination refer to Selecting from the Address Book See page 5 2 If you loaded the document in...

Страница 112: ...o be changed in the settings See page 7 49 Example 2 P222 2222 2222 Tone T This is used to switch from pulse dialing to tone dialing This option may not be available in some countries and regions Prefix N This is used to enter a prefix number A prefix number can only be used when specifying the destination using the numeric keys To use a prefix number it is necessary to register it in advance See ...

Страница 113: ... scanned and real time transmission which performs transmission while the document is being scanned This explanation indicates the procedure for selecting either transmission method for a single fax transmission Real time transmission directly transmits the document to the other fax machine without scanning the document into memory Transmission starts after the transmission operation which allows ...

Страница 114: ...tination and press Start 55 For details on specifying the destination refer to Specifying Destinations See page 5 2 If you loaded the document in the ADF this concludes the procedure If you loaded the document on the document glass load the next document and press Next Doc Press Tx Start to start transmission Note Real time transmission is not possible using the document glass Even if real time tr...

Страница 115: ...yed for the destination currently being transmitted to Completed Displayed for a destination that has finished transmission Deleting Displayed after deleting a destination until the actual deletion process is complete Redial Displayed for a destination that is waiting for redialing Press Job Confirm 11 Fax Cancel The information for the current document is displayed If you want to cancel the curre...

Страница 116: ...u can check and cancel documents reserved for delayed transmission or documents waiting to be redialed because the destination was busy Note If there are multiple internet fax destinations you cannot display or cancel them separately Press Job Confirm 11 Fax Cancel If there are any documents currently being transmitted information for the 22 current destinations is displayed If there are no docume...

Страница 117: ...chronological order To switch the screen press or When performing broadcast transmission Broadcast is displayed on the screen To individually check or delete destinations for the broadcast proceed to step 7 If you do not want to cancel the document press Reset Press Yes 55 Press Close 66 This ends the procedure Select the broadcast destination and press Detail 77 ...

Страница 118: ... jobs This enables you to check the result of transmitting via Scan to Folder or Scan to FTP in addition to checking the result of transmitting via fax and e mail Note The transmission history of jobs older than the last 100 jobs is automatically deleted For information on printing the transmission history see Manually Printing Journal Reports See page 6 6 Press Job Confirm 11 Fax Cancel If there ...

Страница 119: ...r Internet Faxes and Scan to E Mail jobs press e mail Tx To display the reception history for Internet Faxes press e mail Rx To display the transmission history for Scan to Folder jobs press Folder Tx To display the transmission history for Scan to FTP jobs press FTP Tx The transmission history is displayed in order of newest to oldest with six jobs on each page To check the details of a transmiss...

Страница 120: ...you pressed Close the procedure is complete If you pressed Print press Yes to print the transmission results For information on reading the transmission results refer to Reading Journal Reports See page 6 11 Note You can automatically print or specify a time for printing the latest communication history See page 6 5 ...

Страница 121: ...ine rings When the other party sent you a fax When the other party called you Note You can set the machine to ring between 0 and 10 times For details refer to List of Other Default Settings See page 7 49 You can pick up the optional handset or the external phone handset while the machine is ringing to talk on the phone Prioritizing Fax Reception Fax Tel Ready Pick up the optional handset or the ex...

Страница 122: ...r party is using a phone the machine will continue to ring after reception starts Call charges will be accrued during this time Using Both the Answering Machine and Fax Ans Fax Ready The machine rings the number of times set in the answering machine The answering machine message is played Reception starts The message starts recording Message recording When the other party sent you a fax When the o...

Страница 123: ...the ADF when receiving faxes If there is a document remaining transmission will start when Start is pressed Setting the Reception Method In addition to setting the reception mode you can also set manual reception or automatic reception on the screen Auto reception This method automatically receives faxes For details refer to Auto Reception for Fax Only Fax Ready See page 3 36 Manual reception This...

Страница 124: ...ayed on the fax ready screen The information lamp flashes green during reception Note If the other party has registered their name in their machine that name is displayed on the screen If the other party has registered their fax number in their machine that fax number is displayed on the screen If both their name and fax number are not registered nothing is displayed Do not pull out the paper cass...

Страница 125: ...could be stored will be printed Contact the other party and ask them to transmit the fax again When the power shuts off during memory reception the contents stored in memory will be preserved for approximately 72 hours Note that the power of the machine has to have been turned ON for at least 24 hours in advance If printing cannot be performed due to a device error such as a paper jam or running o...

Страница 126: ...effective recording area is larger than the reduction margin Received in each original size the area which does not fit on one sheet will be printed separately on another sheet Received in each original size the area which does not fit on one sheet will be printed separately on another sheet Effective Recording Area Printing is not possible on the area approximately 0 12 in 3 mm around the edge of...

Страница 127: ...d most frequently For details on setting the reduction margin refer to List of Other Default Settings See page 7 49 Paper Saving Settings In order to save paper you can combine multiple documents onto one sheet of paper or print on both sides of the paper Paper saving settings include Duplex Reception and H Page Reception Function Note H Page Reception When two Half Letter size documents have been...

Страница 128: ...w to connect an external phone Making a Phone Call Pick up the optional handset or the external phone handset Or press Fax 11 and then Monitor If Monitor is not displayed press Advanced and then select Monitor Specify the destination 22 For details on specifying the destination refer to Specifying Destinations See page 5 2 When the connection is established talk with the other party 33 When Monito...

Страница 129: ...andset When the connection is established talk with the other party 22 If you hear a beeping sound from the other party or hear nothing it signifies a fax Press Start to receive the fax Adjusting the Speaker Volume Press F 11 ax Press Monitor 22 If Monitor is not displayed press Advanced and then select Monitor Press Volume 33 ...

Страница 130: ...1 2 3 Basic Fax Functions Making a Phone Call 3 45 Select the desired volume and press Enter 44 Press Monitor to hang up 55 ...

Страница 131: ...th the simple mode enables you to specify the fax transmission time and edit the subject and text of the e mail You can also save the created document in a user box in order to transmit it together with other documents later Note Install the Muratec Fax to the computer before using this function For details on installing the driver refer to Chapter 2 Installing to Windows in the Printer Guide Tran...

Страница 132: ...unctions Transmitting Faxes from a Computer 3 47 Select Muratec Fax as the printer 33 Open the detailed settings screen 44 When using Microsoft Office Word 2007 click Printing Preferences The fax settings are displayed ...

Страница 133: ...he same paper size as the document size Resolution 200 200 dpi Equivalent to setting the resolution to Fine when transmitting from the machine 400 400 dpi Equivalent to setting the resolution to Super Fine when transmitting from the machine 600 600 dpi Equivalent to setting the resolution to Super Fine when transmitting from the machine Advanced Options The processing of the image data may become ...

Страница 134: ...elect whether to display the personal address book or shared address book and the address book by company name or name Address Book The address book is displayed in alphabetical order according to the company name or name as selected in Filter Address Book Enter Destination Fax Number Enter the fax number of the destination E mail Address Enter the e mail address of the destination Name When attac...

Страница 135: ...b Send Click Send to start transmission Cancel Click this to close the screen Enter the fax number for the destination in the Fax Number entry box and 111 click FAX To enter the destination name and company name on the cover page also specify the Name and Company Name entry boxes and click FAX Pauses and other dialing options can be also entered using the keyboard For details on dialing options re...

Страница 136: ...tion machine cannot receive TIFF files use this file format PDF The PDF format Documents can be sent in this format when the destination is a computer or our machine using the internet fax function Transmission Report Sets whether to print a transmission report Sending Destinations FAX Displays the specified fax destinations TO Displays the specified e mail destinations CC Displays the specified e...

Страница 137: ...nt to insert in the cover page 111 Set the file format 222 Sets whether to print a transmission report 222 Check the destinations in the Sending Destinations field 222 To delete a destination select the destination to delete and click Delete Click Send 222 Transmitting With the Advanced Mode The procedure for a document created with Microsoft Office Word 2007 is described here as an example Create...

Страница 138: ...ct Muratec Fax as the printer 33 To change the detailed print settings open the detailed settings screen 44 When using Microsoft Office Word 2007 click Printing Preferences To transmit without changing the detailed settings proceed to step 8 The fax settings are displayed ...

Страница 139: ... be transmitted with the same paper size as the document size Resolution 200 200 dpi Equivalent to setting the resolution to Fine when transmitting from the machine 400 400 dpi Equivalent to setting the resolution to Super Fine when transmitting from the machine 600 600 dpi Equivalent to setting the resolution to Super Fine when transmitting from the machine Advanced Options The processing of the ...

Страница 140: ... OfficeBridge after transmitting or saving the document Click OK 77 Start printing 88 When using Microsoft Office Word 2007 click OK The Transmission Settings screen is displayed If you select Save in user box or Save in shared box for the execution type the document properties screen is displayed Edit the detailed information for the document as necessary and press Forward For the procedure for t...

Страница 141: ... this to specify a user or user group for the destination You can set a user as the destination when a fax destination or an e mail destination is set Fax Destination Displayed when Direct Entry is selected as the method for specifying destinations E mail Destination Displayed when Direct Entry is selected as the method for specifying destinations Cover Page ON OFF Sets whether to attach a cover p...

Страница 142: ...lution set when scanning PDF The PDF format Documents can be sent in this format when the destination is a computer or our machine using the internet fax function Document s after transmission Set whether to delete the document without saving it after transmission Delete To delete a set destination select the destination to delete and click Delete If you select the check box at the top of Destinat...

Страница 143: ...destinations from the search results and click Fax to transmit via 111 fax or TO CC or BCC to transmit via e mail Proceed to step 15 If you selected Select User in step 9 click Add after selecting the users or 111 user groups to transmit to For details on the selection method refer to Chapter 2 Transmitting Documents in the OfficeBridge Guide Press Back to return to the screen in step 9 Repeat ste...

Страница 144: ...or the advanced settings For details on the settings refer to Chapter 2 Transmitting Documents in the OfficeBridge Guide Check the destinations in the Destination s field 222 To delete a destination select the destination to delete and click Delete If you select the check box at the top of Destination s you can delete all the destinations Click Send 222 ...

Страница 145: ... attached to the e mail PDF data created by the machine Note Color documents cannot be transmitted or received using the internet fax function A notification e mail is transmitted to the sender when data cannot be received If you set to forward e mails you cannot receive with the internet fax function in advance you can receive them using e mail software etc For details on setting this function re...

Страница 146: ...multiple destinations repeat steps 3 to 4 Up to 50 characters can be entered for an e mail address Destinations can also be specified using other methods For details refer to Specifying Destinations See page 5 2 Press Close 55 Press Start 66 If you loaded the document in the ADF this concludes the procedure If you loaded the document on the document glass load the next document and press Next Doc ...

Страница 147: ...al reception performed by the user Manual Reception If you receive only a few documents each day or you want to check the reception immediately use manual reception Press Fax 11 Press Advanced 22 Press CheckMail 33 Automatic Reception For details on setting to automatically receive e mail at a specified interval refer to Chapter 3 Setting the Connection Environment in the OfficeBridge Guide ...

Страница 148: ...x 4 38 Security Functions 4 45 Restricting Fax Destinations Closed Transmission 4 45 Checking the Destination Machine s Number Before Transmission 4 46 Entering the Destination Twice Before Transmission Confirmation Dial 4 48 Security Reception 4 49 PIN Masking 4 51 Useful Reception Functions 4 54 Automatically Distributing Received Documents Auto Distribution 4 54 Setting the Separator Page 4 66 ...

Страница 149: ... transmission See page 4 14 E mail Gateway You can transmit to a fax server as if you were transmitting to a regular telephone line See page 4 16 Polling Communication Polling enables you to use the machine to request a document that is stored on another machine The phone call is charged to the receiving party this machine side Also if polling documents are stored in the machine they can be transm...

Страница 150: ...yed command list or transmission report See page 4 51 Auto Distribution When a fax is received it is distributed to a specified destination if its information matches the conditions registered in advance Up to 200 distribution settings can be registered See page 4 54 Separator Page You can change the first sheet of paper with another type of paper to make it easier to separate received documents F...

Страница 151: ...t glass only an area from the reference setting position equal to the set scan size is scanned When you scan using the ADF only an area from the center with a width equal to the set scan size is scanned The whole length of the document is scanned Document glass Reference setting position ADF A A4 A5 F4 A Reference setting position A Legal Letter Half letter Half letter Letter Legal A Reference set...

Страница 152: ...Press Scan Size 33 If you loaded the document in the ADF Auto is selected Select the scan size and press Enter 44 Press Close 55 Specify the destination and press Start 66 For details on specifying the destination refer to Specifying Destinations See page 5 2 ...

Страница 153: ...es you to scan an invoice using the ADF and a map using the document glass and send them together in a single transmission Note The next document settings can be set separately for the ADF and the document glass Load the document and press Fax 11 Press Advanced 22 Press Next Doc 33 Select ON and press Enter 44 If you select OFF the next document setting is disabled Press Close 55 ...

Страница 154: ...ecifying the destination refer to Specifying Destinations See page 5 2 Load the next document to scan 77 Set the resolution and contrast as necessary Press Next Doc or Start 88 When the loaded documents have been scanned the message Set next document is displayed If you want to scan another document repeat steps 7 to 8 99 When you have finished scanning all the documents press Tx Start 111 ...

Страница 155: ...u can also transmit without adding a sender name For details on registering sender names refer to Registering Your Name or Company Name TTI See page 3 11 Load the document and press Fax 11 Press Advanced 22 Press TTI 33 Select ON 44 Press OFF to perform transmission without adding a sender name If you selected OFF press Enter and proceed to step 6 ...

Страница 156: ... that is entered differs according to the method for specifying the destination and the login status Destination field If you specify the destination using the numeric keys only the fax number is entered in the destination field If you specify an address book destination the information registered in the address book such as the company name department name fax number and e mail address is entered...

Страница 157: ...tains layout data Formats enable you to automatically insert the destination name and sender name and enter the subject and mail text For details on creating new formats refer to Chapter 4 Creating Cover Pages Cover Page Editor in the OfficeBridge Guide The following format is set by default Creating a New Document Load the document and press Fax 11 Press Advanced 22 Press Cover Page 33 ...

Страница 158: ...nctions Various Fax Functions 4 11 Select ON 44 If you select OFF the cover page setting is disabled If you selected OFF press Enter and proceed to step 12 Press Format 55 Select the format and press Enter 66 Press Subject 77 ...

Страница 159: ...t Press to enter a line break A line break takes up two characters Press ViewText to confirm the mail text that has been entered Press Edit to return to the entry screen For details on entering characters refer to Chapter 1 Entering Characters in the Administrator s Guide Press Enter 111 To print the specified cover page to check it press Print and then Yes Proceed to step 13 Press Close 111 Speci...

Страница 160: ...er Page 33 Select ON 44 If you select OFF the cover page setting is disabled If you selected OFF press Enter and proceed to step 15 Press Format 55 Select the format and press Enter 66 Press Template 77 Select the template to use and press Enter 88 To change the subject press Subject 99 If you do not want to change it proceed to step 11 ...

Страница 161: ...o print the specified cover page to check it press Print and then Yes Proceed to step 15 Press Close 111 Specify the destination and press Start 111 For details on specifying the destination refer to Specifying Destinations See page 5 2 Specifying the Transmission Time Delayed Transmission You can use this function to specify the date and time to perform transmission You can specify a time and dat...

Страница 162: ...ect ON 44 Press OFF to disable delayed transmission If you selected OFF press Enter and proceed to step 6 Select AM or PM and enter the transmission date and time and press 55 Enter Enter the time in the entry box in the 12 hour format You can use and the numeric keys Press Close 66 ...

Страница 163: ...ansmission and then set it again Transmitting Faxes to a Fax Server E mail Gateway You can transmit to a fax server as if you were transmitting to a regular telephone line The e mail gateway settings need to be registered in advance For details on registering an e mail gateway refer to Chapter 2 Specifying the Network Settings in the Administrator s Guide Note This function cannot be used in the f...

Страница 164: ...at is stored on another machine The phone call is charged to the receiving party this machine side Also if polling documents are stored in the machine they can be transmitted automatically when requested by another machine The phone call is charged to the other party Note Passcode polling limits polling to that with machines that have a security function and the same passcode registered For detail...

Страница 165: ...4 18 Various Fax Functions Press Polling Doc 33 Press Store 44 Press Yes 55 Deleting Stored Polling Documents Press Fax 11 Press Advanced 22 ...

Страница 166: ...nctions Various Fax Functions 4 19 Press Polling Doc 33 Press Delete 44 Press Yes 55 Press No to close the screen without deleting the data Printing Stored Polling Documents Press Fax 11 Press Advanced 22 Press Polling Doc 33 ...

Страница 167: ...4 20 Various Fax Functions Press Print 44 Press Yes 55 Printing the Stored Document List Press Setting 11 Press List 22 ...

Страница 168: ...Advanced Fax Functions Various Fax Functions 4 21 Press Stored Doc List 33 Select ON to enable duplex printing or OFF to disable it 44 Select ON to enable combined printing or OFF to disable it 55 Press Yes 66 ...

Страница 169: ...ax 11 Press Advanced 22 Press Polling 33 Select ON and press Enter 44 If you select OFF the polling setting is disabled Press Close 55 Specify the destination and press Start 66 For details on specifying the destination refer to Specifying Destinations See page 5 2 ...

Страница 170: ...layed on the button on the screen if registered If not registered the sub address is displayed Up to 16 characters can be entered Sub Address Must be registered Must be registered Sub addresses are numbers used to distinguish the F code boxes that have been set in memory Up to 20 digits can be entered Numerals and can be registered Password Register if necessary Register if necessary A password is...

Страница 171: ...egister it again See page 4 32 Up to 20 F code boxes can be registered Registering Editing Secure F Code Boxes This section describes the procedure for registering secure F code boxes When editing select the box you want to edit in step 4 and press Edit Enter the I D Code and press Enter and then select the item you want to edit Press Setting 11 Press Register 22 Press F Code Box 33 Press Add 44 W...

Страница 172: ...1 2 3 4 Advanced Fax Functions F Code Communications 4 25 Press Secure Box 55 Enter the sub address using the numeric keys and press Enter 66 Enter the I D code using the numeric keys and press Enter 77 ...

Страница 173: ... Enter the box name and press Enter 99 For details on entering characters refer to Chapter 1 Entering Characters in the Administrator s Guide To set the storage period press Hold Time 111 If you do not want to set it proceed to step 12 Enter the storage period and press Enter 111 You can use and the numeric keys ...

Страница 174: ...dit Secure F code boxes repeat the procedure in steps 4 to 13 Registering Editing F Code Bulletin Boxes This section describes the procedure for registering F code bulletin boxes When editing select the box you want to edit in step 4 and press Edit If an I D code is set enter the I D code Select the item you want to edit Press Setting 11 Press Register 22 Press F Code Box 33 Press Add 44 When edit...

Страница 175: ...4 28 F Code Communications Press Bulletin Box 55 Enter the sub address using the numeric keys and press Enter 66 To set the box name press Box Name 77 If you do not want to set it proceed to step 9 ...

Страница 176: ... For details on entering characters refer to Chapter 1 Entering Characters in the Administrator s Guide To set a password press Password 99 If a password is not set proceed to step 11 Enter the password using the numeric keys and press Enter 111 To set the Rx Protect function press Rx Protect 111 ...

Страница 177: ...you select ON proceed to step 17 To set the Auto Print function press Auto Print 111 If you do not want to set it proceed to step 15 Select ON and press Enter 111 If you select OFF the Auto Print setting is disabled To enable the Overwrite setting press Overwrite 111 If you do not want to set it proceed to step 17 ...

Страница 178: ...the Overwrite setting is disabled To set the Erase Tx Doc function press Erase Tx Doc 111 If you do not want to set it proceed to step 19 Select ON and press Enter 111 If you select OFF the Erase Tx Doc setting is disabled To set an I D code press I D Code 111 If you do not want to set it proceed to step 21 ...

Страница 179: ... Code Boxes Press Setting 11 Press Register 22 Press F Code Box 33 Select the box you want to delete and press Delete 44 If an I D code is set enter the I D code using the numeric keys and press 55 Enter If an I D code is not set proceed to the next step Press Yes 66 Press No to close the screen without deleting the box To continue to delete F code boxes press Enter and repeat the procedure in ste...

Страница 180: ...ss Setting 11 Press Register 22 Press F Code Box 33 Press List 44 Select ON to enable duplex printing or OFF to disable it 55 Select ON to enable combined printing or OFF to disable it 66 Press Yes 77 The F code box list can also be printed from F Code Box List in List after pressing Setting ...

Страница 181: ... transmission and F code bulletin box transmission to be performed First check the sub address and password of the box registered in the other machine Load the document and press Fax 11 Press Advanced 22 Press F Code Tx 33 Select ON 44 Press OFF to disable the F code communication settings Press Enter to complete the procedure Press the sub address entry box 55 ...

Страница 182: ...ssword is set press the password entry box 77 If a password is not set proceed to step 9 Enter the password using the numeric keys and press Enter 88 Up to 20 digits can be entered for a password Numerals and can be entered Press Enter 99 Press F Code Tx again to return to the screen in step 4 where you can correct the sub address and or password if entered incorrectly Press Close 111 Specify the ...

Страница 183: ...d in another machine s bulletin box First check the sub address and password of the bulletin box in the other machine Press Fax 11 Press Advanced 22 Press F Polling 33 Select ON 44 Press OFF to disable the F code polling setting If you selected OFF press Enter and proceed to step 8 Press the sub address entry box 55 ...

Страница 184: ...rd is set press the password entry box 77 If a password is not set proceed to step 9 Enter the password using the numeric keys and press Enter 88 Up to 20 digits can be entered for a password Numerals and can be entered Press Enter 99 Press F Polling again to return to the screen in step 4 where you can correct the sub address and or password if entered incorrectly Press Close 111 Specify the dest...

Страница 185: ...ing storage methods are available Overwrite Overwrites documents in the box Add Adds to the documents in the box Note Up to 30 documents can be stored in each box The F code bulletin box must be registered in advance See page 4 27 Storing Documents Load the document and press Fax 11 Press Advanced 22 Press F Code Doc 33 Press Store 44 ...

Страница 186: ...x in which you want to store the document 55 If an I D code is set enter the I D code using the numeric keys and press 66 Enter If it is not set proceed to step 7 Select the storage method for the document 77 Press Yes 88 Press No to close the screen without storing the document ...

Страница 187: ...uments stored in the bulletin boxes If documents have been received in the F code boxes F code reception information will be printed out Check the box number listed and print out the stored documents Press Fax 11 Press Advanced 22 Press F Code Doc 33 Press Print 44 Select the F code box in which the documents you want to print are stored 55 ...

Страница 188: ...r If a password is not set proceed to the next step Select the file 77 Press All stored documents to print all the documents stored in the F code box This step is not required for a secure box Press Yes 88 Press No to close the screen without printing the documents Security reception documents are automatically deleted after being printed ...

Страница 189: ...4 42 F Code Communications Deleting Stored Documents Press Fax 11 Press Advanced 22 Press F Code Doc 33 Press Delete 44 Select the F code box in which the documents you want to delete are stored 55 ...

Страница 190: ...t enter the I D code using the numeric keys and press 66 Enter If a password is not set proceed to the next step Select the file 77 Press All stored documents to delete all the documents stored in the F code box Press Yes 88 Press No to close the screen without deleting the data ...

Страница 191: ...s Printing the Stored Document List Press Setting 11 Press List 22 Press Stored Doc List 33 Select ON to enable duplex printing or OFF to disable it 44 Select ON to enable combined printing or OFF to disable it 55 Press Yes 66 ...

Страница 192: ...rity function and have the same passcode registered Note For details on passcodes refer to Chapter 2 Closed Communication in the Administrator s Guide You can also set to always enable closed transmission For details refer to Chapter 2 Closed Communication in the Administrator s Guide When using manual transmission transmission using an optional handset an external phone handset or the Monitor fun...

Страница 193: ...dialed and those registered in the destination machine match Transmission is allowed only when the passcodes are matched Note If a fax number is not registered for the destination a communication error occurs and transmission fails You can also set to always enable ID check transmission For details refer to Chapter 2 Setting ID Check Transmission in the Administrator s Guide When using manual tran...

Страница 194: ...4 47 Press ID Check 33 Select ON and press Enter 44 Press OFF to disable the ID check transmission setting Press Close 55 Specify the destination and press Start 66 For details on specifying the destination refer to Specifying Destinations See page 5 2 ...

Страница 195: ... the Administrator s Guide Note When the destination includes a dialing option like pause P you need to reenter it exactly as entered previously including the dialing option Load the document and press Fax 11 Specify the destination 22 For details on specifying the destination refer to Specifying Destinations See page 5 2 When specifying the destination with the numeric keys press Enter after spec...

Страница 196: ...is in the office Since it is necessary to enter a passcode to print the documents this prevents received documents from being taken away This section describes the procedure for manually enabling the security reception function set in advance and printing the received documents Note How to set up security reception refer to Security Reception in the Administrator s Guide When documents have been r...

Страница 197: ...ityRx 33 Enter the protect passcode using the numeric keys and press Enter 44 Select ON and press Enter 55 If you select OFF the security reception setting is disabled Printing Security Reception Documents Press Fax 11 Press Advanced 22 ...

Страница 198: ...n dialing a number Your machine s PIN masking feature helps you keep that PIN private With PIN masking activated you can dial a number plus a PIN but the PIN will not appear in the journal error message printout delayed command list or transmission report The PIN may contain up to eight characters including the or symbols You can enter them from the numeric keys Note Set the PIN mode in advance Fo...

Страница 199: ...778889 12345678 Press Enter 33 Press Start 44 Dialing in PIN Mask Mode 2 Load the document and press Fax 11 Specify the destination 22 If the destination was specified using the numeric keys and or address book number proceed to step 3 If you specify multiple destinations proceed to step 3 If the destination was specified using the address book proceed to step 4 Press Start 33 ...

Страница 200: ...1 2 3 4 Advanced Fax Functions Security Functions 4 53 Use the numeric keys to enter the PIN number 44 and press Enter ...

Страница 201: ...ted when the reception mode is set to the Tel Ready mode Use a reception mode other than the Tel Ready mode For details on checking the currently set reception mode refer to Setting the Fax Reception Mode See page 3 9 Since faxes can only be distributed to destinations registered in the address book register the destinations to distribute to in the address book in advance See page 7 2 Auto distrib...

Страница 202: ...priority if no other matching conditions are set to High or Middle Conditions Set the conditions for determining whether to distribute a received document Fax Number Set this to only distribute documents received from a specific fax number Up to 24 digits can be entered Numerals and can be entered Matching Method Select the matching method for the fax number Sub Address To distribute documents rec...

Страница 203: ...4 56 Useful Reception Functions Press AutoDistribute 33 Press Add 44 When editing select the distributing condition you want to edit and press Edit Press Setting 55 ...

Страница 204: ...tions 4 57 Select ON and press Enter 66 If you select OFF the setting is disabled Press Name 77 Enter the name and press Enter 88 For details on entering characters refer to Chapter 1 Entering Characters in the Administrator s Guide Press Destination 99 ...

Страница 205: ...number For details on selecting search numbers refer to Specifying Using Search Numbers See page 5 13 If you press Search you can search a destination For details on searching destination refer to Searching for Server Destinations See page 5 5 Press Priority 111 Select the priority level and press Enter 111 Press Conditions 111 If you do not want to register distribution conditions proceed to step...

Страница 206: ... do not want to register a fax number proceed to step 18 Enter the fax number using the numeric keys and press Enter 111 Press Matching Method 111 Select the matching method and press Enter 111 Press Sub Address 111 If you do not want to forward F code reception documents proceed to step 22 ...

Страница 207: ...ress Password 222 Enter the password and press Enter 222 To delete one of the entered digits press Clear To delete all of the entered digits press All Clear Press Enter 222 Press Schedule 222 Press Weekday 222 If you do not want to specify a day of the week proceed to step 26 ...

Страница 208: ... and press Enter 222 You can select multiple days of the week Press Start time 222 If you do not want to specify the time proceed to step 30 Select AM or PM and enter the start time and press Enter 222 Enter the time in the 12 hour format You can use and the numeric keys Press End time 222 ...

Страница 209: ... You can use and the numeric keys Press Enter 333 Press Auto Print 333 Select ON and press Enter 333 If you select OFF the Auto Print setting is disabled Press Enter 333 To continue to register distributing conditions and repeat the procedure from steps 4 to 33 It is necessary to set auto distribution to enable it See page 4 65 ...

Страница 210: ...ditions Press Setting 11 Press Register 22 Press AutoDistribute 33 Select the distributing condition you want to delete and press Delete 44 Press Yes 55 Press No to close the screen without deleting the data To continue deleting distributing conditions repeat the operation in steps 4 to 5 ...

Страница 211: ... 11 Press Register 22 Press AutoDistribute 33 Press List 44 Select ON to enable duplex printing or OFF to disable it 55 Select ON to enable combined printing or OFF to disable it 66 Press Yes 77 Note The auto distribution settings list can also be printed from Auto Distribute in List after pressing Setting ...

Страница 212: ...f auto distribution is enabled the forwarding conditions set individually are enabled and faxes will be distributed according to the registered conditions Press Fax 11 Press Advanced 22 Press AutoDist 33 Select ON and press Enter 44 If you select OFF the auto distribution setting is disabled ...

Страница 213: ... the first sheet of paper Print Document Set whether to insert a blank page in the start of the received document 1 2 1 2 1 2 1 2 Separator page separates each received document Print Document OFF Print Document ON Blank Note Paper sources will only appear on the control panel if they have been installed If a cassette is set to not be used for the fax function you cannot set it as the separator ca...

Страница 214: ... 4 Advanced Fax Functions Useful Reception Functions 4 67 Press 33 Separate Rx Page Press 44 Setting Select ON and press Enter 55 Press OFF to disable the separator page function Press Separator Cassette 66 ...

Страница 215: ...Useful Reception Functions Select 77 the paper source to print the separator page and press Enter Press 88 Print Document Select ON to print on the first page or OFF to insert a blank page and press 99 Enter ...

Страница 216: ...tication method is set to Network Transmitted and received documents inside a box are only displayed after performing a user login For details on performing a user login refer to Chapter 1 Logging In Logging Out in the Administrator s Guide Some boxes may not be able to be used depending on the document box settings For details on document box settings refer to Chapter 3 Specifying Document Box Se...

Страница 217: ...nsmit and press Transmit 66 Press to display detailed information for the file Press Yes 77 Press No to close the screen without transmitting the document Printing a Box Document Press Fax 11 Press the OB Doc tab 22 The shared reception box is displayed Select the box in which the documents you want to print are saved 33 ...

Страница 218: ...ile Enter the number of copies to print using the numeric keys 55 Select the paper 66 For details on selecting paper refer to Chapter 1 Basic Copying in the Copier Guide To perform sorting press Sort 77 If you do not want to perform sorting proceed to step 9 Select the type of sorting and press Enter 88 For details on sorting refer to Chapter 1 Basic Copying in the Copier Guide ...

Страница 219: ...ng on the document box settings If a screen for entering the administrator password is displayed after the screen in step 5 enter the administrator password and press Enter For details on document box settings refer to Chapter 3 Specifying Document Box Settings in the OfficeBridge Guide Press Fax 11 Press the OB Doc tab 22 The shared reception box is displayed Select Shared Rx Box Rx Box or Tx Box...

Страница 220: ...fax you can edit the body and subject of the e mail to send You can also enter the body of the e mail using a template registered in advance Note For details on registering e mail templates refer to Registering Editing Templates see page 7 51 or Setting Templates in Chapter 3 of the OfficeBridge Guide Load the document and press Fax 11 Press Advanced 22 Press e mail Subject 33 Press Template 44 ...

Страница 221: ...es already have a template registered select any box from 01 to 10 If you selected Auto Subject Text you cannot edit the subject and mail text Proceed to step 10 If you selected Auto Subject you can only edit the mail text Proceed to step 8 Press Subject 66 If you do not want to edit it proceed to step 8 For details on entering characters refer to Chapter 1 Entering Characters in the Administrator...

Страница 222: ...nter the mail text and press Enter 99 Up to 1024 characters can be entered for the mail text Press to enter a line break A line break takes up two characters Press ViewText to confirm the mail text that has been entered Press Edit to return to the entry screen For details on entering characters refer to Chapter 1 Entering Characters in the Administrator s Guide Press Enter 111 Press Close 111 Spec...

Страница 223: ...anned document with each page as a separate file Load the document and press Fax 11 Press Advanced 22 Press Batch Tx 33 Select OFF and press Enter 44 If you select ON the batch transmission setting is enabled Press Close 55 Specify the destination and press Start 66 For details on specifying the destination refer to Specifying Destinations See page 5 2 ...

Страница 224: ...not receive TIFF files use this file format TIFF The full mode TIFF format Documents are transmitted with the document size and resolution set when scanning PDF The PDF format Documents can be sent in this format when the destination is a computer or this product Load the document and press Fax 11 Press Advanced 22 Press FileFormat 33 Select the file format and press Enter 44 Press Close 55 Specif...

Страница 225: ...PDF files of monochrome scans created using this machine can be forwarded There are restrictions on the senders that can perform forwarding For details refer to Chapter 3 Setting the Connection Environment in the OfficeBridge Guide Up to 30 faxes can be transmitted Create the e mail 11 Attach a file as necessary 22 Enter FAXNO followed by the fax number for the destination enclosed in 33 Enter thi...

Страница 226: ...the Muratec TiffMaker to the computer before using this function For details on installing the driver refer to Chapter 2 Installing to Windows in the Printer Guide The procedure for a document created with Microsoft Office Word 2007 is described here as an example Create and edit the document to transmit 11 Execute a print command in the application software 22 When using Microsoft Office Word 200...

Страница 227: ...he document size and paper size Paper Size Select the paper size to print with at the destination Resolution 200 200 dpi Equivalent to setting the resolution to Fine when transmitting from the machine 400 400 dpi Equivalent to setting the resolution to Super Fine when transmitting from the machine 600 600 dpi Equivalent to setting the resolution to Super Fine when transmitting from the machine Adv...

Страница 228: ...tions Useful Internet Fax Functions 4 81 Start printing 77 When using Microsoft Office Word 2007 click OK The Save As dialog box is displayed Enter the filename to save with 88 Specify the location to save to 99 Click Save 111 ...

Страница 229: ...4 82 4 82 ...

Страница 230: ...s Book 5 2 Searching for Server Destinations 5 5 Entering Destinations 5 11 Specifying Using Search Numbers 5 13 Selecting From the History 5 15 Confirming Specified Destinations 5 18 Checking the Specified Destinations 5 18 Checking Destinations with the Confirm Destination Function 5 19 ...

Страница 231: ... number or fax number group E mail address or e mail address group Folder shortcut User FTP shortcut Selecting from the Address Book If you register a destination in the address book in advance you can select that destination from the address book displayed on the screen When you have registered groups they are also displayed in the address book When you specify a destination from the address book...

Страница 232: ...ages To use the personal address book press Personal Mode to switch to the personal address book Perform a user login before using the personal address book For details on logging in refer to Chapter 1 Logging In Logging Out in the Administrator s Guide Using the Index Function When there are many destinations registered you can press Index to sort or filter the displayed destinations Others Lists...

Страница 233: ...l address book press Personal Mode to switch to the personal address book Perform a user login before using the personal address book For details on logging in refer to Chapter 1 Logging In Logging Out in the Administrator s Guide Note For details on registering destinations refer to the following pages Destination Type Reference Page Fax number or e mail address Registering Editing Address Book D...

Страница 234: ...DAP Lightweight Directory Access Protocol server and address book destinations There are two methods for searching for destinations simple search which enables you to search by entering part of the destination and advanced search which enables you to search by setting detailed conditions Note Register the LDAP server in advance For details on the procedure for registering servers refer to Chapter ...

Страница 235: ... fax 11 screen Enter part of the name or the e mail address to search for and press Execute 22 Up to 30 characters can be entered For details on entering characters refer to Chapter 1 Entering Characters in the Administrator s Guide You can press Server on the search screen to change the server to perform searching Normally perform searching using the specified server ...

Страница 236: ...D OR AND Searches for destinations that meet all the specified conditions OR Searches for destinations that meet at least one of the specified conditions Search Items Name Enter to search for destinations by name Fax Enter to search for destinations by fax number e mail Enter to search for destinations by e mail address Co Enter to search for destinations by company name Cannot be specified as a s...

Страница 237: ...ter 33 In this example e mail is selected You can press Server on the search screen to change the server to perform searching Normally perform searching using the specified server Enter the search condition and press Enter 44 You can press CopyName to copy the string entered in Name or e mail For details on entering characters refer to Chapter 1 Entering Characters in the Administrator s Guide ...

Страница 238: ...earch condition box 55 next to the search item you entered If you do not want to change the search condition proceed to step 7 Select the search condition and press Enter 66 To continue entering search conditions repeat the operation in steps 3 to 6 77 If the search condition is set proceed to step 8 Press Execute 88 ...

Страница 239: ...nations are displayed To further search within the search results press NarrowList and repeat steps 3 to 8 To perform another search press NewSearch and repeat steps 3 to 8 Regarding Search Results An icon is displayed in front of destinations in the search results Icon Description A fax number on an LDAP server An e mail address on an LDAP server A fax number registered in the address book An e m...

Страница 240: ...press Enter 22 Press Clear to delete the digit at the position of the cursor You can press Prefix to enter a prefix number registered in advance See page 7 49 Dialing options can be entered For details on dialing options refer to Dialing Options See page 3 27 When there are multiple destinations repeat step 2 33 Note You can press Register after entering a fax number to register the displayed fax ...

Страница 241: ...ifying Destinations Entering E mail Addresses When transmitting with Internet Fax or Scan to E Mail enter the e mail address Press Scan or Fax 11 Press Advanced 22 Press Mail Address 33 Scanner screen Fax screen ...

Страница 242: ...tering Characters in the Administrator s Guide When there are multiple destinations repeat steps 3 to 4 55 Note You can press Register after entering an e mail address to register the displayed e mail address in the address book See page 7 8 Specifying Using Search Numbers You can enter destinations by specifying registered search numbers Press Scan or Fax 11 Press Advanced 22 Press Speed Dial 33 ...

Страница 243: ...tep 1 proceed to step 6 Select Fax if transmitting a fax or e mail if transmitting an internet fax and 55 press Enter This screen is only displayed if both a fax number and e mail address are registered in the address book When there are multiple destinations repeat steps in 3 to 5 66 Note You cannot use prefixes when selecting a destination using the search number ...

Страница 244: ...the history of the last 10 destinations entered using the numeric keys You can also edit the selected history before using it as a destination Note Transmission using destinations registered in the address book are not displayed in the dial history Press Fax 11 Press Redial 22 If Redial is not displayed press Advanced and then select Redial Select the destination you want to specify 33 ...

Страница 245: ... E mail Addresses From the Transmission History When transmitting an Internet Fax or using Scan to E Mail you can select a destination from the history of the last 10 e mail addresses entered You can also edit the selected history before using it as a destination Note Transmission using destinations registered in the address book are not displayed in the e mail history Press Scan or Fax 11 Press A...

Страница 246: ...44 To change the e mail address edit the address and press Enter 55 To use the displayed e mail address as it is press Enter without editing it For details on entering characters refer to Chapter 1 Entering Characters in the Administrator s Guide When there are multiple destinations repeat steps 2 and 5 66 ...

Страница 247: ... it is set as a To destination To set the destination as a Cc or Bcc destination change the setting on the destination confirmation screen If you entered the destination using the numeric keys or the keyboard an icon is not displayed Fax number or fax number group E mail address set as a To destination E mail address set as a Cc destination E mail address set as a Bcc destination Folder FTP server...

Страница 248: ...ing the destinations is displayed when you press Start after specifying the destinations Note For details on setting the confirm destination function refer to Chapter 2 Confirming the Destination Before Transmission in the Administrator s Guide A screen for confirming or deleting the destinations is displayed when you press 11 Start after specifying the destinations Confirm the destinations and pr...

Страница 249: ...5 20 Confirming Specified Destinations ...

Страница 250: ...ssion Result Transmission Report 6 2 Issuing the Transmission Report 6 2 Reading the Transmission Report 6 4 Managing the Communication History 6 5 Manually Printing Journal Reports 6 6 Automatically Printing Journal Reports 6 7 Reading Journal Reports 6 11 ...

Страница 251: ...e You can also set to always print a transmission report For details refer to Specifying Default Fax Settings See page 7 48 Issuing the Transmission Report Load the document and press Fax 11 Press Advanced 22 Press Tx Report 33 Press Tx Report Setting 44 Select the method for checking the transmission result and press Enter 55 If you selected OFF or Print press Enter and proceed to step 7 ...

Страница 252: ... 50 characters can be entered To delete one of the entered characters press Clear Press Close twice 77 Specify the destination and press Start 88 For details on specifying the destination refer to Specifying Destinations See page 5 2 Note You can change the transmission report settings while scanning Press Tx Report on the screen displayed while scanning Continue the procedure from step 5 ...

Страница 253: ...he type of communication is printed for the following types of communication Manual Tx Polling Tx F Code Tx Broadcast Tx PC Fax Tx PC Fax F code Tx Archive Tx Rerouted Fax Tx 8 Result OK Completed normally ECM Mode transmission Super G3 transmission Code The communication error code 1 9 Details Blank when the communication ends without an error When a communication error occurs the error message i...

Страница 254: ...the daily communication report for the previous day has not yet been printed because it has not yet reached the specified time the daily communication report is also printed when the number of jobs reaches 1 000 Types of Journal Reports The following types of journal reports are printed by the machine When manually printing a report you can select the type of journal report to print When a daily c...

Страница 255: ...anually Printing Journal Reports You can print the history of the latest 100 jobs for the specified type of communication Press Setting 11 Press List 22 Press Journal List 33 Select the type of communication to print the journal report for 44 ...

Страница 256: ...OFF to disable it 66 Press Yes 77 For information on reading the reports refer to Reading Journal Reports See page 6 11 Automatically Printing Journal Reports You can set to print the report when there is transmission history for 100 jobs or set to print the transmission history every day at a set time for a daily communication report Press Setting 11 Press Default Settings 22 ...

Страница 257: ...6 8 Managing the Communication History Press Fax Settings 33 Press Other Settings 44 Press Auto Print Journal 55 ...

Страница 258: ...al report press ON To set the printing 66 time press Reserve print If you selected ON proceed to step 12 If you selected OFF the procedure is complete when you press Enter Press Print 77 Enter the printing time and press Enter 88 You can use and the numeric keys Enter the time in the entry box in the 12 hour format ...

Страница 259: ...ct ON and press Enter 111 If you select OFF the print setting is disabled To continue selecting types of communication repeat the operation in steps 9 and 10 Press Close 111 Select ON to enable duplex printing or OFF to disable it 111 Select ON to enable combined printing or OFF to disable it 111 Press Enter 111 ...

Страница 260: ...as the archive transmission or scan path notification function 8 Result OK Completed normally ECM Mode transmission Super G3 transmission Code The communication error code 1 9 Note The type of communication is printed for the following types of communication Nothing is printed for other types of communication Manual Tx Polling Tx F Code Tx Broadcast PC Fax Tx PC Fax F code Tx Archive Tx Rerouted F...

Страница 261: ...ror code 1 8 Note The type of communication is printed for the following types of communication Nothing is printed for other types of communication Manual Rx Polling Rx F code polling Rx Received in F code Secure Box Received in F code Bulletin Box 9 Printed date 2 The date and time that the journal report was printed 10 The date and time that the journal report was printed or the date and time th...

Страница 262: ...rmed transmission with a function such as the archive transmission or scan path notification function 6 Result OK Transmission complete Code The communication error code 1 7 Number of addresses The number of destinations transmitted to 8 Printed date 2 The date and time that the journal report was printed 9 The date and time that the journal report was printed or the date and time that communicati...

Страница 263: ...orwarding A reception error occurred and the received e mail was forwarded Error Mail Reply A reception error occurred and the received e mail was replied to Error Mail Size over A reception error occurred due to the e mail size being too large and a notification e mail was transmitted Erase A reception error occurred and the received e mail was erased 7 Printed date 2 The date and time that the j...

Страница 264: ...e machine performed transmission with a function such as the archive transmission or scan path notification function 6 Result OK Completed normally Code The communication error code 1 7 Printed date 2 The date and time that the journal report was printed 8 The date and time that the journal report was printed or the date and time that communication history started to be stored for a daily communic...

Страница 265: ...6 16 Managing the Communication History ...

Страница 266: ... a Color Printer 7 30 Registering Favorite Destinations 7 36 Specifying Default Settings 7 39 Specifying Default Scanner Settings 7 39 Specifying Default E mail Transmission Settings 7 43 Specifying Default Fax Settings 7 46 Registering Other Settings 7 51 Registering Editing Templates 7 51 Registering Editing File Names 7 55 Registering Editing Document Categories 7 56 Registering Editing Domain ...

Страница 267: ...e destination Pause and other dialing options can be entered in addition to numerals and See page 3 27 Also register the prefix number if you want to use a prefix Up to 40 digits can be entered e mail The e mail address of the destination Up to 50 characters can be entered Super G3 Set whether to perform transmission with Super G3 PIN If Mode 1 is set for the PIN mode register a PIN Note Either a ...

Страница 268: ... describes the procedure for registering address book destinations When editing select the destination you want to edit in step 5 and press Edit After the screen in step 7 is displayed select the item to change Press Setting 11 Press Register 22 Press Address Book Entry 33 Press Enter Edit 44 ...

Страница 269: ...t is already registered select the destination you want to change 66 Enter the name and press Enter For details on entering characters refer to Chapter 1 Entering Characters in the Administrator s Guide Press Fax No 77 If you do not want to register a fax number proceed to step 9 ...

Страница 270: ...s to enter the fax number and press Enter 88 Also register dialing options if you want to use them See page 3 27 Press e mail 99 Enter the e mail address and press Enter 111 Press Super G3 111 Select ON to enable transmission with Super G3 or OFF to disable it and 111 press Enter ...

Страница 271: ...he PIN and press Enter 111 Press Enter 111 To continue to register or edit address book destinations repeat the procedure in steps 5 to 15 Useful Registration Method 1 Registering From the Scanner or Fax Ready Screen Press Scan or Fax 11 For the scanner screen press the e mail tab 22 For the fax screen proceed to step 3 Press Add Edit 33 ...

Страница 272: ... procedure is then the same as for registering an address book destination 55 Continue from step 6 of Registering Editing See page 7 4 Useful Registration Method 2 Registering a Number Entered With the Numeric Keys Press Fax 11 Use the numeric keys to enter the destination fax number 22 Press Register 33 ...

Страница 273: ...ess No to return to the screen in step 2 The procedure is then the same as for registering an address book destination 55 Continue from step 6 of Registering Editing See page 7 4 Useful Registration Method 3 Registering an Entered E mail Address Press Scan or Fax 11 Press Advanced 22 Press Mail Address 33 Scanner screen ...

Страница 274: ...ring Destinations 7 9 Fax screen Enter the e mail address 44 Up to 50 characters can be entered for an e mail address For details on entering characters refer to Chapter 1 Entering Characters in the Administrator s Guide Press Register 55 ...

Страница 275: ... 4 The procedure is then the same as for registering an address book destination 77 Continue from step 6 of Registering Editing See page 7 4 Useful Registration Method 4 Registering a Search Result Search for a destination 11 See Searching for Server Destinations for how to search destinations See page 5 5 Press 22 on the screen displaying the search results ...

Страница 276: ...egister and press Yes 44 You can use and the numeric keys Press No to return to the screen in step 3 The procedure is then the same as for registering an address book destination 55 Continue from step 6 of Registering Editing See page 7 4 Deleting Press Setting 11 Press Register 22 Press Address Book Entry 33 ...

Страница 277: ... Select the destination you want to delete 55 Press Yes 66 Press No to close the screen without deleting the data To continue deleting data repeat the operation from step 5 Press Close 77 Printing the Address Book Destination List Press Setting 11 ...

Страница 278: ...ngs Registering Destinations 7 13 Press List 22 Press Address 33 Press Number or Alphabet 44 Select ON to enable duplex printing or OFF to disable it 55 Select ON to enable combined printing or OFF to disable it 66 Press Yes 77 ...

Страница 279: ...me The group name The group name displayed in the button on the screen Up to 50 characters can be entered Group Members The destinations registered in the group Up to 1000 address book destinations can be specified Note If you register a group two group buttons are created in the address book a fax number button and e mail address button Registering Editing Press Setting 11 Press Register 22 Press...

Страница 280: ...tions to register from the address book and press Enter 77 Select a destination that is already selected to deselect it If you press Speed Dial you can select a destination using a search number For details on selecting search numbers refer to Specifying Using Search Numbers See page 5 13 If you press Search you can search a destination For details on searching destination refer to Searching for S...

Страница 281: ... Deleting Press Setting 11 Press Register 22 Press Group 33 Select the group you want to delete and press Delete 44 Press Yes 55 Press No to close the screen without deleting the data To continue deleting groups repeat the operation in steps 4 to 5 Printing a Group List Press Setting 11 Press Register 22 Press Group 33 ...

Страница 282: ... want to print and press List 44 Press Number or Alphabet 55 Select ON to enable duplex printing or OFF to disable it 66 Select ON to enable combined printing or OFF to disable it 77 Press Yes 88 Note The group list can also be printed from Group List in List after pressing Setting ...

Страница 283: ...d If you do not register a name the link will be displayed on the shortcut key When the link is too long to be displayed on the key it will be omitted at the center with and only the beginning and ending of the link will be displayed Link To specify the link to the folder enter the link manually or browse to the desired folder The link must be registered Up to 128 characters can be entered User Na...

Страница 284: ... select the name of the shortcut you want to change and press Edit 55 Press Shortcut Name If you do not want to register or edit the shortcut name proceed to step 7 Register or edit the shortcut name and press Enter 66 For details on entering characters refer to Chapter 1 Entering Characters in the Administrator s Guide ...

Страница 285: ...s Server 2008 specify the computer name instead of the IP address when manually entering the path to the link Start the link with two slashes Press Root to return to the list of computers or networks Press Back to return to the previous screen Press User Name 99 If user name and password are not required proceed to step 15 Enter or edit the user name and press Enter 111 For details on entering cha...

Страница 286: ...Chapter 1 Entering Characters in the Administrator s Guide Press Automatic Network Login 111 Select ON to set the automatic network login function or OFF to disable it 111 and press Enter Press Enter 111 To continue to register or edit shortcuts repeat the procedure in steps 4 to 15 Deleting Press Setting 11 Press Register 22 Press Folder Shortcut 33 ...

Страница 287: ...elect the name of the shortcut to delete and press Delete 44 Press Yes to proceed with the deletion 55 Press Cancel to close the screen without deleting the shortcut To continue deleting shortcuts repeat the operation in steps 4 to 5 ...

Страница 288: ... Specify a folder 11 See Scanning to a Shared PC Folder step 1 to 5 See page 1 4 Press Register 22 Press Yes to proceed 33 Press No to close the screen without registering the shortcut Refer to the procedure in steps 5 to 15 of Registering Editing to register the 44 shortcut See page 7 19 ...

Страница 289: ...gister the PASV mode default ON and port number For details refer to Chapter 3 Registering Shortcuts in the OfficeBridge Guide Registering Editing The following items can be registered for each FTP server shortcut Item Description Shortcut Name This is the button name displayed on the screen Up to 24 characters can be entered If nothing is registered the first 24 characters of the link are display...

Страница 290: ... registered select the name of the shortcut you want to change and press Edit Press Shortcut Name 55 If you do not want to register or edit the shortcut name proceed to step 7 Register or edit the shortcut name and press Enter 66 For details on entering characters refer to Chapter 1 Entering Characters in the Administrator s Guide ...

Страница 291: ... Enter or edit the link to the FTP server you want to register and press Enter 88 Start the link with two slashes Press UserName 99 Enter or edit the user name and press Enter 111 For details on entering characters refer to Chapter 1 Entering Characters in the Administrator s Guide Press Password 111 ...

Страница 292: ...ls on entering characters refer to Chapter 1 Entering Characters in the Administrator s Guide Press Enter 111 To continue to register or edit shortcuts repeat the procedure in steps 4 to 13 Deleting Press Setting 11 Press Register 22 Press FTP Shortcut 33 Select the name of the shortcut to delete and press Delete 44 ...

Страница 293: ...en without deleting the shortcut To continue deleting shortcuts repeat the operation in steps 4 to 5 Registering from an Operation Screen On the screen for specifying an FTP server press Add Edit 11 Refer to the procedure in steps 4 to 13 of Registering Editing to register the 22 shortcut See page 7 25 ...

Страница 294: ... Server Specify an FTP Server 11 See Scanning to an FTP Server step 1 to 10 See page 1 13 Press Register 22 Press Yes 33 Press No to close the screen without registering the shortcut Refer to the procedure in steps 4 to 13 of Registering Editing to register the 44 shortcut See page 7 25 ...

Страница 295: ...1 General You can set the following four items Print Log Display print errors in popup window Delete printed document Limit memory size 7 34 Network Settings The following items are set when installing the Scan to Print Monitor but can be changed as necessary IP Address HTTP Port No HTTPS Port No Perform secure communications 7 35 Note For details on installing the Scan to Print Monitor refer to t...

Страница 296: ...ssions for Everyone in security setting Printer Register the printer You can register a printer installed in the computer you are using Margin With some printers the document may be reduced when printed to avoid the margin where printing cannot be performed You can register that margin to prevent the document from being reduced For details on the margin value see the instruction manual for the pri...

Страница 297: ...er Edit 33 If the message Cannot connect to the server is displayed specify the Network Settings first See page 7 35 To change registered information select the item you want to change and click Register Edit Click Browse 44 Browse to the shared folder you created in Browse for Folder and click OK 55 ...

Страница 298: ...lect a color printer registered in the 66 computer Click Margin and register the margin if necessary 77 Click OK to close the screen 88 Place the cursor in the Name entry box and register the printer name 99 Change the account name as necessary 111 Change the password as necessary 111 Click OK 111 ...

Страница 299: ...orm printing when printing cannot be performed correctly due to the document size or resolution settings Right click the task tray icon of the Scan to Print Monitor and select 11 Configuration Press the General tab 22 Select the required items 33 Click OK 44 Note If Delete printed document is not selected printed image files will remain in the program installation folder normally C Program Files M...

Страница 300: ...Set the HTTPS port number set in OfficeBridge This is normally set to 433 Perform secure communications Select this to perform SSL communications Right click the task tray icon of the Scan to Print Monitor and select 11 Configuration Select the Network Settings tab 22 To change the IP address of the machine enter the IP address 33 Click Search to automatically search for copiers on the network and...

Страница 301: ...ust be started Registering Favorite Destinations You can register up to 10 destinations to display in the Faves tab Note Destinations registered in the Faves tab must already be registered in the address book or as a shortcut Destinations registered in the Faves tab cannot be deleted without first deleting them from the Faves tab Registering Editing Press Setting 11 Press Register 22 Press Favorit...

Страница 302: ...ect the destination you want to register and press Enter 55 You can press e mail Folder FTP or User to filter the destinations To continue to register or edit favorites repeat the procedure in steps 4 to 5 Note You can press Add Edit in the Faves tab to jump to the procedure for registering or editing favorites Perform steps 4 and 5 to register the favorite ...

Страница 303: ... Register 22 Press Favorite Address 33 Select the favorite you want to delete and press Delete 44 Press Yes to proceed with the deletion 55 Press No to close the screen without deleting the data To continue to delete favorites repeat the procedure in steps 4 to 5 ...

Страница 304: ...s are useful default settings Note You can set the time it takes to return to the default settings For details refer to Chapter 1 Specifying Default Settings in the Administrator s Guide Specifying Default Scanner Settings You can change the default values and other settings for the scanner function For information on the items and settings that can be specified refer to List of Default Scanner Se...

Страница 305: ...gs or Other Settings 44 In this example Default Settings is selected For details on the settings that can be specified refer to List of Default Scanner Settings see page 7 41 and List of Other Settings see page 7 43 Select the function to set 55 In this example Contrast is selected ...

Страница 306: ...tings Reference page Doc Type Set the default document type setting Text Auto Photo 1 20 Contrast Set the default contrast setting Lightest Lighter Normal Darker Darkest 1 21 Color Set the default scan format setting Mono Color 1 24 Resolution Set the default resolution setting 100 dpi 200 dpi 300 dpi 600 dpi 1 23 Scan Size Set the default scan size setting Letter Legal H LTR A4 F4 A5 2 4 Next Doc...

Страница 307: ...ile format used when a scanned document is saved In the default settings for PDF w Password you can set the encryption level and restrictions with a permissions password Note If you have changed the file format in the default e mail settings that setting is also changed See page 7 45 Mono TIFF PDF PDF w Password Color JPEG PDF PDF w Password PDF w Password Encryption Level Low 40 bit RC4 High 128 ...

Страница 308: ...o Color Fine Adjustment 7 59 Note Underlined values are the default settings specified at the time of shipment For details on these settings refer to Setting Example See page 7 39 Specifying Default E mail Transmission Settings You can change the default Internet Fax and Scan to E Mail settings For information on the items and settings that can be specified refer to List of Default E mail Settings...

Страница 309: ...efer to List of Default E mail Settings see page 7 45 List of Default Internet Fax Settings see page 7 45 and List of Default Template Settings see page 7 46 Select the item to set 55 In this example FileFormat is selected Select the default value and press Enter 66 In this example the default file format for monochrome scanning is changed to TIFF and color scanning to JPEG ...

Страница 310: ... Allowed Not allowed Copying Allowed Not allowed 2 30 Batch Scan Set the default batch scan setting ON OFF 2 27 Note Underlined values are the default settings specified at the time of shipment For details on these settings refer to Setting Example See page 7 43 List of Default Internet Fax Settings Function Description Settings Reference page FileFormat This sets the default file format used when...

Страница 311: ...ngs Auto Subject Text Auto Subject Template 1 to Template 10 2 22 4 73 Note Underlined values are the default settings specified at the time of shipment For details on these settings refer to Setting Example See page 7 43 Specifying Default Fax Settings You can set or change the default fax settings For information on the items and settings that can be specified refer to List of Default Transmissi...

Страница 312: ...pecify 44 In this example Default Settings is selected Select the function to set 55 In this example Resolution is selected Select the default value and press Enter 66 In this example Fine is selected Press Close 77 To continue to change other default values repeat steps 4 to 7 of the operation ...

Страница 313: ... as a single document ADF ON OFF FBS ON OFF 4 6 TTI The sender name printed at the top of a document received at the destination ON OFF 4 8 Cover Page A cover page containing a simple message can be attached to the documents ON OFF 4 9 Tx Report The transmission result is printed Or can be checked via e mail OFF Print e mail 6 2 Memory Tx This sets whether to give the priority to memory transmissi...

Страница 314: ... which automatically selects the magnification according to the length of the document being received or 100 to have all faxes printed out at the same rate of reduction Auto 100 3 40 Reduction Margin This sets at what point the document printout will extend to the following page if the document being received cannot fit within the effective recordable area 0 3 3 in 1 6 in 3 42 Paper Saving This se...

Страница 315: ...nal Line Up You can select whether to arrange printed journal reports in order of job or in order of communication number OFF ON 6 6 Note Underlined values are the default settings specified at the time of shipment For details on these settings refer to Setting Example See page 7 46 ...

Страница 316: ...edit the following three items Title The title of the registered template Up to 40 characters can be entered Subject The subject entered here is used as the subject for the e mail to transmit Up to 80 characters can be entered Text The text entered here is used as the message for the e mail to transmit Up to 1024 characters can be entered This section describes the procedure for registering templa...

Страница 317: ...e template you want to edit and press Edit Press Title 55 Edit the title and press Enter 66 For details on entering characters refer to Chapter 1 Entering Characters in the Administrator s Guide To enter a subject press Subject 77 If you do not want to enter a subject proceed to step 9 ...

Страница 318: ...uide To enter the message press Text 99 If you do not want to enter the message proceed to step 10 Enter or edit the message and press Enter 111 For details on entering characters refer to Chapter 1 Entering Characters in the Administrator s Guide Press to enter a line break A line break takes up two characters Press Enter 111 To continue to register or edit templates repeat the procedure in steps...

Страница 319: ... Other Settings Deleting Press Setting 11 Press Register 22 Press Template 33 Select the template you want to delete and press Delete 44 Press Yes 55 To continue deleting templates repeat the operation in steps 4 to 5 ...

Страница 320: ...ting File Names You can register up to 20 file names to use for scanned image data in advance Registering Editing Press Setting 11 Press Register 22 Press File Name 33 Select a new button 44 To change a file name that is already registered select the file name you want to change ...

Страница 321: ...o register or edit file names repeat the procedure in steps 4 to 5 Deleting Registered file names can be deleted from OfficeBridge For details refer to Chapter 3 Setting Templates in the OfficeBridge Guide Registering Editing Document Categories You can register up to 20 document categories to use when saving scanned documents in the box in advance Registering Editing Press Setting 11 Press Regist...

Страница 322: ...ocument category and press Enter 55 Up to 20 characters can be entered For details on entering characters refer to Chapter 1 Entering Characters in the Administrator s Guide To continue to register or edit document categories repeat the procedure in steps 4 to 5 Deleting Registered document categories can be deleted from OfficeBridge For details refer to Chapter 3 Setting Templates in the OfficeBr...

Страница 323: ...play screen on the character entry screen can use registered domain names You can register up to 10 types of domain names in advance Registering Editing Press Setting 11 Press Register 22 Press Domain Name 33 Select a new button 44 To change a domain name that is already registered select the domain name you want to change ...

Страница 324: ...he adjustment level corresponding the setting value for each item fine adjustment The adjustable items are indicated below Item Description Number RGB R Fine adjustment for the R component 3 2 1 0 1 2 3 in RGB adjustment 000 009 G Fine adjustment for the G component 3 2 1 0 1 2 3 in RGB adjustment 010 019 B RFine adjustment for the B component 3 2 1 0 1 2 3 in RGB adjustment 020 029 Contrast Densi...

Страница 325: ...7 60 Registering Other Settings Color Fine Adjustment Press Setting 11 Press Default Settings 22 Press Scanner Settings 33 Press Other Settings 44 Press Color Fine Adjustment 55 Press Yes 66 ...

Страница 326: ...her Settings 7 61 Press Register Change 77 Press Initialize and then Yes to return the adjustment values to the factory default settings Press 88 and to select the item to adjust Enter the adjustment value using 99 and press Enter Press Close 111 ...

Страница 327: ...tions on overlapping settings for the color adjustment function Color Fine Adjustment Contrast Density Contrast Brightness level Sharpness RGB Lightness Saturation Hue Contrast Density Contrast Brightness level Sharpness RGB Lightness Saturation Hue Cannot be set simultaneously Blank Can be set simultaneously ...

Отзывы: