EXPC-1319 Series Hardware
Hardware Installation
2-11
Replacing the SSD
The EXPC-1319 comes with a removable 32 GB industrial SSD that can be upgraded to a maximum of 256 GB.
To replace the SSD, follow these steps.
1.
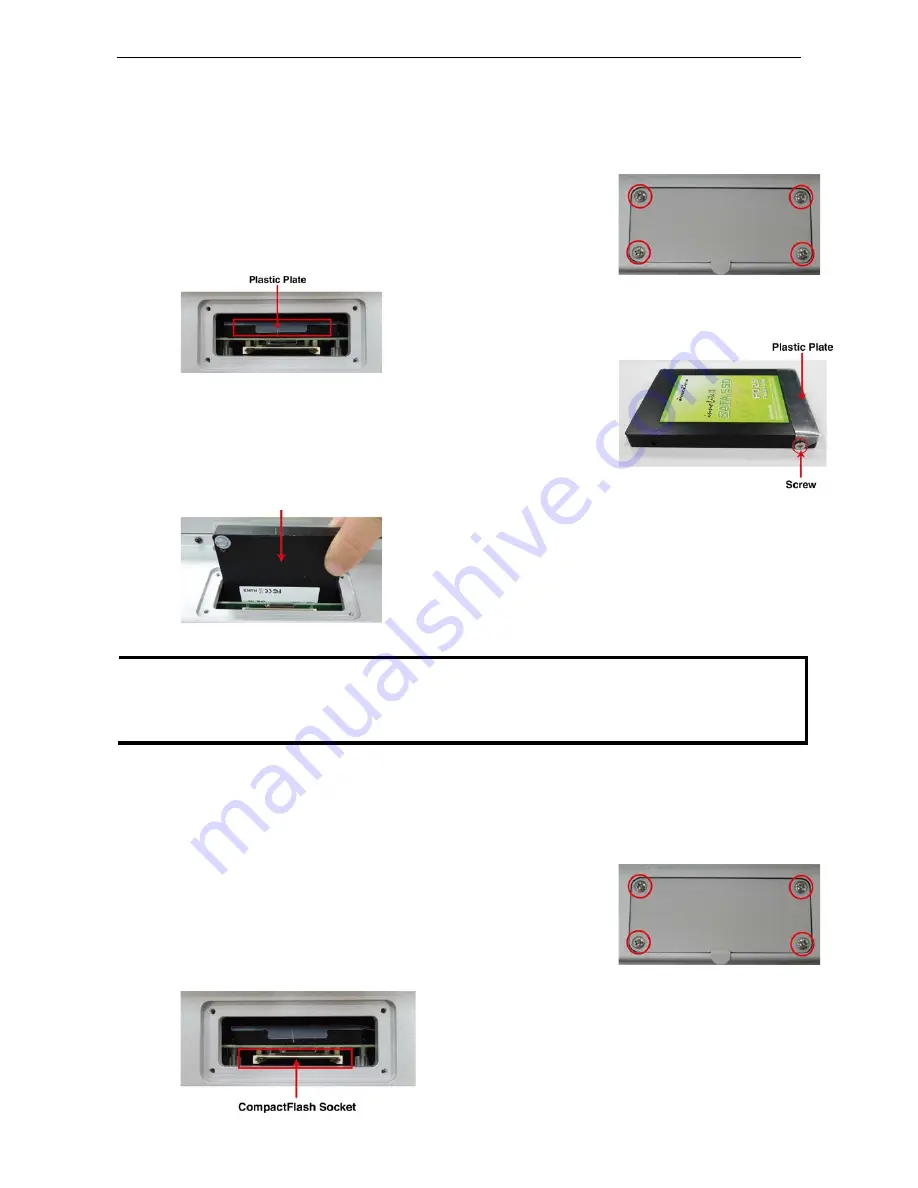
Remove the SSD cover, located on the left side of the computer (shown
at right).
2.
Remove the SSD by pulling out the plastic plate (shown at left).
3.
Remove the screws on two sides of the SSD, and then remove the plastic
plate.
4.
Place the plastic plate on the new SSD, and fasten the screws on
two sides of the SSD. When finished, insert the SSD into the socket
(shown at left)
5.
Set the SSD cover in place and fasten it using the original four screws.
NOTE
Please note that the operating system is stored on the SSD. If you replace this SSD with a new model you will
may perform a system recovery procedure to re-install the operating system on the new SSD. For details
about this procedure, please refer to the System Recovery chapter in either the EXPC-1319 Win 7
Embedded (Chapter 9), or EXPC-1319 Win Linux (Chapter 5) software manuals,.
Installing the CompactFlash Card
The EXPC-1319 comes with an onboard CompactFlash socket located just beside the SSD socket. Follow these
steps to install.
1.
Remove the SSD cover, located on the left side of the computer (shown
at right).
2.
The CompactFlash socket is located beside the SSD socket
(shown at left).


