Issue 1.1 April 2006
Page 154
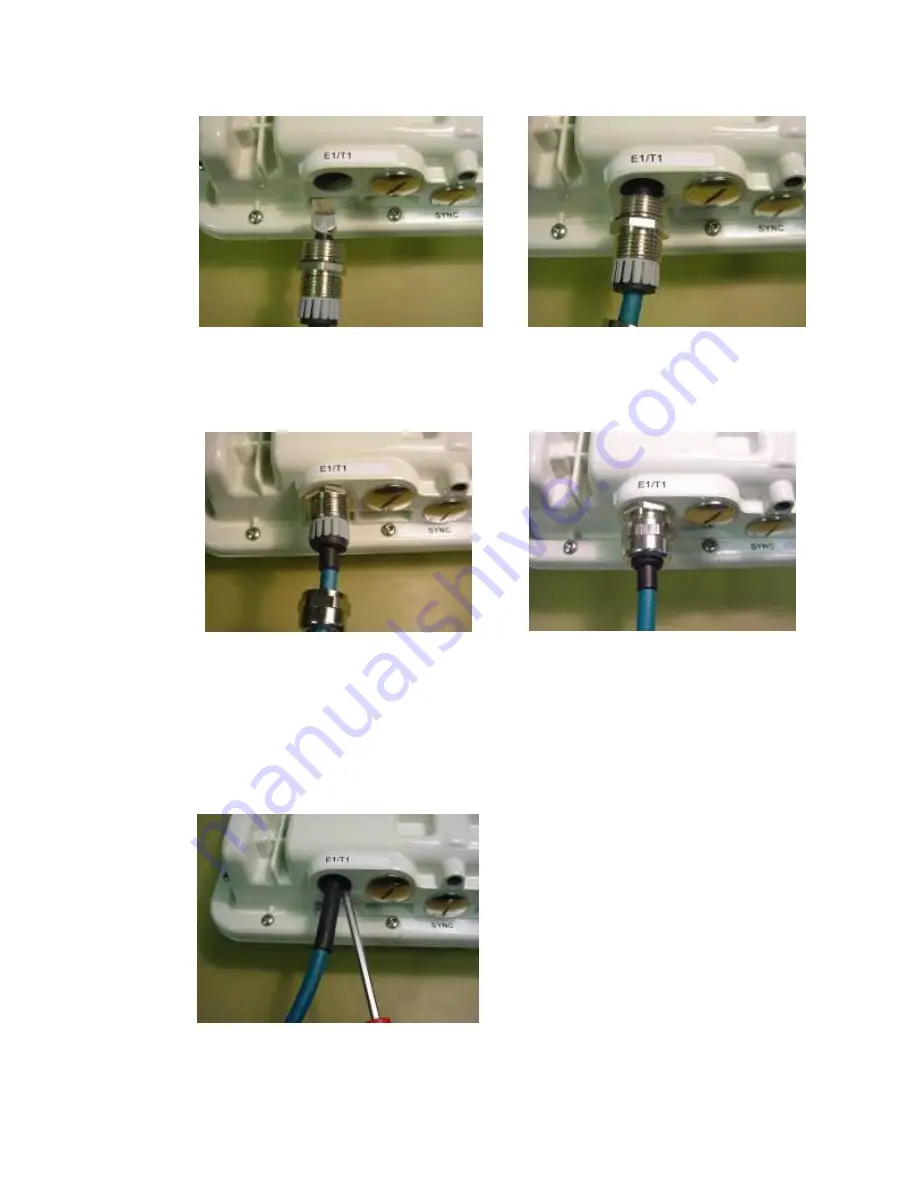
Step 1: Assemble the cable as described in
above
Step 2: Insert the RJ45 connector making
sure that the locking tab snaps home
Step 3: Screw in the body of the weather
proofing gland and tighten
Step 4: Screw on the clamping nut and
tighten
Should it be necessary to disconnect the
Canopy 150/300 Mb BH E1/T1 cable at the
ODU this can be achieved by removing the
weather proofing gland and depressing the
RJ45 locking tab with a small screwdriver as
shown opposite.
Содержание Canopy 150 Mbps Backhaul
Страница 1: ...Canopy 150 300 Mbps Backhaul User Guide BH150 300 UG en Issue 1 1 April 2006 ...
Страница 25: ...Issue 1 1 April 2006 Page 24 Figure 5 Canopy 150 300 PIDU Power Input ...
Страница 66: ...Issue 1 1 April 2006 Page 65 Figure 29 Save and Restore Configuration Page Figure 30 Save File Pop up ...
Страница 97: ...Issue 1 1 April 2006 Page 96 Figure 59 Spectrum Management Help Page ...
Страница 162: ...Issue 1 1 April 2006 Page 161 Figure A8 Surge Arrestor ALPU ORT Connection Illustration ...
Страница 167: ...Issue 1 1 April 2006 Page 166 Figure 113 64 QAM 0 92 Dual Payload Figure 114 256 QAM 0 81 Dual Payload ...


