27
6.5.7 Requirements for the calibration
• The calibration markers are laid out according to the
Chapter"Laying out the calibration markers" on
page 24.
• The cameras are cleaned.
• There is no precipitation (rain / snow).
• The vehicle is parked in a straight line and the surface
it is parked on is flat.
• The doors and attachments (e.g., exterior mirrors) are
closed or folded in.
Please observe:
• If the calibration markers are not detected properly, this
can result in the panoramic view being not continuous.
• The calibration is not optimised: This may create blind
spots around the vehicle, which can lead to a
dangerous situation.
• In this case, the calibration must be repeated or the
calibration must be carried out manually.
Selecting the blending process
• The standard setting for the overlap of the images of
adjacent cameras are pre-set at the factory.
• In order to achieve an application optimised display of
images, you can select from a variety of image
overlapping types (blending) between the cameras.
6.5.8 Semi-automatic calibration
• As a rule, all cameras are calibrated semi-
automatically.
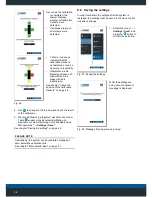
1.
Select the menu “
... / Settings / Calibration / Semi-
Autom."
and press the
button to confirm the
selection.
PLEASE NOTE
Incorrect calibration
During the calibration process, persons are not permitted
to stand or move within the field of view of the cameras.
2. Select the entry
All
cameras.
3. Use the
button to
confirm the selection.
The calibration is now
being processed.
Fig. 25
: “Calibration semi-automatic” menu
Содержание MC7180N
Страница 1: ...Mobile Vicinity Scout MVS Installation instructions...
Страница 4: ...4 5 1 Switching on the system 20 5 1 1 Menu overview 21...
Страница 6: ...6 11 1 Disposal of packaging 52 11 2 Disposal of the products 52 12 Index 53...
Страница 54: ...54...


