background image


Instructions 


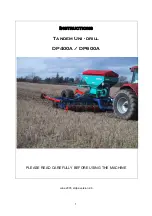
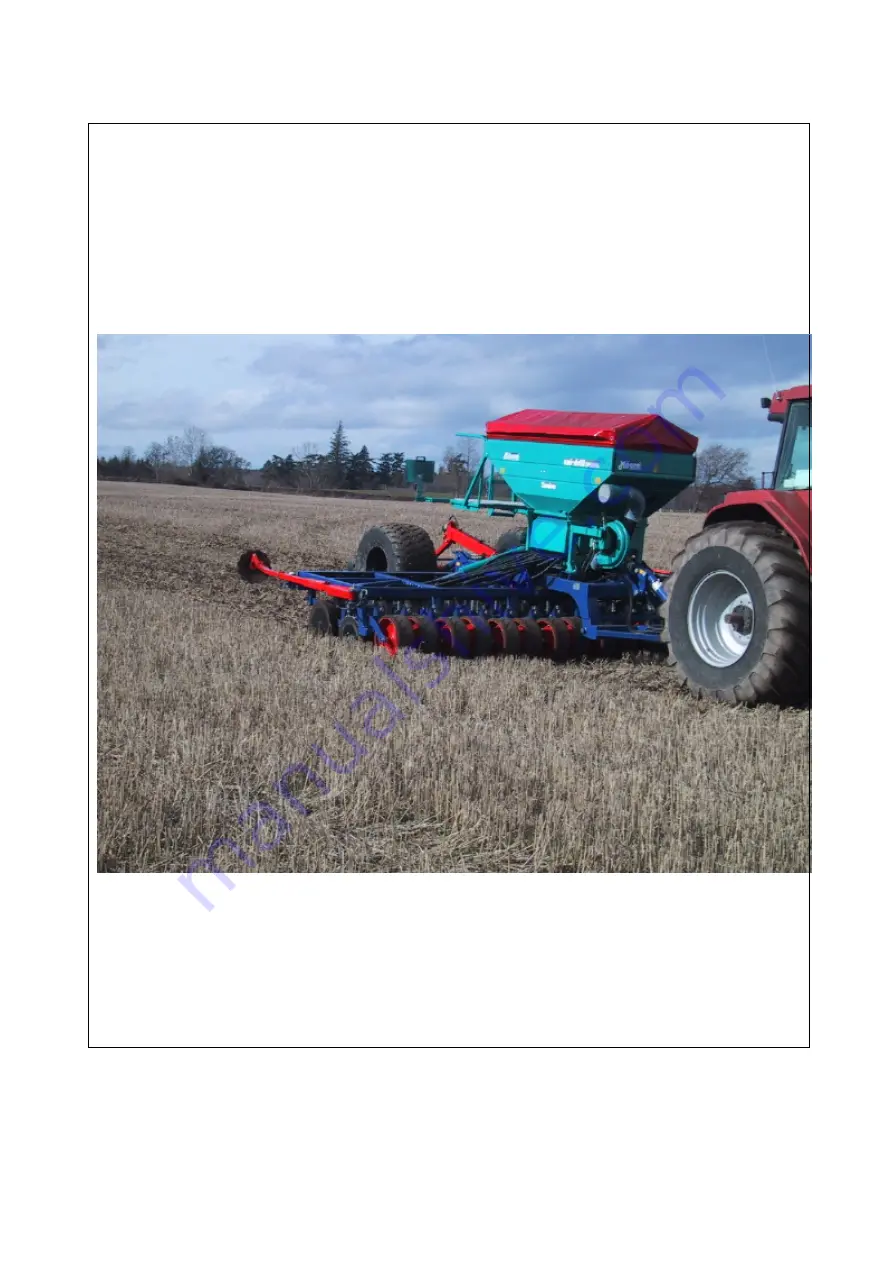
Tandem Uni - drill 


DP400A / DP600A


PLEASE READ CAREFULLY BEFORE USING THE MACHINE 


June 2005  stdpa version 2.0 

Содержание Tandem Uni-Drill DP400A

Страница 1: ...Instructions Tandem Uni drill DP400A DP600A PLEASE READ CAREFULLY BEFORE USING THE MACHINE June 2005 stdpa version 2 0 1 ...

Страница 2: ...ilities we recommend that you read this operators manual carefully Please do not hesitate to make suggestions or comments based on your experience they will always be of use to us and will help us improve our products Please return the duly completed guarantee form to us We wish you success with your seed drill Yours sincerely Sam Moore Managing Director 2 ...

Страница 3: ...E MACHINE IN AN ACCEPTIBLE CONDITION AND TO THE CORRECT SPECIFICATION I HAVE RECEIVED AND READ THE OWNERS MANUAL FOR SAFE AND CORRECT OPERATION OF MACHINE I WISH TO REGISTER MY MACHINE FOR WARRANTY SIGNED CUSTOMER DATE 1 To be completed detached and returned to Moore Uni Drill within 14 days of customer receipt purchase 2 It is essential that all details be completed 3 Failure to complete and retu...

Страница 4: ...ereby declare that Model Serial No Date conforms with the following Directives and Regulations and has been certified accordingly The Essential Health and Safety Regulations Directive 98 37 EC The Proposed Seed Drills Safety Document 2000 00 714171 DC Certified on behalf of Moore Uni Drill Limited James A O Kane Technical Engineer 4 ...

Страница 5: ...from the tractor 11 Before hitching up the machine ensure that the front axle of the tractor is sufficiently weighted Ballast weights should be fitted to the special supports in accordance with the instructions of the tractor manufacturer 12 Do not exceed the maximum axle weight or the gross vehicle weight rating 13 Do not exceed the maximum authorized dimensions for using public roads 14 Before e...

Страница 6: ...on lock the lift control lever DRIVE EQUIPMENT Power take off and universal drive shafts 1 Only use universal drive shafts supplied with the machine of recommended by the manufacturer 2 Power take off and universal drive shaft guards must always be fitted and in good condition 3 Ensure that the tubes of the universal drive shafts are properly guarded both in the working position and in the transpo...

Страница 7: ...achine prop it up using appropriate means of support 4 When replacing a working part seed drill coulter or disc etc wear protective gloves and only use appropriate tools 5 To protect the environment it is forbidden to throw away oil grease or filters of any kind Give them to specialist recycling firms 6 Before operating on the electric circuit disconnect the power source 7 Protective devices likel...

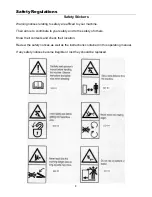
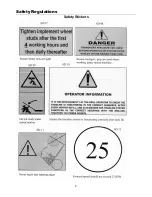
Страница 8: ...our machine Their aim is to contribute to your safety and to the safety of others Know their contents and check their location Review the safety notices as well as the instructions contained in this operating manual If any safety notices become illegible or lost they should be replaced 8 ...

Страница 9: ...Safety Regulations Safety Stickers 9 ...

Страница 10: ...26 C Weight Transfer 27 D Coulter Adjustment 28 E Markers 29 F Half Width Shut Off 30 G Electronic Tramlines 31 H Tramline Track Width 32 Maintenance A Wear Check 33 B Seed Distribution 34 C Greasing and Lubrication 35 Optional Equipment A Multiplier 36 B Flexible Agitator 37 C Pre Emergence Marker 38 D Moore Headland Control 38 46 Practical Recommendations 47 48 Flow Rate Calibration Procedure 49...

Страница 11: ...______ Type of machine__________________________________________________________ Accessories _________________________________________________________ MOORE UNIDRILL DP400A DP600A Width m 4 6 Number of rows 24 36 Row spacing cm 16 6 16 6 Width in transport m 3 3 Hopper capacity l 1600 2200 Weight Kg 3750 5750 Horse Power Required HP 130 180 ...

Страница 12: ...mlines 3 Tramline track width 4 Number of rows shut off whilst tram lining 5 Marker width setting to allow matching of bouts 6 Operation of half width shut off 7 Folding the machine in and out of work without damage It is also the owner operator s responsibility to check the operation of the various functions of the machine between each hopper fill or at least once every hour to check the machine ...

Страница 13: ...rawbar motion 1 Hitching height The height of the hitching point greatly influences the performance of the device 450 mm The hitching point must be fixed Low hitching heights should be preferred The drawbar should be preferred when twin wheels or wide tyres are used to make field end manoeuvering easier 2 Damper This was set in the factory 13 ...

Страница 14: ... must also use the transport pins when making adjustments to the drill Important Do not exceed 25 Kilometers per hour TRANSPORT SPEED TRANSPORT Positioning the transport locks 1 Raise the seed drill Insert the transport locks Lower the machine to rest mandatorily on transport locks Do not stand near the axle during operation 14 ...

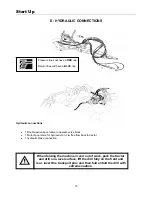
Страница 15: ...ool valve to operate valve block 1 Motor spool valve for hydraulic fan c w free flow back to tractor 1 hydraulic brake connection When folding the machine in and out of work park the tractor and drill on a level surface lift the drill fully on the front and rear insert the transport pins and then fold unfold the drill with extreme caution 15 ...

Страница 16: ...Start Up F HOPPER COVER Ensure that sieve 1 is in place in the bottom of the hopper bottom Operate with tarpaulin 2 sealed 16 ...

Страница 17: ...Start Up G TURBINE 17 ...

Страница 18: ...i e put the return pipe for the hydraulic fan motor directly into the back of the tractor without going through the spool valve 4 When using a tractor with open center hydraulics use the oil flow regulator on the tractor to control the speed of the fan and free flow the oil back to tank If there is no flow regulator on the tractor an inline flow regulator will be required for the motor again free ...

Страница 19: ...ng valve b Description of operation 1 Intake with Push Pull connector red plug on rubber strap 2 Divider unit 3 Motor 4 Pressure gauge on hydraulic feedback 15 bar 5 Free feedback hose blue plug on rubber strap c Using the hydraulically driven turbine Adjusting air flow rate Using the tractor oil rate control valve adjust the rotation to a rate between 3300 and 3600 rpm max Depending on the type o...

Страница 20: ...w 1 Small seed 8 kg ha 2 Large seed 3 Flap Move lever 3 slightly to the right and set it to the corresponding notch Index 1 Cereals 2 3 4 Preserve peas 5 Peas 6 Field beans Max Low position Hopper emptying Seek to lead the seed with the peg wheel while tightening the flap as much as possible e g index 1 for wheat barley However if seeds are continually being projected set the lever one notch highe...

Страница 21: ... 1 on the peg wheel so as to cover it b Rotate c Engage the spring pin d Set the flaps to position 1 Dismantling is done by reversing the procedure Use pin B to unclip Index Standard peg 2 large seed cereals Fine peg wheel 3 rate 8 kg ha 5 Variator Set the flow rate trial index using knurled wheel 4 and lever Read values above the flat plate 5 Each index change must be followed by a flow rate test...

Страница 22: ...wheels 1 b Push the injectors 2 c Put the trough 3 beneath the metering device d Fit the crank 4 on to the variator shaft Check that the metering devices used are engaged Perform the flow rate test with both trays and according to the recommendations of the following pages Close the injectors Bring the trough back to the guard position NOTE It is possible to do the test on one side only by disenga...

Страница 23: ...Settings A Distribution Settings 23 ...

Страница 24: ...back up to the required value 9 Reset the area meter to zero after the calibration test 10 The most representative test is one carried out under real working conditions After sowing a hectare carry out a further check proceed as above from step 5 Checking the distribution system Distribution of seed to the seed tubes should be checked at regular intervals through out the day for example every hour...

Страница 25: ... used for the first flow rate test on line 2 which corresponds to the amount in kg collected in the tray during that test Without moving the slide ruler discs find the target flow rate in Kg ha on the line 3 On line 4 read the new variator index corresponding to your seed and conditions After sowing one hectare perform another verification test If you want to change the rate ha with the same seed ...

Страница 26: ... Depth stage 1 4 1 2 1 1 Deep Sowing 1 2 1 2 1 1 4 3 1 1 4 4 1 1 4 1 2 5 1 6 1 1 2 7 1 2 1 8 1 4 1 2 1 9 Shallow Sowing The table on the right shows how it is possible to get a range of depth stages from the depth clips The sowing depth should be checked regularly throughout the day for example every 4 hectares Check sowing depth midway between tractor tracks within a tractor track and at each sid...

Страница 27: ...e stroke control segments here to vary the front ram stroke Using the stroke control clips to limit retraction of the front ram will increase the weight transferred onto the rear press wheel and reduce the weight on the front press wheel Using the stroke control clips to allow retraction of the front ram will increase the weight transferred to the front press wheel and reduce the weight on the rea...

Страница 28: ... Adjusting that clearance is easy the machine being set on a flat and level area with a block under the coulter Note When operated on very soft soil encumbered by trash it is recommended to raise the coulter to 40 mm above the disc edge to facilitate disc motion b Recline adjustment The coulter 1 leading edge should be Parallel to the disc As close as possible to the disc but not hampering its rot...

Страница 29: ...stance between the first sowing row and the marker disc equals sowing width plus the seed row spacing The disc angle can be changed by loosening bolt 1 and increasing the disc angle to get the desired marking intensity Operation of markers using Moore headland Control See page 46 for operation of markers on the Moore Headland control The markers should be operated in a gentle manner beware of obst...

Страница 30: ...e sure both shafts are rotating again d Emptying the hopper The hopper is emptied into tray 3 Position the tray under distribution and lower lever 4 all the way downwards To stop seed flow while the hopper is not empty slightly raise the lever without seeking to put it in the top position For faster emptying levers 5 can be used Set the seed drill to transport position Place a container under the ...

Страница 31: ...typical tramline rhythms for different widths of tramline bouts Drill meters Width of Sprayer Half drill shut off for tram lining Target Bout No of bouts to start tramline 12 No 3 2 16 Yes 4 2 4 20 No 5 3 24 Yes 6 3 28 No 7 4 32 Yes 8 4 36 No 9 5 12 Yes 2 1 6 18 No 3 2 24 Yes 4 2 36 Yes 6 3 When using half width shut off begin on the left of the field Don t forget to re engage the half width shut ...

Страница 32: ...Settings H Tramline Track Width 32 ...

Страница 33: ... LUBRICATE turn or replace the plates as soon as their thickness is significantly reduced Tightening check After 10 hours of operation Check the tightening of the furrowing system screws disc securing screws and check tapered roller bearings If those roller bearing have play they should be tightened Remove the dust cover Tighten the nut until the disc rotates forcibly Release the nut by turn After...

Страница 34: ...evices and seed pips Checks Incorrect setting of flaps 2 may induce oversowing in the course of work It is recommended to check and adjust if necessary after each sowing period Set the flap lever to index 1 Begin with visually assessing the distance between the flap and the peg wheel If necessary insert a 6mm spacer 3 between the flap and large space peg wheel Adjust the distance with screw 4 34 ...

Страница 35: ...ampaign Grease the front Otico press wheels every 120 hours Lubricate markers every 20 hours Oil tramline springs with spray releasing oil Oil distribution chains Check variator oil level horizontal seed drill top up the red dot with ATF DEXTRON II D Change oil every 500 ha or 2 years if the area has not been covered 35 ...

Страница 36: ...emove the couplings Fit the multiplier from the outside Check alignment and tighten the multiplier and variator securing screws Operation In relation to baseline settings the flow rate is doubled Follow the column B in flow rate tables h Flexible agitator Use the flexible agitator with very poorly flowing seed eg Rye grass Fitting Hold the rubber flap and roll it around the agitator finger accordi...

Страница 37: ...taneously with post emergence marking out Tramlines The marking out track must match that of the disengaged rows Ground marking is adjusted by letting the discs catch more or less soil It is recommended to let the disc catch in the edge of the first seeded row so as to project soil 37 ...

Страница 38: ...aintain pH between 6 5 and 7 to ensure good stability of the clay humic complex 5 Enrich the soil with organic matter to protect it from compaction and improve resistance Return straw and harvest residues bring manure grow forage avoid plowing HOW TO BURY STRAW 1 Select the right variety Depending on variety the amount of straw produced varies as does its resistance to impact A disease resistant v...

Страница 39: ... Trust the swiftness of UNIDRILL action and the quality of its emergences and sow on schedule without any risks 5 Setup a clean and strong crop upon sowing Use clean weed free seed with high germination potential Lay the seed to obtain fast and grouped emergence competing with weed 6 Use a seed drill that moves little soil like UNIDRILL UNIDRILL only works the seed row thus reducing the risk of bl...

Страница 40: ...rely indicative Check you flow rate ha REMINDER OF PRE SETTINGS 1 Shutters 3 positions 2 Flap 6 positions 3 Turbine 5 positions 4 Pegs 2 positions 5 Variator Indices 0 90 FLOW RATE TABLES Wheat Rapseed Barely Peas Field peas Oats Mustard Phacelia Radish Alfalfa Linseed Ray grass Clover 40 ...

Страница 41: ...Flow Rate Tables Calibration Procedure 41 ...

Страница 42: ...Flow Rate Tables Calibration Procedure 42 ...

Страница 43: ...Flow Rate Tables Calibration Procedure 43 ...

Страница 44: ...Flow Rate Tables Calibration Procedure 44 ...

Страница 45: ...Flow Rate Tables Calibration Procedure 45 ...

Страница 46: ...thin 12 months from the date of receipt be the purchaser or his her nominee of the machine 5 Any claim under this warranty must be made by the original purchaser of the machine and is not assignable to any third party 6 If the purchaser hires out the machine to any third party the warranty shall apply only to matters notified to the Company within 90 days of the date of delivery and clause 4 shall...

Страница 47: ...orrectly in every respect Moore Uni Drills are subject to thorough quality assurance inspection and function testing before delivery The user purchaser shall retain sole liability for insuring the equipment is functioning correctly when in use Moore Uni Drill Ltd accepts no liability for losses arising from incorrect use of the drill including its depth control and seed dosage equipment Follow the...

Страница 48: ...DP400A and DP600A Parts booklet 2002 seeding line ...

Страница 49: ...80001 1 Timken Taper Roller Beraing 33 140029 M12 x 55 Bolt 34 020011 Right Hand Tungsten Coulter 35 010016 Disc Hub 36 600001 450mm Notched Disc 37 140039 3 8 Spring Washer 38 140055 3 8 x3 4 unf Set Screw 39 010222 Cambridge Press Wheel 40 140033 M10 x 70 Bolt 41 010017 Seed Tube Retainer 42 140040 M10 x 20 Set Screw 43 140018 M16 Binx Nut 44 010027 Distance Piece 45 020106 Uni drill Bogie Short...

Страница 50: ... 6 UNC bolt 11 A130 1 UNC Lock nut 12 130 1234 Pivot Collar axle unit 13 A156 1 3 8 Taper Bearing 14 131 1234 Pivot Bush axle unit 15 125 1134 Transport Pin 16 A129 1 UNC nyloc 17 A117 1 x 71 2 UNC Bolt 18 BAC 808 Wing Ram 19 422 11 Wing Lock Profile 20 1 washer 21 Spring unit collar 23 Spring Pressure adjuster 24 1 x 5 UNC bolt 25 A129 1 UNC nut 26 1 x 8 nut 27 A07 942 Swivel hitch 28 BAC 093 Dep...

Страница 51: ... 10 A101 1 x 6 UNC bolt 11 A130 1 UNC Lock nut 12 130 1234 Pivot Collar axle unit 13 A156 1 3 8 Taper Bearing 14 131 1234 Pivot Bush axle unit 15 125 1134 Transport Pin 16 A129 1 UNC nyloc 17 A117 1 x 71 2 UNC Bolt 18 BAC 808 Wing Ram 19 422 11 Wing Lock Profile 20 1 washer 21 Spring unit collar 23 Spring Pressure adjuster 24 1 x 5 UNC bolt 25 A129 1 UNC nut 26 1 x 8 nut 27 A07 942 Swivel hitch 28...

Страница 52: ...2002 DP600A markers ...

Страница 53: ...13 140085 M12 x 25 set screw 14 140084 M12 washer 15 080014 DPA Series marker ram 16 020046 DPA marker arm ram pin 17 140082 M12 x 100 bolt 18 010106 Marker roller 19 140030 M12 nyloc 20 250001 U bolt 50 x 50 21 020134 DPA 400 outer marker arm 22 140086 M16 x 90 bolt 23 140087 M16 lock washer 24 480001 50 x 50 end cap 25 600002 Notched Marker disc 26 020132 Depth Ring 27 140039 3 8 h d Spring wash...

Страница 54: ...Marker Circuit Diagram ...

Страница 55: ...W Seed box hopper extension ...

Страница 56: ...W Seed box Peg Wheels ...

Страница 57: ...W Seed box Distributor Assembly ...

Страница 58: ...W Seed box Distributor Assembly ...

Страница 59: ...W Seed box Variator Assembly W Seed box Variator Assembly ...

Страница 60: ...W Seed box half width shut off ...

Страница 61: ...W Seed box Venturi System ...

Страница 62: ...W Seed box Drive Wheel Assy ...

Страница 63: ...W Seed box Wind turbine Assy ...

Страница 64: ...W Seed box Air Intake ...

Страница 65: ...W Seed box RDS system ...

Страница 66: ...W Seed box MS Variable seeding ...

Отзывы: