44
••••••••••••••••••••••••••••••••••••••••••••••••••••••••••••••••••••••••••••••••••••••••••••••••••••••••••••••••••••••••••••••••••••••
<INITIAL SET UP/INFORMATION> (continued)
♦
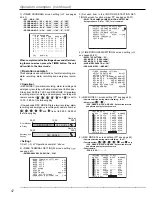
SEQUENTIAL PLAY
It is possible to make backups of the video recorded to an
analog video recorder, etc., using the SEQUENTIAL PLAY
function. This function plays back the video of each camera
in it's original recording rate and in full screen. When this
function is activated the SPLIT/SEQUENCE button will light.
The playback order/time of each camera will be the order of the
recorded video.
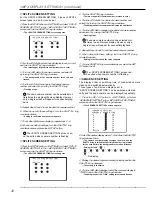
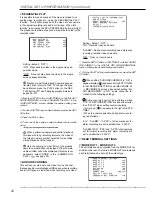
<HDD SETTINGS>
HDD REPEAT REC OFF
HDD REPEAT PLAY OFF
IM-CHECK PLAY OFF
>>SEQUENTIAL PLAY OFF
Setting ( default : “OFF” )
“ON” : Plays back the video in the single screen se-
quential mode.
“OFF” : Does not play back the video in the single
screen sequential mode.
Playback is performed during camera sequen-
tial play at an interval of 30P. To change the play-
back interval, press the PLAY button (or the REV.
PLAY button)(
see “Changing playback intervals,
pages 56, 57).
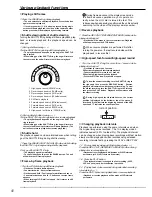
1. Press the SET UP button
}
<SETTINGS>
}
<INITIAL SET
UP/INFORMATION>
}
Select “SEQUENTIAL PLAY” in the
<HDD SETTINGS> screen. Display the desired setting and
confirm.
2. Turn the SHUTTLE ring counterclockwise or press the SET
UP button.
3. Press the PLAY button.
4. Press one of the camera number buttons with recorded
video.
• Single screen sequential playback starts.
When performing camera sequential playback
for video with long recording intervals, the video of
the largest camera number selected for recording
will be played back the longest.
Only the camera number (title) of the pressed
camera number button is displayed. Other camera
number (titles) will not be displayed. If display is not
necessary, select “NONE” in the <CAMERA DIS-
PLAY> (
see page 30).
■
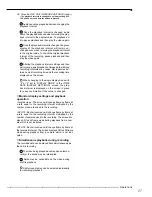
AUDIO RECORDING
This unit can record audio and video for one channel.
Because audio recording takes HDD space, when recording
audio, HDD space is less than when recording only video.
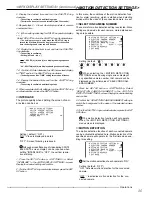
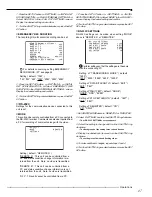
<INITIAL SET UP/INFORMATION>
HDD SETTINGS
>>AUDIO RECORDING OFF
REAR TERMINAL SETTINGS
RS-232C
INFORMATION/SERVICE
Setting ( default : “OFF” )
“ON” : Records video and audio.
“ALARM” : During alarm recording and emergency
recording, records video and audio.
“OFF” : Does not record audio.
1. Press the SET UP button
}
<SETTINGS>
}
Select “AUDIO
RECORDING” in the <INITIAL SET UP/INFORMATION>
screen. Display the desired setting and confirm.
2. Turn the SHUTTLE ring counterclockwise or press the SET
UP button.
When setting “AUDIO RECORDING” to “ON”, a
speaker display ( ) appears next to <ESTD TIME>
in the <RECORD SETTING> and <REC MODE A>
~ <REC MODE D> screens. Even when setting “AU-
DIO RECORDING” to “ON”, audio cannot be re-
corded for the following settings.
Audio recording cannot be performed when
“PPS” of “RECORD SETTING” are all set to smaller
than “0.333P” when setting normal recording.
• In this case, ( X ) appears to the right of <ESTD
TIME>.
• When the camera selection during alarm record-
ing is as follows :
“ALL”, “ALARM” : “A-PPS” of all cameras set for
alarm recording are set to smaller than “0.333P”.
“ALARM PLUS” : “PPS” and “A-PPS” of all cameras
set for normal recording and alarm recording are
set to smaller than “0.333P”.
■
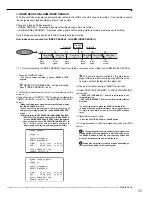
REAR TERMINAL SETTINGS
♦
MODE OUT 1 - MODE OUT 4
The unit status can be outputted from the MODE OUT ter-
minals on the rear. There are 4 MODE OUT terminals and
each terminal can be set with the output type.
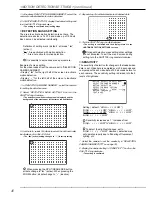
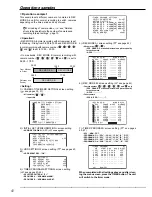
<REAR TERMINAL SETTINGS>
>>MODE OUT 1 OFF
MODE OUT 2 OFF
MODE OUT 3 OFF
MODE OUT 4 OFF
KEY SOUND ON
BUZZER OFF
REMAIN HDD HDD-10
%
CALL OUT SETTINGS
EMERGENCY REC DURATION 10M
Содержание DX-TL900U
Страница 75: ...75 Specifications ...
Страница 76: ...872C276A8 PRINTED IN MALAYSIA ...


