100
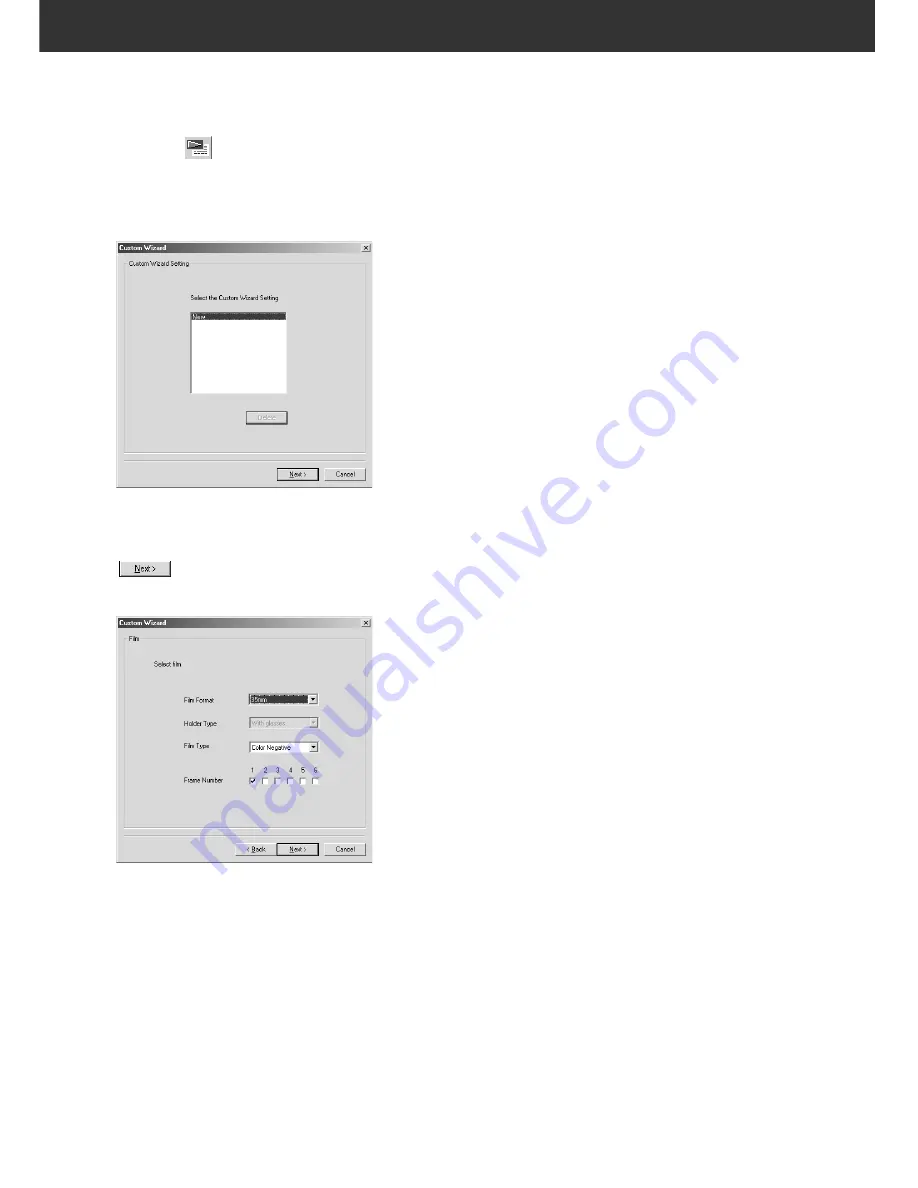
CUSTOM WIZARD
1.
Click on
in the Main window.
• The Custom Wizard window is displayed.
• When the Custom Wizard Setting window is displayed
for the first time, “New” is selected.
• When specifying a new auto operation setting, select
[New].
2.
Select the auto operation setting and click on
.
• The Film window is displayed.
• Click on the arrow next to the Film Format drop-down list
to display the film format and select the appropriate film
format.
• When selecting 6x4.5, 6x6, 6x7, 6x8 or 6x9 in the film
format, select the type of the holder set in the scanner.
• Click on the film type to be scanned.
• Confirm the frame number to be scanned.
The Custom Wizard function allows you to automate a series of operations of scanning. When
clicking on [Custom Wizard] button in the Main window, the Custom Wizard window appears.
Auto operation settings can be saved, and later selected or deleted.
Содержание DiMAGE DiMAGE Scan Multi PRO
Страница 1: ...INSTRUCTION MANUAL E 9224 2887 11 H A108...
Страница 111: ...DiMAGE Scan Multi PRO 111 SCAN JOB FILE LIST 35 mm...
Страница 113: ...DiMAGE Scan Multi PRO 113 SCAN JOB FILE LIST 120 220 6x4 5...
Страница 115: ...DiMAGE Scan Multi PRO 115 SCAN JOB FILE LIST 120 220 6x6...
Страница 117: ...DiMAGE Scan Multi PRO 117 SCAN JOB FILE LIST 120 220 6x7...
Страница 119: ...DiMAGE Scan Multi PRO 119 SCAN JOB FILE LIST 120 220 6x8...
Страница 121: ...DiMAGE Scan Multi PRO 121 SCAN JOB FILE LIST 120 220 6x9...
Страница 123: ...DiMAGE Scan Multi PRO 123 SCAN JOB FILE LIST MULTI FORMAT 35 mm...


