3-7
Chapter 3 Setup
3
2
2
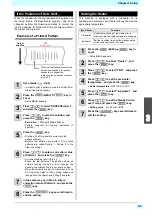
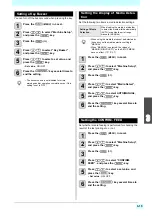
Setting of Left and Right Margins
Set a non-printing area along the left and right edges of
the media.
The offset value against the standard margin 15mm is set
hereupon.
1
Press the
(MENU)
key in
Local.
• SETUP MENU appears.
2
Press the
(>>)
.
3
Press
to select “Margin/L” or
“Margin/R” , and press the
key.
4
Press
to select a set value, and
press the
key.
•
Set value
: -10 to 85 mm
5
Press the
key several times to
end the setting.
Setting of UV mode
Set the amount of light for the UV lamp of the LED UV
device.
Setting of Mode
There are two types of setting of mode available as shown
below.
Normally, select "AUTO".
If the level of ink curing is strong/weak, adjust the UV lamp
intensity by using "Light Adjust" in the "AUTO" settings.
If adjustment cannot be made even by using "Light Adjust" in
the "AUTO" settings, select "MANUAL".
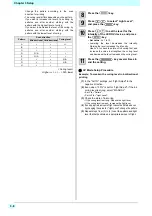
To adjust the amount of light in the "AUTO"
settings
1
Press the
(MENU)
key in
Local.
• SETUP MENU appears.
2
Press the
(>>)
.
3
Press
to select “UV Mode” , and
press the
key.
4
Press the
key.
5
Press
to select “AUTO”, and
press the
key.
6
Press
to select “Light Adjust”,
and press the
key.
7
Press
to set the adjustment value
for the intensity of the LED UV device, and
press the
key.
•
Set value
: -50% to +50%
• If you set this value to 0%, the machine applies an
intensity recommended for each of the printing
modes.
• Setting a negative value reduces the intensity;
setting a positive value increases the intensity.
8
Press the
key several times to
end the setting.
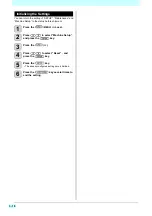
If you fail to adjust the amount of light in the
"AUTO" settings
1
Press the
(MENU)
key in
Local.
• SETUP MENU appears.
2
Press the
(>>)
.
3
Press
to select “UV Mode” , and
press the
key.
4
Press the
key.
5
Press
to select “MANUAL”, and
press the
key.
6
Press
to select “PATTERN”, and
press the
key.
7
Pressing
to select a UV lamp
irradiation pattern.
•
Set value
: Pattern A to H
• A recommended scan direction for printing is fixed
for each pattern.
• The margin setting is enabled only if the media
detection method is set to “AUTO”.
• The margin setting is reflected when the media
width is detected.
• Pay attention to the settings of the right and left
margins when printing with the media press. If any
of the margins is set to a negative value, printing
may start from a position on the media press.
• The color tone may differ if any of the UV mode
settings is changed. Check in advance that the
color tone will not be affected.
Setting item
Descriptions
AUTO
Prints with an amount of light recommended
for each of the printing modes.
MANUAL
Select this if the curing level is not good when
AUTO is selected.
Содержание SIJ-320UV
Страница 1: ...MIMAKI ENGINEERING CO LTD URL http mimaki com D202809 13 Original instructions ...
Страница 13: ...xii Warning labels 1 2 2 2 2 2 1 No Reorder Label 1 M905811 2 M903330 3 M905980 4 M907935 5 M903239 6 M903404 ...
Страница 14: ...xiii Warning labels ...
Страница 28: ...1 14 Chapter 1 Before Use ...
Страница 98: ...4 26 ...
Страница 116: ...5 18 Chapter 5 Troubleshooting ...
Страница 122: ...Chapter 6 Appendix 6 6 ...
Страница 124: ...MM FW 1 50 MIMAKI ENGINEERING CO LTD 2015 ...


