2-12
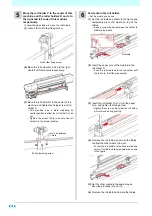
(2)
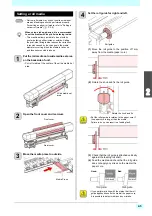
In the same manner, fix the left side and right
side of the media.
• Pull roll media evenly for right and left, check
that there is no slack or waviness on the
media, and paste tape in numerical order.
• When you place the tape, consider the
rolling-up direction.
20
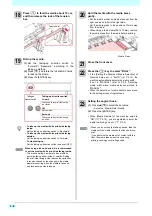
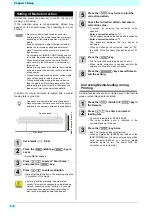
Press
to feed the media about 10 cm,
and then release the lock of the tension
bar.
21
Roll up the media.
(1)
Set the taking-up direction switch to
“Forward”/ “Backward” according to the
taking-up method.
(2)
Press [
] , and rotate the roll shaft 2-3 times
to take up the media.
(3)
Press the [ENTER] key.
22
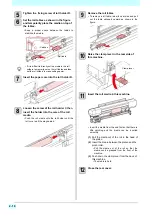
Hold the media with the media press
gently.
• Set the media so that no media sticks out from the
right end pinch roller to the right side.
• Set the media press to the position of 3mm away
from the media.
• When using a thick media, remove the media
press from the media before printing.
23
Close the front cover.
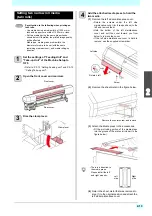
24
Press the
key to select "ROLL" .
• If the [Setting the Display of Media Detection] of
Machine Setup set in “AUTO”(
P.3-15), the
machine automatically detects the media width.
25
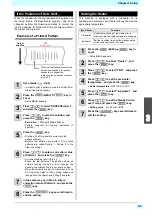
Setting the Logical Seek.
(1)
Press [
][
] to select the set value.
• Set value : Media/ Data/ Quality
(2)
Press the [ENTER] key.
• When [Media Remain] of the Machine Setup is
"ON" (
P.3-14), you are prompted to enter the
media remaining amount. (
•
To take up the media with its print-side facing
inside:
Set the taking-up direction switch to “Backward”.
•
To take up the media with its print-side facing
outside:
Set the taking-up direction switch to “Forward”.
•
To stop taking-up:
Set the taking-up direction switch to neutral (OFF).
Tension bar
Lock
Backward
Taking-up with the print side facing to
the inside.
Forward
Taking-up with the print side facing to
the outside.
OFF
Not operated.
Taking-up
manual switch
Taking-up direction switch
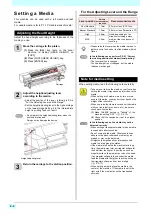
• Before printing, rewind by hand the roll media set
on the narrow roll holder to remove any slack.
If the media is loose, the media feed amount
varies, causing poor image quality.
• When you do not use the take-up device, feed the
media until the media reaches the floor, and then
print.
If you print with the media out of contact with the
floor, the media feed amount varies during
printing, causing poor printing quality.
• Surface waviness or ruck may affect the quality of
currently printed image.
When fixing media with tape, align the media
along the direction indicated with an arrow in the
figure.
• If you pull the media too much when fixing with
tape, the media tension may not be even. And, it
may negatively affect the media feeding.
Media Press
Содержание SIJ-320UV
Страница 1: ...MIMAKI ENGINEERING CO LTD URL http mimaki com D202809 13 Original instructions ...
Страница 13: ...xii Warning labels 1 2 2 2 2 2 1 No Reorder Label 1 M905811 2 M903330 3 M905980 4 M907935 5 M903239 6 M903404 ...
Страница 14: ...xiii Warning labels ...
Страница 28: ...1 14 Chapter 1 Before Use ...
Страница 98: ...4 26 ...
Страница 116: ...5 18 Chapter 5 Troubleshooting ...
Страница 122: ...Chapter 6 Appendix 6 6 ...
Страница 124: ...MM FW 1 50 MIMAKI ENGINEERING CO LTD 2015 ...


