


User Guide Version 2.60 I-Button
Revision 21_Sep_2015
21
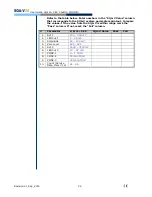
Controls
Set-Up and
Testing
Please note:
When a new control lot
is used, the control
default settings must
be changed prior to
initiating a test.
Refer to section(s):
Set-up: Assayed
Control and
Set-up: Non Assayed
material
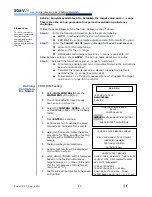
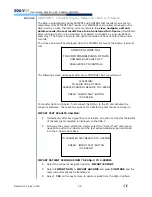
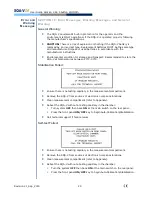
Please note:
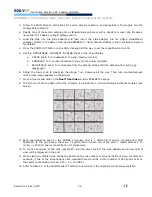
Level 1, 2, and
NEGATIVE control set-
up screen from
V-Sperm GOLD.
The NEGATIVE control
may also be labeled
Level 3 control on the
SQA-V.
For the SQA-V to work
properly the CONTROLS
must have set-up data
inserted. If control
material is not available
or non-assayed
enter
current date in the EXP
Date field and zeros in
all other fields.
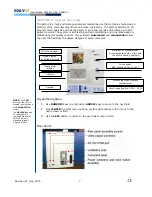
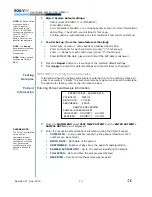
SECTION 6: Controls
External quality control samples (CONTROLS) are run on the RUN CONTROLS mode
from the MAIN MENU of the SQA-V. Commercially available latex beads or stabilized
sperm CAP can be run as non-assayed controls. QwikCheck™ beads produced by
Medical Electronic Systems are assayed for the SQA-V. It is recommended that
controls be run daily or based upon laboratory protocols.
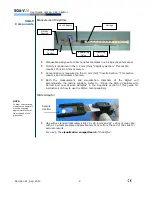
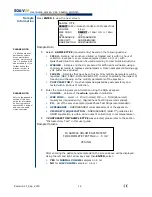
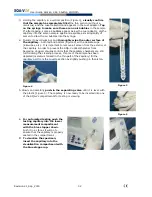
The control media is aspirated into the testing capillary and run in the same manner
as a normal volume specimen in the testing compartment of the SQA-V.
For each
new lot
of controls, SQA-V system defaults need to be set-up/updated
through V-Sperm GOLD prior to running a test. To run an assayed control use the
information for Target Value and +/- Range provided on the product labeling. To run a
non-assayed control, the Target Value and +/- range must be established by the
laboratory or set 0 (zero) if not established. Follow instructions below to
set-up
an
assayed or non-assayed material. The testing process is the same.
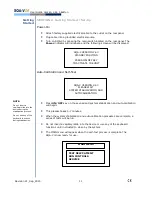
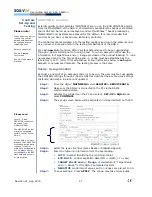
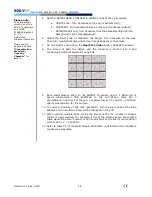
Set-Up: Assayed Control
Each time a new lot of an assayed control is to be run, the user must set-up/update
the CONTROL settings through V-Sperm GOLD as described below. Previous settings
(defaults) will remain in place until updated.
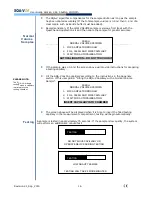
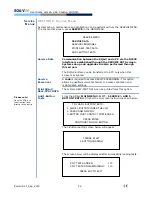
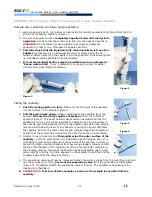
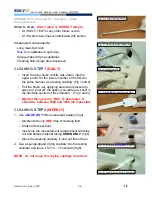
Step 1:
From the SQA-V
MAIN MENU
select
SERVICE > SERVICE DATA.
Step 2:
Make sure the SQA-V is connected to the PC via the RS232
communication cable.
Step 3:
Activate the V-Sperm on the PC and select:
SET-UP > SQA-V
and
press
CONTINUE
.
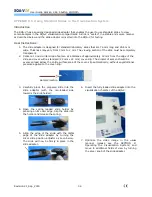
Step 4:
The set-up screen below will be activated in V-Sperm GOLD on the PC:
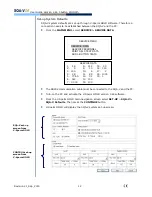
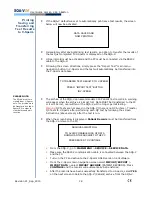
Step 5:
Select the type of control (Latex Beads or Stabilized Sperm)
Step 6:
Enter the following information from the box labeling:
LOT#
- number identifying the control media lot.
EXP. DATE
– control expiration date (MM = month, YY = year).
TARGET VALUE and +/- Range
–manufacturer's "Target Value
and +/- Range” for the SQA-V Automated System.
NEGATIVE
control target values and +/- ranges are pre-set to 0.0.
Step 7:
To save settings: Press
APPLY
. The set-up may take two minutes.
Содержание SQA-V Gold
Страница 39: ...Revision 21_Sep_2015 39 User Guide Version 2 60 I button WHO 5th APPENDIX 8 Dilution Media...
Страница 41: ...Revision 21_Sep_2015 41 User Guide Version 2 60 I button WHO 5th APPENDIX 10 Assayed Control QwikCheck Beads...
Страница 44: ...Revision 21_Sep_2015 44 User Guide Version 2 60 I button WHO 5th APPENDIX 13 GLOBOZOOSPERMIC SAMPLES...


