nadac.merging.com
Page 35
Network Menu
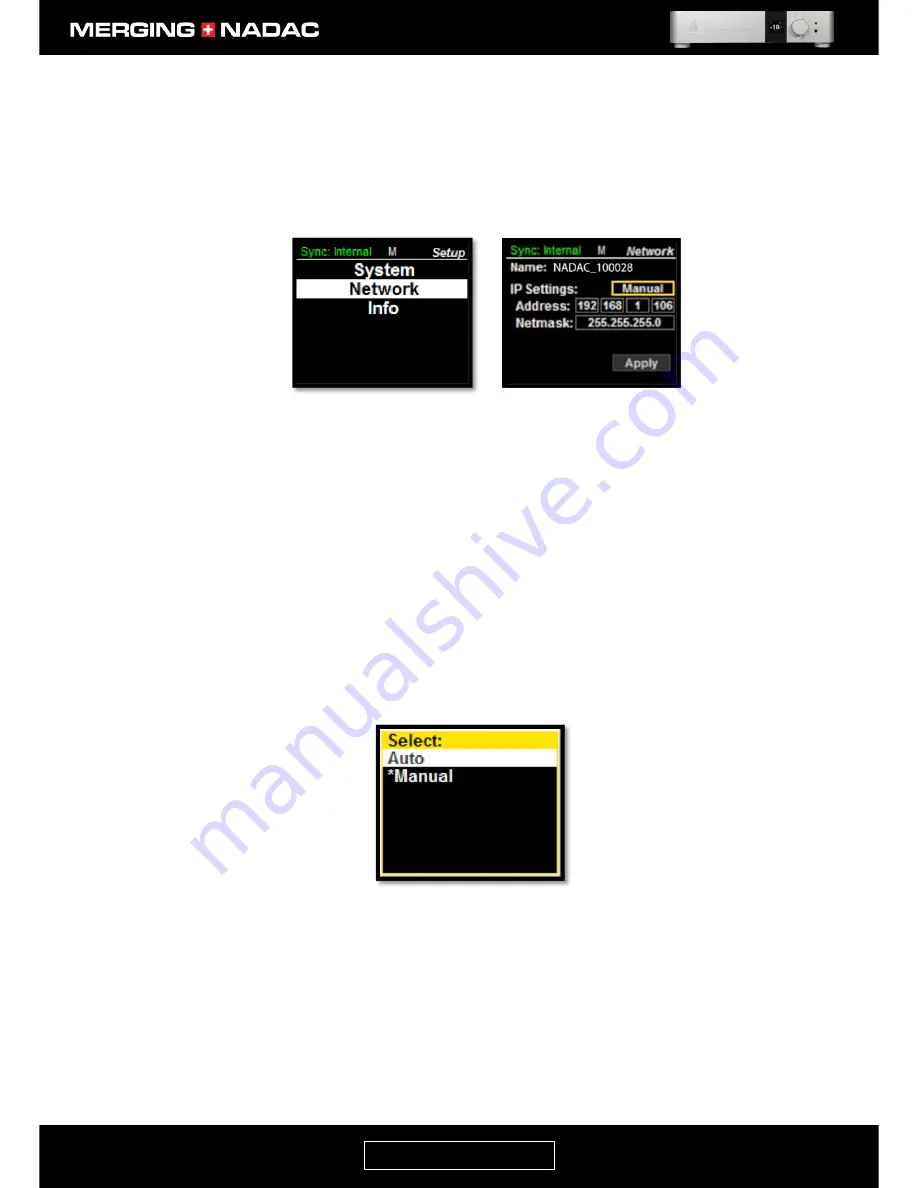
The Network menu allows the user to manually set the IP address and Netmask, or opt for these to be
automatically set. The recommended option is Auto for automatic selection.
To enter the Network menu: From the home screen press and hold the Rotary Control until the Main menu
top screen appears – Figure 20. Use the Rotary Control to highlight
Setup
, then briefly press the control. This
will open the Setup menu – Figure 30. Use the Rotary Control to highlight
Network,
briefly press the control
again and the Network menu will appear – Figure 31.
Name:
This shows the name of the NADAC unit and its serial number. This name
will be broadcast across the network and will be seen in applications such as the
NADAC App remote control (page 59) and MT Discovery tool (page 66).
IP Settings:
Allows the IP settings to be set either manually or automatically.
If Auto is selected: The IP address will be automatically attributed using
ZeroConf/Auto-IP mechanism (address range 169.254.xx.xx if no DHCP server is
present). The Address and Netmask lines in the menu will be greyed out and the
cursor will always skip these lines in the menu.
If Manual selected: The user can enter a fixed IP address as shown below.
To toggle between automatic and manual IP setting, use the Rotary Control to
highlight the
IP Settings
option box in the Network menu (figure 31), then briefly
press the Rotary Control. This will open the IP Settings menu – Figure 32.
Use the Rotary Control to highlight the required setting, then briefly press the
control to confirm the selection. The display will revert to the Network menu, Figure
31, with the new setting shown in the
IP Settings
option box.
If Manual selection has been chosen, the IP Address and Netmask may now be set as
shown below.
Figure 32. IP settings menu.
Figure 30. Setup menu.
Figure 31. Network menu.
Содержание MERGING+NADAC
Страница 1: ...REFERENCE GUIDE ...
Страница 75: ...nadac merging com Page 74 ...


