19
18
The system must be installed on a firm, load-bearing and dry wall.
The distance to the collectors must be chosen to prevent overheating
of the station. Risks due to adjacent structural components,
electrical cables, gas, water or heating pipes must be
avoided. Ensure free access to the station, safety fittings and
connection pipes and cables.
1.
Choose installation site
2.
Mark drillholes on the wall by means
of installation and fixing bracket (A).
3.
Make drillholes and knock in anchors/Rawl plugs
4.
Screw on station with insulation subsection
5.
Pipeline binding without tension manufacture
Before assembling the modules of the single-line solar station,
remove the insulation and lift the module from the retainer clip.
The lower mounting hole (behind the flow meter) is accessible
after removing the module. Once the insulation has been installed,
put the module back into the retainer clip.
Check if it is attached firmly.
Top shut-off fittings
The top shut-off fittings are equipped with integrated,
manually openable backflow preventer.
The direction of flow is indicated by a stylised arrow shape on the spindle.
(Chapter 3, see. fig. 1)
Upper shut-off fittings
The upper shut-off fittings are fitted with integrated,
manually adjustable backflow preventers.
The flow direction or position is visible through the bevelled
side (see fig. ).
If the flow direction is not observed,
the back flow preventer can act against the intended flow direction
and thus block the flow.
Operating state with active backflow preventers (see. fig.):
- Ball valve: Solar return (cold, solar pump line) upwards (Position 1)
- Ball valve (two-line): Solar flow (hot) downwards
3.1
Wall-mounted installation
3.2 Shut-off fittings
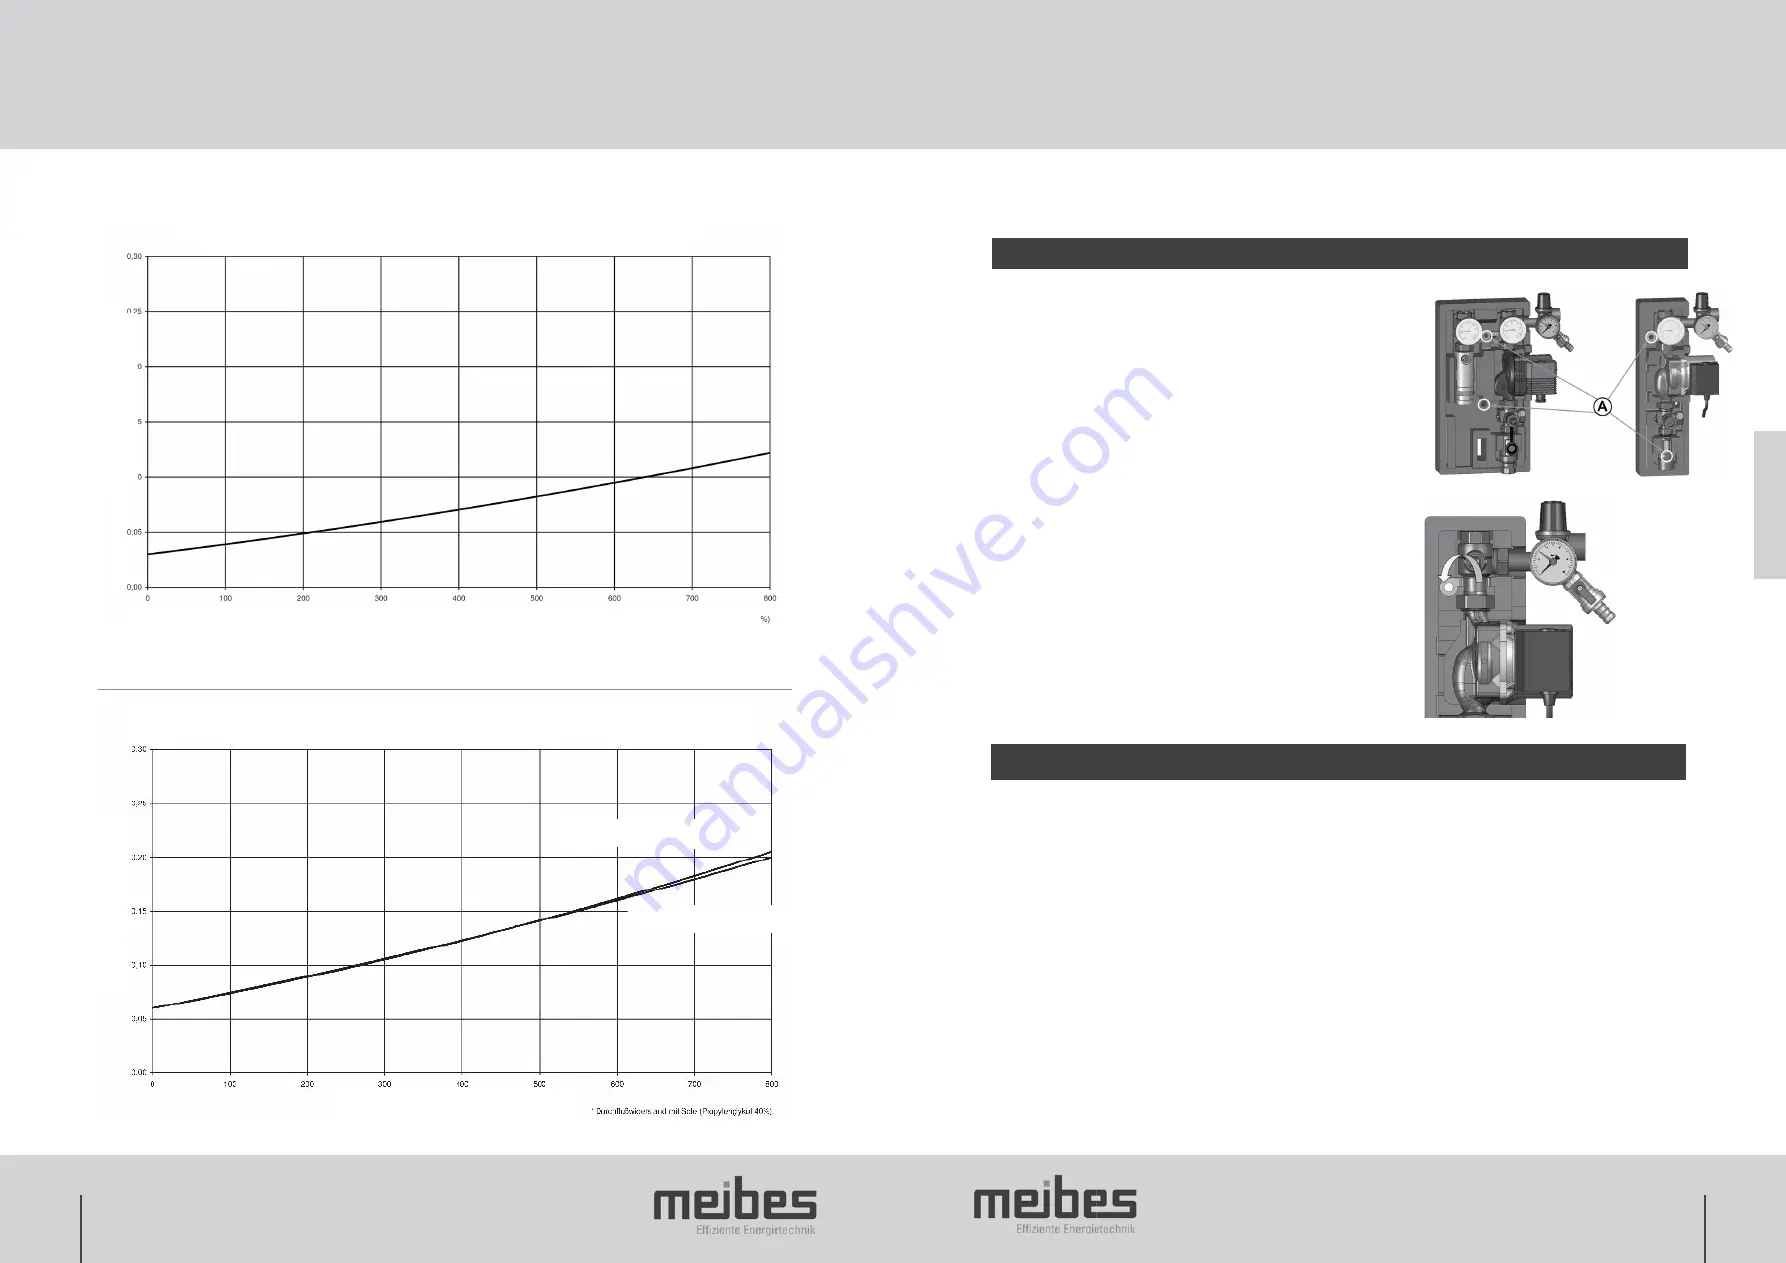
Pressure loss (bar)
Volumetric flow l/h
Volumetric flow - pressure loss diagram Two-branch solar station Type S
Volumetric flow - pressure loss diagram Single branch solar station Type S
Volumetric flow l/h
Pressure loss (bar)
GB
with permanent permanent catcher
without permanent permanent catcher
2. Technical Data
3. Installation
Содержание Solar station S
Страница 20: ...39 38...
Страница 21: ......


