Envoy E Series User Guide 20171215-40.docx
Page 35 of 64
20.
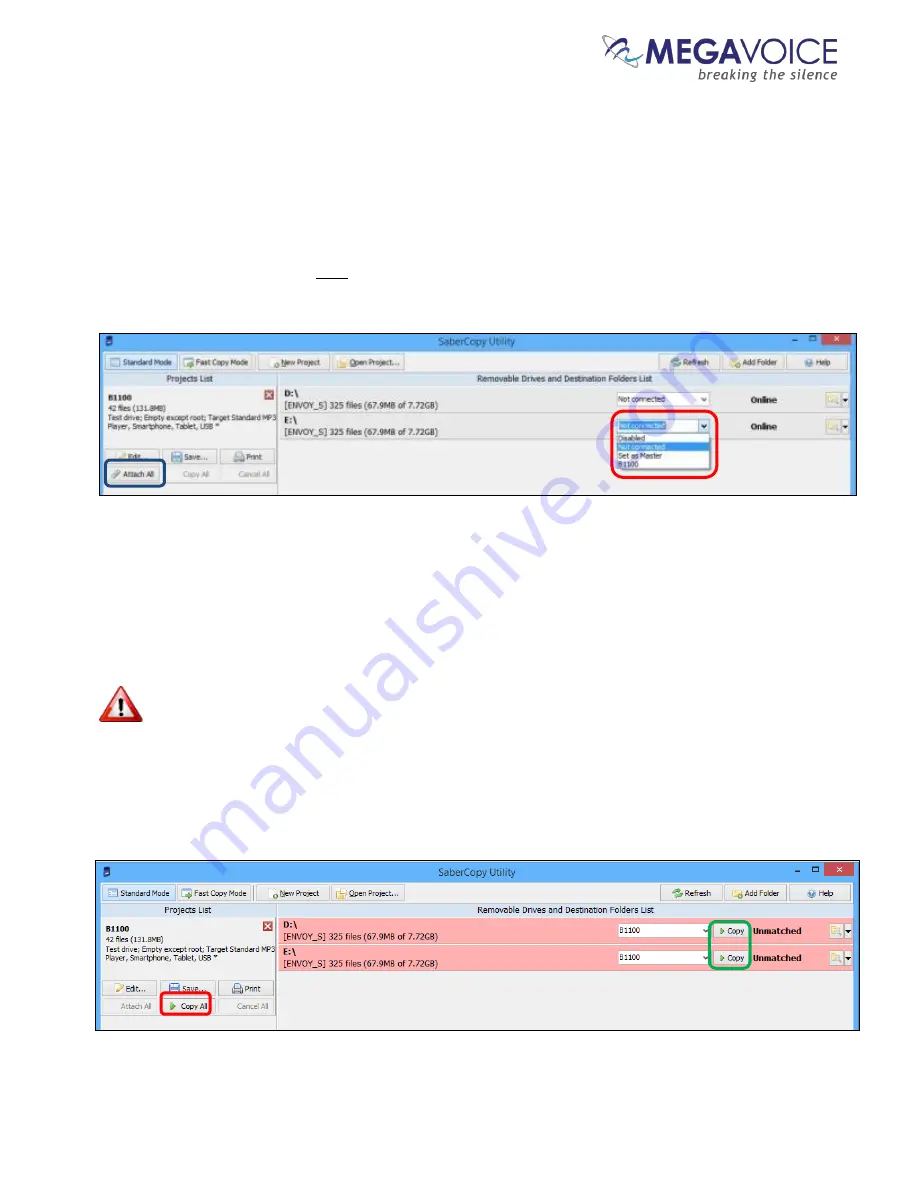
At this point, the main screen should look like the example below.
21.
Now we need to set the “source” of the copy for each player. When all the players connected are
being loaded from the same source, the easiest thing to do is to click on the “Attach All” button in
the project (
circled in blue
). SaberCopy will assign all of them (no matter how many) to the project
for you.
22.
Alternatively, within the line for each player, we could click on the drop-down list and change the
setting for each individually to the project “B1100” (
circled in red
).
23.
Notice that the rows containing the players turned red. This is because SaberCopy will perform a
compare
before and after
loading a player from a project (
unless
you check the option “Don’t verify
when project first attached” in the project definition). These particular players were loaded with audio
different from the B1100 project so they display as “Unmatched”.
24.
To begin the copy process, all we need to do now is click on the “Copy All” button (
circled in red
).
The “Copy All” button in the project will not be enabled until
at least one
of the players in the
list is attached to it as the source for the copy process.
25.
Note that you could also click on the “Copy” button appearing in each player line (
circled in green
), but
using “Copy All” is a bit more convenient when you want to load all of the connected/selected players
and not just some of them.


