2011 Owners Manual...Storage and Winterization...Page 18-3
Step 8:
MasterCraft recommends the battery or batteries be removed from the boat for winter
storage. Batteries should be fully charged before being stored in a cool, dry location, protected
from the elements and fully re-charged before being re-installed in the boat.
Step 9:
If the tower will be lowered during storage, be certain that the tower does not rest on
the boat upholstery or on any support that rests on the upholstery. The tower or support(s)
may leave a permanent imprint on the upholstery. This is not covered under warranty.
Step 10:
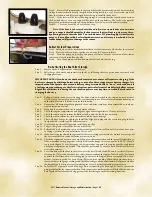
Cover the boat with a boat cover or tarp.
Note: If the boat is to be stored outside and subject to accumulations of snow, water
and ice, a support should be made for the boat cover so that it will not sag, rip or tear, there-
by allowing water to enter the boat. Two-inch diameter PVC plumbing pipe is ideal for this
purpose. It is readily available at local hardware stores, and it is easy to work with. Also, its
rounded shape will prevent damage to the canvas.
Ballast System Preparations
Step 1:
Attach a hose to the starboard side ballast hose that comes out of the deck at the rear seat.
Step 2:
Place the other end into a gallon of non-toxic, RV-type anti-freeze.
Step 3:
Turn the pump on to empty and pump anti-freeze into the system until anti-freeze
comes out of the thru-hull on the side.
Step 4:
Turn the pump on to fill and pump anti-freeze back into the jug.
Re-Activating the Boat After Storage
Step 1:
Remove the duct tape from the exhaust flaps.
Step 2:
Fully charge the battery and install it in the boat, following all safety precautions associated with
changing batteries.
IMPORTANT NOTE: Often, batteries that have been stored over winter will require re-charging. If the
battery is charged by utilizing a battery charger, use only a three-stage or more battery charger. It is
important that the operator never turn a battery charger immediately to “start,” as the sudden jolt
of voltage may cause damage to the electrical system, particularly control modules for ballast system.
Regardless of whether it is during the re-activation process or at any time, care should also be used in
charging the battery.
Step 3:
Follow all instructions for reactivating the drive train as detailed in the engine owner’s manual.
NOTE: Due to the complex nature of the reactivation process, MasterCraft recommends having an
authorized MasterCraft dealer perform this function.
Step 4:
Ensure that all drain plugs throughout the boat and drive train have been reinstalled to avoid un-
wanted intrusion of water.
Step 5:
If applicable, reconnect the hoses to your heater or shower.
Step 6:
Check the engine compartment and bilge for signs of nesting animals. Clean as necessary.
Step 7:
Check the entire engine system for fluid, oil and coolant levels. Add as necessary.
Step 8:
Check the entire engine for cracks or leaks caused by freeze damage.
Step 9:
Check all hose clamps for tightness. Install the bilge drain plug and the rear drain plug in boats
equipped with certain types of ballast systems.
Step 10:
Grease the propeller shaft taper and install the propeller.
Step 11:
Fully re-charge and re-install the battery or batteries.
Step 12:
Perform the daily maintenance as noted previously in this Owner’s Manual. If it was not done prior
to storage, perform the annual maintenance as well.
Step 13:
If the boat is equipped with the optional fresh water cooling system and was drained for storage, fill
the system with fresh coolant solution per instructions.
Step 14:
Check the alignment between the output flange on the transmission and the propeller shaft flange.
If the maximum feeler gauge that can clip between the flange faces at any point is 0.003”, the unit
is properly aligned. If a thicker gauge can be inserted at any point, the engine must be re-adjusted
until proper alignment is obtained. This should be performed by an authorized MasterCraft dealer’s
service department.
Step 15:
For all models, with the boat in the water, cycle the key ON and then OFF two (2) or three (3) times,
allowing ten (10) seconds between key cycles, before cranking the engine. This allows the fuel pump
to prime the fuel lines; then start the engine. In the event the engine does not respond, allow a two-
minute cool-down period for every thirty (30) seconds of cranking. When the engine fires, keep a
close watch over the gauge readings and check for leakage and abnormal noises. Keep speeds low for
the first fifteen (15) minutes to allow the engine to reach normal operating temperatures.
Step 16:
In ProStar 197s equipped with ballast bags, when reconnecting the hook-ups, be sure to squeeze the
prongs to help slide the connector back on. Dish soap or some similar product will help slide the connects
back together. Note that the red ring goes over the raised ring to ensure a working connection.
Содержание prostar 190 2011
Страница 26: ...Guide to Individual Models 2011 Owners Manual Guide to Individual Models Page 4 1...
Страница 81: ......
Страница 93: ......
Страница 105: ......


