7 - Maintenance
ExpressCard 2000| Instant Issuance Card Personalization System | User Installation and Operation Manual
Page 55
14)
Re-synchronize the image printer ribbon (see section
6.8.4 How to Select and Synchronize the
15)
6.11.1 How to Create Sample Cards
16)
Press the
Status
button to return to the
Status
menu.
7.1.7
About Cleaning the Image Print Head
The EC2000’s image print head is a delicate device made partly of glass. Smudges and dirt on the print
head can accumulate with use, and can cause print quality problems, so it is important to clean the print
head regularly, thoroughly, and carefully. Cleaning the print head involves swiping it with a specially
designed cleaning pen, which is similar to a marker but contains cleaning fluid instead of ink.
7.1.8
How to Clean the Image Print Head
Be cautious when following the steps in this section:
Avoid contact between the print head and any metal, sharp, or rough objects.
Avoid touching the print head directly with your fingers, as it could affect print quality
or permanently damage the print head.
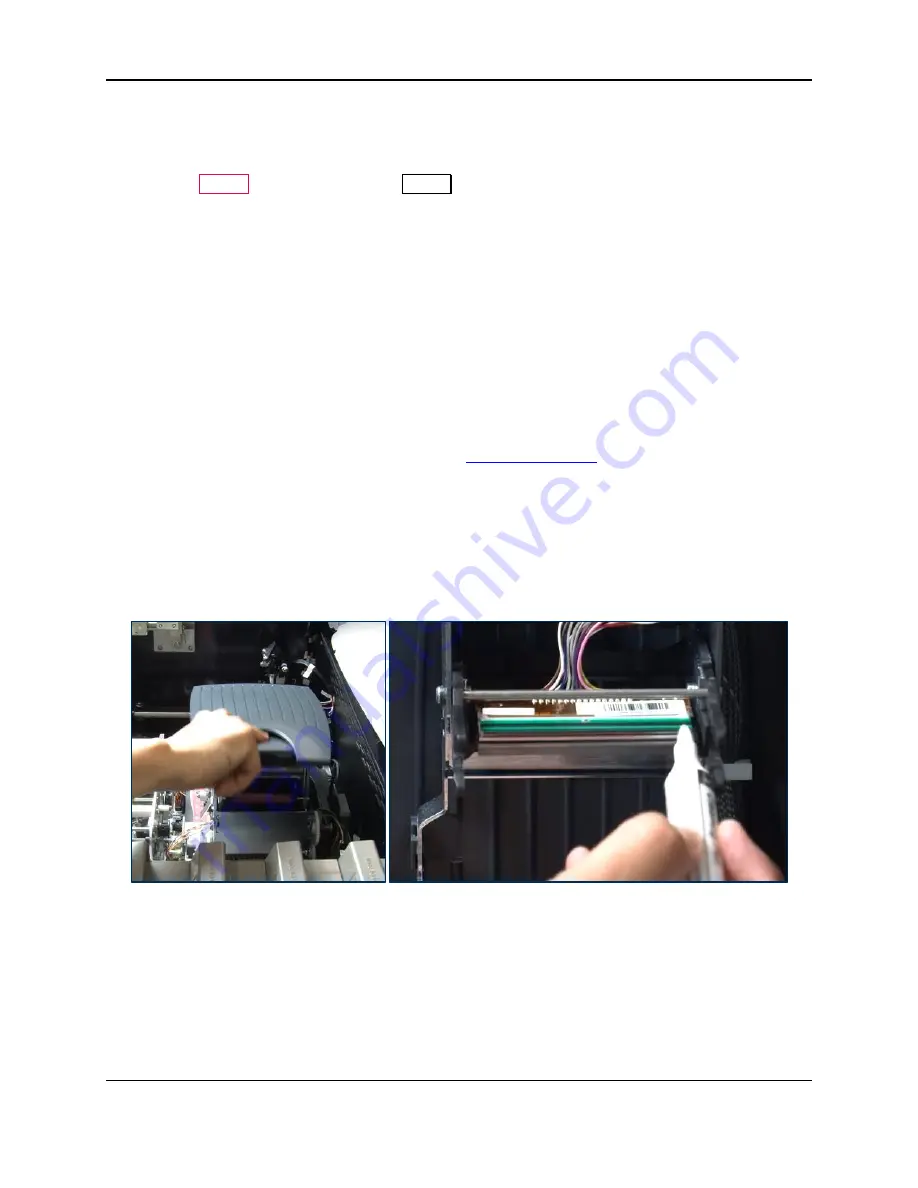
To clean the image print head, follow these steps (see
1)
Obtain a print head cleaning pen from the EC2000 Cleaning Kit.
2)
Remove any jewelry or accessories that could touch the print head during cleaning.
3)
Open the EC2000’s top access door (see section
4)
Shut down the EC2000 completely.
5)
Unplug the EC2000’s power cord from the wall.
6)
Open the image printer (see section
Figure 7-3 - Cleaning the Image Print Head
7)
Locate the print head (see
). The area you want to clean is the front face of the thin brown
glass layer closest to the ceiling.
8)
Take the cap off the cleaning pen.
9)
Gently swipe the cleaning pen back and forth along the print head 10-15 times, until the head feels /
looks clean. The print head is slightly textured, so if you are making proper contact you should feel a
very slight vibration or “squeak” during each swipe.
10)
Wipe the cleaning pen on a piece of clean paper, then put the cap back on the cleaning pen.


