background image

6 - Operation 

ExpressCard 2000| Instant Issuance Card Personalization System | User Installation and Operation Manual 

 
Page 30 

6.4.2


How to Clear Error Messages 

The EC2000 will continue to display most errors on the touchscreen until the user corrects the problem 
that caused the error.  After correcting the problem, clear the error message and return to normal use by 
pressing the 

Status

 button to return to / refresh the 

Status

 page, then attempt the operation again. 

6.5


Top Access Door Security 


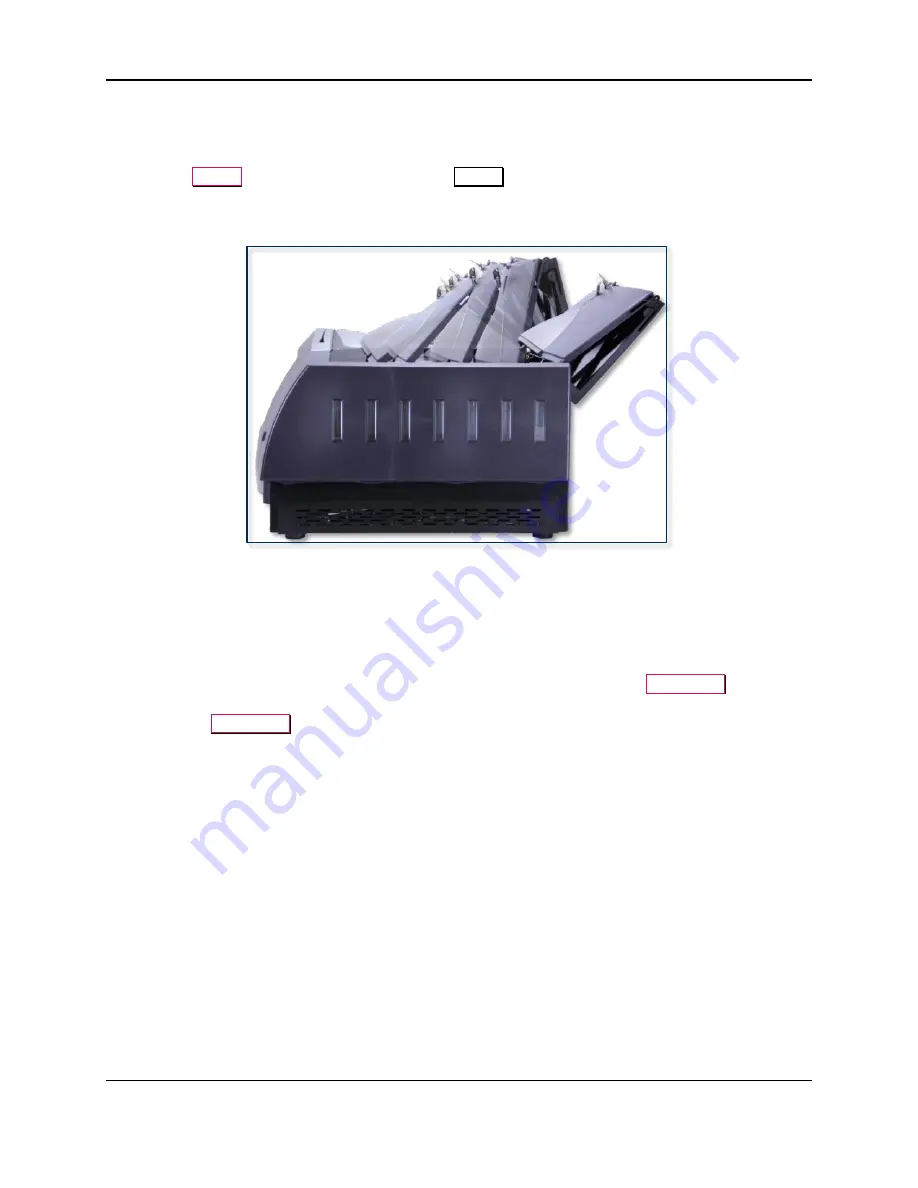
Figure 6-5 - Top Access Door Movement 

6.5.1


About the Top Access Door 

The EC2000 secures all consumables (such as card stock and image printer ribbons) under the top access 
door, which users must unlock before opening.  There are two ways to unlock the top access door: 


A mechanical key lock using a tubular key; 


A touchscreen unlock function which authorized users can activate using the 

Case/Door

 button. 

 
By default, the 

Case/Door

 button is disabled.  In a typical installation, an advanced user with the 

administrator passwords will enable the feature and store the tubular keys in a secure location.  See 
section 

8.7 How to Enable / Disable Touchscreen Unlock

 for details. 

6.5.2


How to Use the Keys to Unlock the Top Access Door 

The EC2000 comes with two identical tubular keys that are unique to the device.  For security reasons, 
keys can not be re-issued; if keys are lost or misplaced or the lock stops functioning, contact your sales 
representative for assistance with replacing both the lock and the keys. 
 
To 

unlock

 the top access door using one of the tubular keys: 

1)


Line up the tab on the outside of the key with the slot on the top access door lock, and insert the key.  
When locked, the slot will point toward the rear of the device. 

Содержание ExpressCard 2000

Страница 1: ...40 I Phone 562 546 6400 I Technical Support 888 624 8350 www magtek com ExpressCard 2000 Instant Issuance Card Personalization System User Installation and Operation Manual November 2014 Manual Part N...

Страница 2: ...gTek Inc MagTek is a registered trademark of MagTek Inc ExpressCard 2000 is a trademark of MagTek Inc MagnePrint is a registered trademark of MagTek Inc Microsoft and Windows are registered trademarks...

Страница 3: ...tion that is not specifically described in this manual or in other ExpressCard 2000 instructional documents published by MagTek DO NOT remove any of the covers or guards that are fastened with screws...

Страница 4: ...o Receive the EC2000 17 4 2 How to Unpack the EC2000 17 4 3 How to Pack the EC2000 21 4 4 How to Ship the EC2000 22 5 Installation 23 5 1 Installation Checklist 23 6 Operation 27 6 1 Finding the Seria...

Страница 5: ...Indent Printer 47 6 10 2 How to Install Remove the Indent Ribbon Cartridge 47 6 11 Processing Cards 48 6 11 1 How to Create Sample Cards 48 6 11 2 About Card Personalization Software 48 6 11 3 About T...

Страница 6: ...2 How to Configure TCP IP Settings 63 8 2 Authorizing the Device 64 8 2 1 About Authorization 64 8 2 2 How to Manually Re Authorize the Device 65 8 3 Client Certificate Option 65 8 4 Passwords 65 8 4...

Страница 7: ...ms 71 9 9 Troubleshooting Picture Alignment Problems 71 9 10 Troubleshooting Magstripe Encoding Problems 71 9 11 Troubleshooting Image Printer Ribbon Breaking 71 9 12 Troubleshooting Tipping 72 9 13 T...

Страница 8: ...ty software solutions creating a complete secure instant issuance system for distributed locations that can be maintained and controlled centrally With the feature rich solution offered by EC2000 fina...

Страница 9: ...output bin 7 Manual feed slot 8 Power button 9 Product serial number 10 Windows product key 11 Product identification tag 12 Power connector 13 Ethernet data port 14 Security anchor 15 XY transport p...

Страница 10: ...ExpressCard 2000 Instant Issuance Card Personalization System User Installation and Operation Manual Page 10 Figure 2 1 EC2000 Components Isometric View Part 1 of 4 Figure 2 2 EC2000 Components Back V...

Страница 11: ...ExpressCard 2000 Instant Issuance Card Personalization System User Installation and Operation Manual Page 11 Figure 2 3 EC2000 Components Top View Part 3 of 4 Figure 2 4 EC2000 Components Accessories...

Страница 12: ...ils If the EC2000 is placed on a non level surface it will not work correctly Make sure the EC2000 s placement during normal operation will provide the physical clearances shown around the sides in Fi...

Страница 13: ...r on the rear of the EC2000 can be attached to a security cable or chain If the device is installed in an enclosure in addition to the other requirements in this section the enclosure must provide suf...

Страница 14: ...t to retrieve card processing transactions MagTek recommends selecting one of two internet connection topologies to support these processes In both topologies the EC2000 uses Secure Sockets Layer SSL...

Страница 15: ...tation from which administrators can perform updates to the EC2000 At the administrator s discretion it may share a workstation with the card personalization software with some additional requirements...

Страница 16: ...y and are beyond the scope of this document but some features will require the EC2000 to be configured a specific way to support them Card stock types The EC2000 can print to a variety of card stock t...

Страница 17: ...e EC2000 will be installed see section 3 Planning for details b Obtain an appropriate wheeled carrier designed to safely move boxes like the EC2000 s c With a partner use the box s handles to lift it...

Страница 18: ...User Installation and Operation Manual Page 18 Figure 4 1 Two Partners Lifting EC2000 Lid Figure 4 2 Using the EC2000 Lid Handles 3 Remove the accessory box contents shown in Figure 2 4 and set it asi...

Страница 19: ...gure 4 3 EC2000 Foam Inserts 5 Open the EC2000 s anti static bag as shown in Figure 4 4 Figure 4 4 Removing Anti Static Bag 6 Rotate the box so the EC2000 s touchscreen faces away from the surface whe...

Страница 20: ...your sales representative for replacement 10 Locate the tubular keys and test them both in the top access door s lock see section 6 5 Top Access Door Security for details Leave the top access door op...

Страница 21: ...re they are intact and will protect the device from impact and weather during transport e Remove the small accessories box shown in Figure 2 4 and set it aside f Remove the top layer of packing styrof...

Страница 22: ...e 2 4 in the accessories box 19 Seal the accessories box with packing tape 20 Lay the bottom layer of styrofoam flat in the EC2000 box with the hollow center facing up 21 Place the anti static bag on...

Страница 23: ...Security for details b Remove the two thumb screws on the left side of the backplane see Figure 5 2 and remove the service access door on the bottom left side of the device c Locate the 3 8 inch diame...

Страница 24: ...Card 2000 Instant Issuance Card Personalization System User Installation and Operation Manual Page 24 Figure 5 2 Thumb Screws to Unlock Left Service Access Door Figure 5 3 Left Service Access Door and...

Страница 25: ...ack or network device b If the EC2000 will be used in demonstration mode use an Ethernet crossover cable to connect the EC2000 directly to the demonstration computer Figure 5 4 Connecting the EC2000 t...

Страница 26: ...the image printer see section 6 8 Image Printer for details 12 If necessary install a tipper foil roll see section 6 9 Foil Tipper for details 13 If necessary install an indent ribbon cartridge see s...

Страница 27: ...or in the upper left corner of the Help page see section 6 3 3 About the Help Page for details 6 2 Powering On Shutting Down and Restarting To power on the EC2000 press the round power button on the f...

Страница 28: ...en on the front of the EC2000 can be operated using either the included stylus or a fingertip If the touchscreen accumulates smudges or fingerprints wipe it using a soft dry cloth If that fails to rem...

Страница 29: ...list to see information about the device including serial number identification number ribbon information encoder and decoder information device options and the number of successful or failed transact...

Страница 30: ...echanical key lock using a tubular key A touchscreen unlock function which authorized users can activate using the Case Door button By default the Case Door button is disabled In a typical installatio...

Страница 31: ...key in the lock As a security measure it can not be removed when the top access door is unlocked 3 Grab the top access door s indented handles just in front of and just behind the lock Figure 6 7 Open...

Страница 32: ...d top access door away from you to prop it open It is important that the top access door be open all the way not leaning on anything behind the device see Figure 6 9 Figure 6 9 Top Access Door In Open...

Страница 33: ...nt of and just behind the lock to support it Be careful to keep your fingers within the indented handles and not in the space between the top access door panels otherwise your finger will be pinched w...

Страница 34: ...oor press the Unlock Top Door button The EC2000 will click and display a countdown timer on the touchscreen during which the top access door will remain unlocked When the countdown timer reaches zero...

Страница 35: ...lockdown mode after a user enters an incorrect set of passwords three times 6 7 Card Stock Figure 6 13 Card Stock Hopper and Blank White Card Stock 6 7 1 About Card Stock Note Although the EC2000 is e...

Страница 36: ...hopper see section 6 7 Card Stock It will automatically feed each card off the bottom of the stack Card customization software can also specify that stock for a specific operation should be fed into...

Страница 37: ...he EC2000 6 Open the hopper as follows see Figure 6 16 Figure 6 16 Opening Card Stock Hopper a Turn the hopper around so its clear loading door is facing you b Slide the gray door release lever locate...

Страница 38: ...and is causing stock cards to stick together riffle the stack like shuffling a deck of cards to separate them 5 Orient the card stock with magstripes toward the floor facing the right wall of the hopp...

Страница 39: ...nto the EC2000 in the release position Be sure the hopper is level and that all four lock pins on the bottom have inserted into the hopper deck 11 Slide the hopper into the locked position the directi...

Страница 40: ...e section 6 8 2 How to Install Remove the Image Printer Ribbon To order ribbons specifically designed for use with the EC2000 contact your sales representative or see Appendix A Do not touch the color...

Страница 41: ...o EC2000 Components for details 4 Press the image printer s release button to unlock it as shown in Figure 6 22 Figure 6 22 Unlocking the Image Print Head 5 Gently lift up the print head until it swin...

Страница 42: ...he spool with all the ribbon on it is called the supply spool and the other end is the take up spool 2 Orient the ribbon so the supply spool is near the card stock hoppers The ribbon stretched between...

Страница 43: ...2 Press the Menu button to open the Main Menu page 3 Press the Settings button to open the Settings Menu page 4 Press the Printer button to open the Printer Utility page 5 If you have not changed the...

Страница 44: ...he Ribbon item in the navigator list g In the main area of the window change the Ribbon setting to match the ribbon you are using h Change the Front side and Back side settings setting to match the ri...

Страница 45: ...what color foil you wish to install and obtain a new tipper foil roll 2 Open the top access door see section 6 5 Top Access Door Security 3 Locate the foil tipper on the inside front of the EC2000 se...

Страница 46: ...n 12 Press the small yellow foil release tab at the end of the yellow spool to secure the new roll 13 Rotate the orange core until you can press it firmly onto the orange spool Continue rotating until...

Страница 47: ...nt Ribbon Cartridge To remove an indent ribbon cartridge from the EC2000 s indent printer follow these steps see this YouTube video for a demonstration 1 Open the top access door see section 6 5 Top A...

Страница 48: ...he simplest way to test the EC2000 is to create sample cards which does not require a network connection or any additional software To create a sample card follow these steps see this YouTube video fo...

Страница 49: ...y direct the EC2000 to hold the transaction in a queue When it receives queued transactions the EC2000 s configuration determines whether it will immediately process them or hold them in the queue unt...

Страница 50: ...troduction to EC2000 Components for help locating the card output bin 6 11 8 About the Card Rejection Bin When errors occur that prevent a card from being processed properly the partially processed ca...

Страница 51: ...Hopper 8 but in most cases it is not exposed in the EC2000 s user interface Instead processes that prompt users to use the manual feed slot must be implemented in the card personalization software Se...

Страница 52: ...the print head s useful life and to ensure excellent print quality Particular care must therefore be taken with cleaning Users must comply with the servicing and maintenance instructions as fully desc...

Страница 53: ...on see section 6 8 Image Printer Figure 7 1 Removing the Card Cleaning Roller 5 Remove the cleaning roller see Figure 7 1 6 Unwrap the wipe and rub it gently over the entire surface of the roller Pay...

Страница 54: ...the Image Printer Ribbon and close the image printer 5 Using the touchscreen navigate to Menu Maintenance to open the Maintenance Menu page 6 Press the Clean Printer button to launch the Printer Utili...

Страница 55: ...rough objects Avoid touching the print head directly with your fingers as it could affect print quality or permanently damage the print head To clean the image print head follow these steps see this Y...

Страница 56: ...Replacing the Image Print Head for details 7 2 Replacing the Card Cleaning Roller 7 2 1 About Replacing the Card Cleaning Roller The EC2000 s card cleaning roller located below the image printer s ri...

Страница 57: ...During the print head s warranty period MagTek will provide free exchanges for defective print heads provided You have used only MagTek consumables ribbons and maintenance products You have followed t...

Страница 58: ...open the Printer Utility page 13 Select the Command text box and use the on screen keyboard to enter the case sensitive command Pkn x where x is the print head kit code number you noted above then pr...

Страница 59: ...is important to print and stamp the characters precisely on top of each other Occasionally after periodic maintenance or firmware updates embossed and printed characters may become misaligned Re alig...

Страница 60: ...ning procedure you will need to notice subtle differences in alignment between embossed characters and the ink on top of them The easiest way to do this is to lay the card flat at eye height so you ar...

Страница 61: ...the lower left corner appears to the right of the printed 0 decrease the Card X Offset setting and press the Save button g If the embossed 0 in the lower left corner appears higher than the printed 0...

Страница 62: ...process for Font ID4 looking only at the first character of the string of front indented characters 15 Calibrate the Font ID1 X SPI and Font ID1 Y SPI steps per inch settings a Press the Print button...

Страница 63: ...Call MagTek Support Services see section 9 Troubleshooting for contact information 3 If the EC2000 is not already displaying the Status page press the Status button 4 Press the Menu button to open the...

Страница 64: ...g Error Machine is Deauthorized Contact MagTek Support Services to obtain default passwords and for instructions to authorize the device see section 8 4 Passwords for more information Every 24 hours a...

Страница 65: ...to point authentication by refusing transactions from any card issuance workstation that does not have a certificate installed To configure the client certificate options follow these steps 1 From th...

Страница 66: ...one press the E button to confirm The EC2000 will report prompt with Enter password X again and press E 8 Use the on screen keypad to enter the new password again This is to make sure the password wil...

Страница 67: ...00 see that software s documentation or contact the company that provided the software For information on implementing card personalization software that can send transactions to the EC2000 contact Ma...

Страница 68: ...ired setup passwords 6 Press the Expand All button to expand all entries in the list of settings in the middle of the page 7 Use the scrollbar to scroll through the list of settings in the middle of t...

Страница 69: ...cards 6 Make sure each loaded hopper s card stock is loose enough that it moves when shaken 7 Make sure the card weights are inserted on top of the card stock in every hopper 8 Check the image printer...

Страница 70: ...tion Checklist for details 2 Make sure the security certificate is valid and up to date See 8 1 Passwords for details 3 If unable to connect to the network try using the EC2000 s IP address instead of...

Страница 71: ...e Printer Ribbon 9 9 Troubleshooting Picture Alignment Problems If the device is producing cards where some elements are misaligned 1 If embossed characters do not line up with printed characters foll...

Страница 72: ...ly or press the embossed characters evenly and may need to be replaced Contact a qualified service technician to diagnose and fix the problem 9 13 Troubleshooting Ribbon Continuously Feeding If the ri...

Страница 73: ...cannot continue because no card is present in the Encoder Possible card feed error from card stock hopper See section 9 6 Troubleshooting Card Feed Problems Move Card to Encoder Card did not transfer...

Страница 74: ...ntroller board could not be initialized Possible cable disconnection from board to PC Get Configuration The internal device configuration file is corrupted Error Ejecting Card No card was detected at...

Страница 75: ...e the top door If still reporting then check the top door sensor Access Door Open The access door is open Close the access door If still reporting then check the access door sensor Door Status Failed...

Страница 76: ...rvice XY module card clamp did not fully open or close Possible cable disconnection or failed sensor Check to ensure that the card has cleared the path and if necessary clear the path If this problem...

Страница 77: ...hen cards are stuck together because of static electricity or because a stock card is bent the EC2000 s image printer may fail to output a card properly When this occurs the EC2000 will report Error E...

Страница 78: ...9 Troubleshooting ExpressCard 2000 Instant Issuance Card Personalization System User Installation and Operation Manual Page 78...

Страница 79: ...ea Silver Ribbon 93400051 Silver monochrome image printer ribbon will produce up to 1000 cards 1 ea Gold Tipper Foil Roll 33070895 Gold tipper foil roll will produce up to 1800 cards 1 ea Silver Tipp...

Страница 80: ...he card cleaning roller Minimum order of 12 1 ea EC2000 User Installation and Operation Manual 99875600 Manual providing instructions for planning installing configuring using and troubleshooting an E...

Страница 81: ...s 163 seconds for 2 sided color images Card output bin capacity 10 cards at 30 mil thickness Card rejection bin capacity 20 cards at 30 mil thickness Duty cycle 50 cards per day 15 000 cards per year...

Страница 82: ...indent Image printed embossing Embosser fonts FontID1 Farrington 7B from ISO IEC 7811 1 typically used for the account number on the front of financial cards FontID2 Gothic is used for the cardholder...

Страница 83: ...e 83 Physical Characteristics Environmental Tolerance Operating temperature 65 F to 80 F 18 C to 27 C Operating relative humidity 20 to 80 without condensation Storage temperature 30 F to 100 F 1 1 C...

Страница 84: ...the patch 1 On a workstation set up to allow connections to the EC2000 obtain access to the cab update file provided in the e mail from MagTek 2 Determine the EC2000 s IP address or DNS name see sect...

Отзывы: