51
ber method. Remember, the method of saving your present position and
the cursor’s position is identical.
Edit Lat/Lon
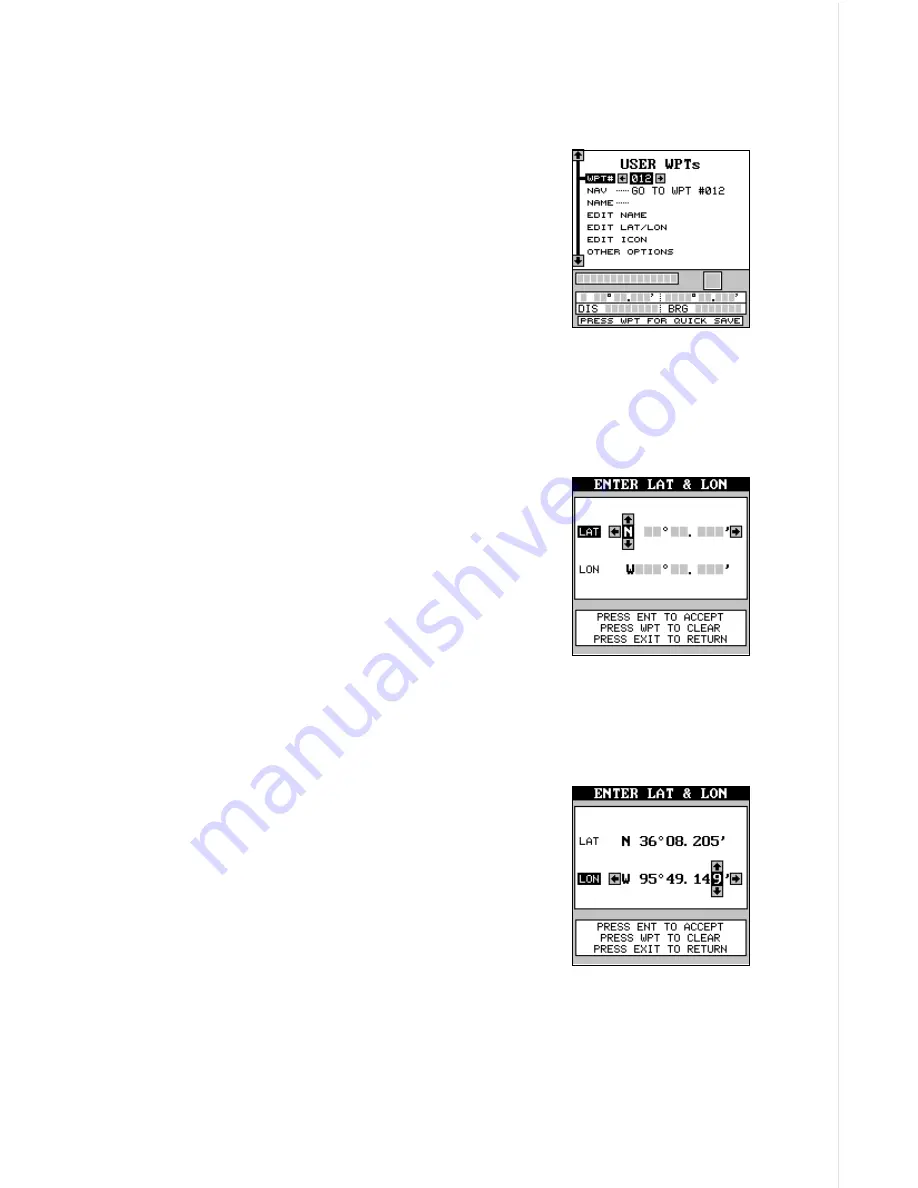
The AirMap 300 lets you enter any latitude/longi-
tude using the keyboard and save it under any
waypoint number, from 1 to 250. You can also
change any waypoint’s position using this method.
To do this, first select the waypoint number. When
you select the USER WPTs menu, the GPS re-
ceiver places you at the last-used waypoint num-
ber. If you want to save the location under a differ-
ent waypoint number, press the up arrow key until the black box is on the
“WPT #” label. Now press the left or right arrow keys until the desired
waypoint number appears. In this example, we moved it to waypoint num-
ber twelve.
When the desired waypoint number is showing,
highlight the “EDIT LAT/LON” label, then press the
right arrow key. The screen shown at right appears.
To enter the latitude, simply move the black box
using the right and left arrow keys, then press the
up or down arrow keys until the desired number
appears. If you make a mistake, simply move the
black box back to the number you need to change,
and change it. If you want to change the entire lati-
tude number, press the WPT key to erase it and start over. To exit com-
pletely out of this screen without saving the position, press the EXIT key.
When the latitude is the way you want it, press the
right arrow key to move the black box to the longi-
tude. Now enter the longitude.
When you’re ready to save this position and return
to the waypoint screen, press the ENT key. The
location you entered shows at the bottom of the
screen under the waypoint number you selected.
WAYPOINT NAMES
The AirMap 300 lets you assign a name to each waypoint. The name can
have up to twelve characters. To name a waypoint, first select the way-
point number that you wish to name. (Note: A waypoint must have a posi-
tion stored before you can name it.) Now highlight the “EDIT NAME” label
Содержание AirMap 300
Страница 1: ...INSTALLATION AND OPERATION INSTRUCTIONS AirMap 300 TM...
Страница 85: ...81 WINDOW BOXES These boxes are used on Map 3 and Nav 1 only 1 2 3 4 5 6 7 8 9 10 11 12...
Страница 86: ...82 13 14 15 16...
Страница 87: ...83 WINDOW GROUPS This is a listing of window groups A through O A B C D E F G H I J K L...
Страница 88: ...84 M N O...
Страница 94: ...90...


