15
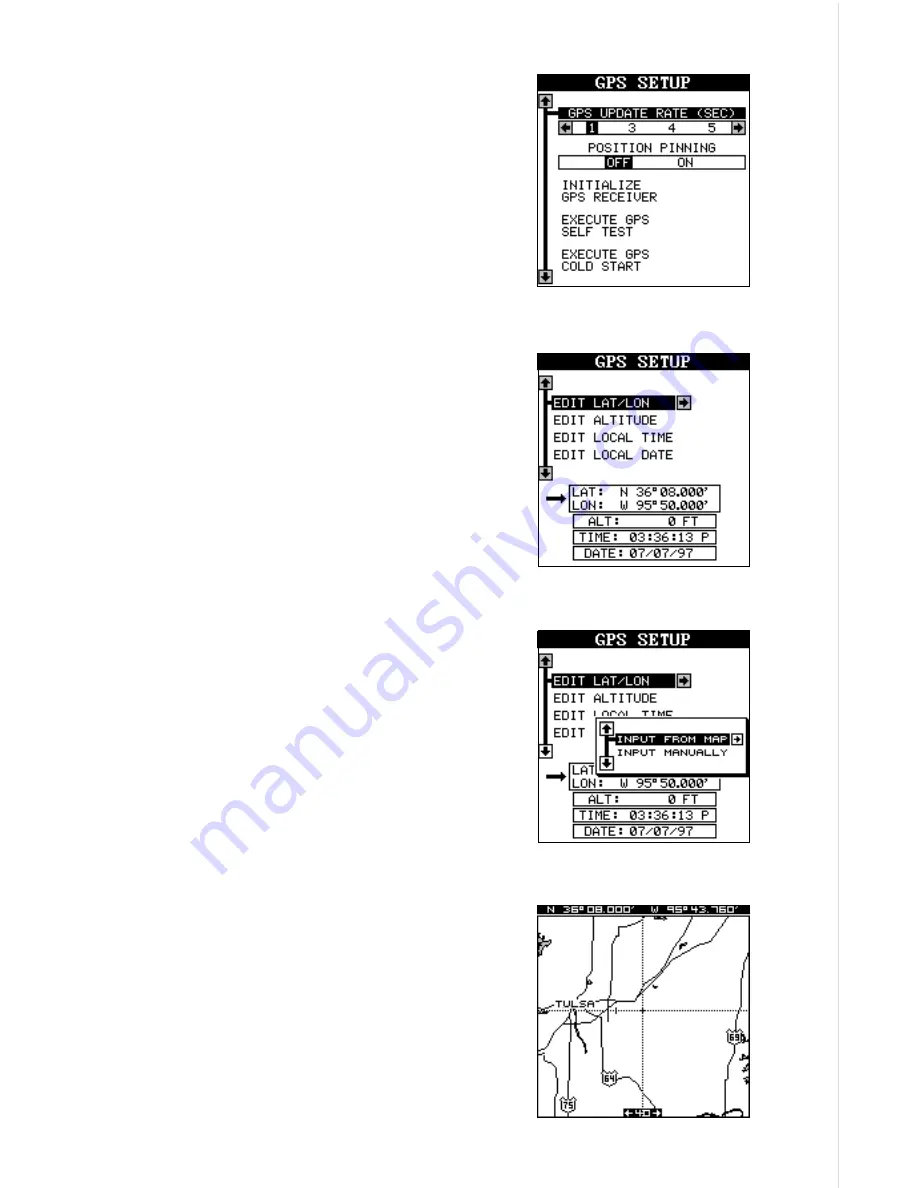
Using the down arrow key, highlight the “Ini-
tialize GPS Receiver” menu, then press the
right arrow key. The screen shown below ap-
pears next.
This is the GPS initialization screen. The posi-
tion, altitude, time, and date the GPS receiver
is currently using to find the satellites is shown
at the bottom of this screen. Changing these
values to your local position and time will speed
the position lock.
To change the position, highlight the “EDIT LAT/
LON label, then press the right arrow key. A
screen similar to the one at right appears. With
the “INPUT FROM MAP” label highlighted,
press the right arrow key. The screen below
appears.
The mapping screen appears with two lines
that intersect at the center. These lines are the
cursor. Using the arrow keys, move the cursor
to your present position. You can use the Z-IN
and Z-OUT keys to zoom in or out to find your
area on the map. Once you have the cursor
close to your location, simply press the ENT
key. The unit returns to the GPS SETUP menu
with your local latitude and longitude showing
in the box at the bottom of the screen.
Содержание AirMap 300
Страница 1: ...INSTALLATION AND OPERATION INSTRUCTIONS AirMap 300 TM...
Страница 85: ...81 WINDOW BOXES These boxes are used on Map 3 and Nav 1 only 1 2 3 4 5 6 7 8 9 10 11 12...
Страница 86: ...82 13 14 15 16...
Страница 87: ...83 WINDOW GROUPS This is a listing of window groups A through O A B C D E F G H I J K L...
Страница 88: ...84 M N O...
Страница 94: ...90...


