55
Vista Pro 6 Client Software
VIEWING VIDEO ON VISTA PRO 6 CLIENT
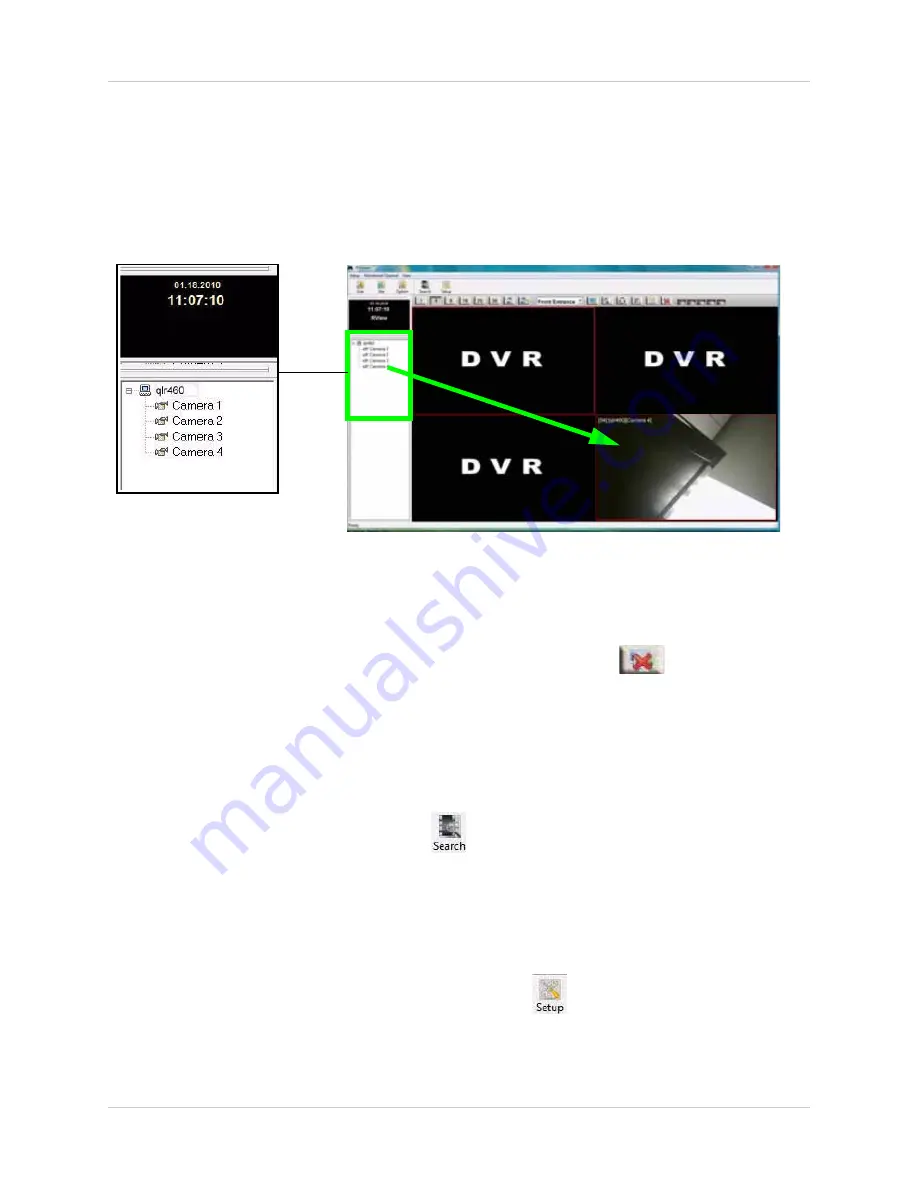
Once you have connected to your system, Vista Pro 6 Client displays a blank screen with the text
"DVR" on the Live View window. A list of connected systems and cameras appear on the left of the
window.
To connect your cameras to Vista Pro 6 Client:
• Drag a camera from the camera list to one of the channels in the Live View window.
• To disconnect from all the cameras, click the
All Disconnect
button(
) near the top of the
window.
• To hide the Camera List, click
View
near the top of the window, and then click
Hide Tree
.
SEARCHING FOR VIDEO USING VISTA PRO 6 CLIENT
To search for video, click the
Search
button (
) near the top-left corner of the window. The
search menu is identical to the local viewing software. For details on operating the Search menu,
see “Vista Pro 6 Server: Searching For Video” on page 39.
CONFIGURING YOUR SYSTEM USING VISTA PRO 6 CLIENT
To configure your system remotely, click the
Setup
button(
) near the top-right corner of the
window.The setup menu is identical to the setup tabs in the local viewing software. For details on
using the setup menu, see “Vista Pro 6 Server: Viewing Mode” on page 10.
Drag a camera into one of the
empty channels marked DVR.
You can drag the cameras to any channel you wish.
Figure 10.4 Enabling cameras on Vista Pro 6 Client. Drag the desired camera into a channel to
begin viewing.


