46
Using the Main Menu
your router as a static IP as well. Consult
your router’s user’s manual for details.
3
Click
Apply
to save your settings.
4
Right-click until you exit all menus. You
will be prompted to restart.
Enabling Auto Port Forwarding
Auto Port Forwarding allows the DVR to
open required ports on your router. This
feature only works on certain router
models. If the Auto Port Forwarding
feature does not work on your router, it
is recommended to use the Auto Port
Forwarding Wizard (PC only), located on
the software CD. You may have to
manually open the port on your router.
To Enable Auto Port Forwarding:
1
Select the
Network
tab.
2
In the
Auto Port Forwarding
drop-down
menu, select
Enable
or
Disable
.
3
Click
Apply
to save your settings.
Changing the DVR’s Client and
HTTP Port
The DVR’s Default Client port is
9000
.
The default HTTP port is
80
. You must
port forward the Client Port and HTTP
port on your router to your DVR’s IP
address to enable remote access.
To change the Client port and HTTP
port:
1
Select the
Network
tab.
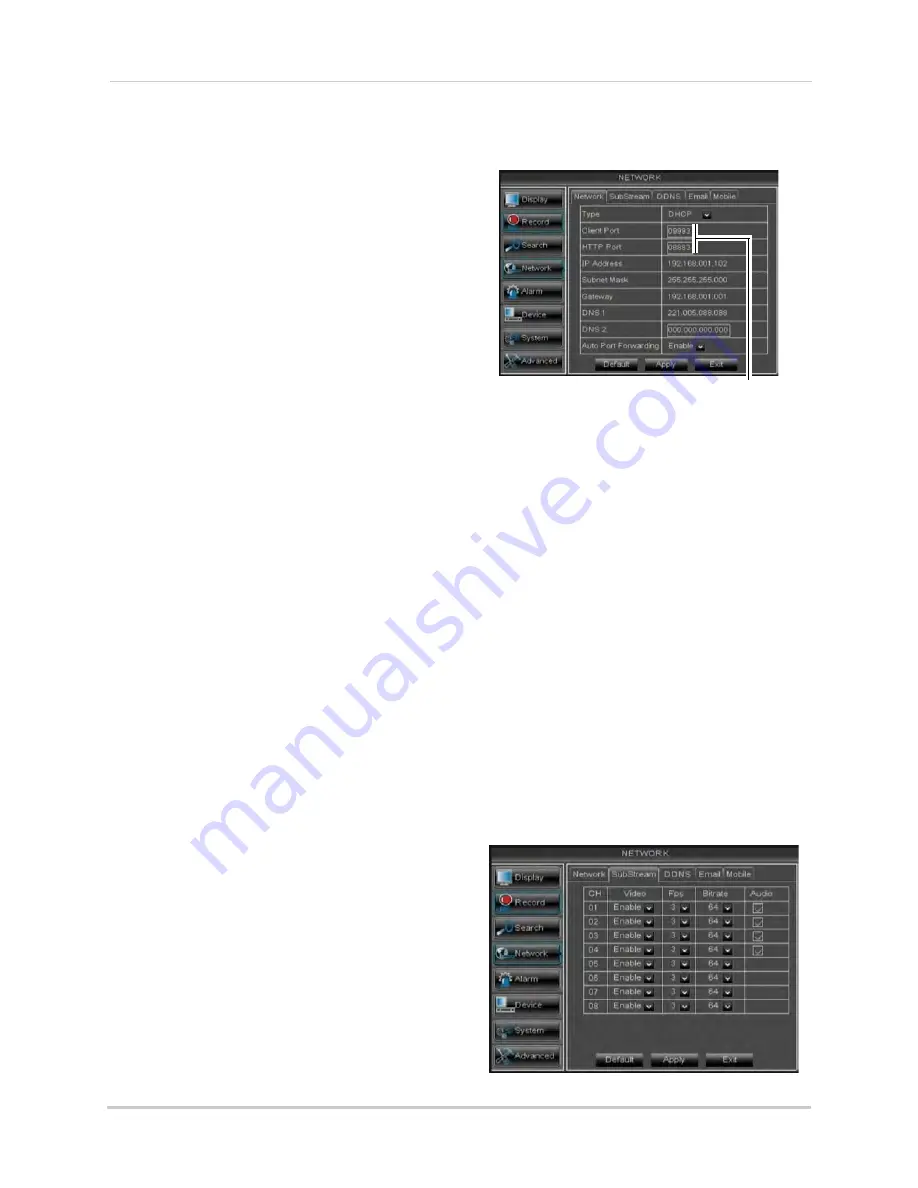
2
In
Client Port
, enter the desired Client
Port (default:
9000
).
Client Port & HTTP Port fields
NOTE:
9000 is represented as "09000."
3
In
HTTP Port
, enter the desired HTTP Port
(default:
80
).
4
Click
Apply
to save your settings.
5
Right-click to exit all menus. You will be
prompted to restart.
Adjusting Remote Connectivity
Streaming Rates
You can adjust the data streaming rate
(also called the SubStream) when you
connect to the system remotely. If you
want to conserve bandwidth, select a
lower frame rate and bitrate.
NOTE:
Setting your system to stream with a
lower frame and bitrate may cause
the video to appear choppy or slow.
To adjust the SubStream settings:
1
Click the
SubStream
tab.
Содержание LH140
Страница 16: ...xiv...