USB BOOT CLIENT
Logicube ZXi-
10G™ User’s Manual
97
7.
Turn the ZXi-10G on. After the ZXi-10G boots up, you should see additional drives appear on
the Source position depending on the Imaging mode chosen.
The Logicube device will show the last two segments of
the IP address. For example, I:2.65. The connected drive
will show as
SDA
. If there are any additional connected
drives, they will show as
SDB
,
SDC
, etc. For example, if
there is one drive connected, it will show as I:2.65/SDA.
From here you can clone using the ZXi-10G using the normal cloning steps. When using the USB Boot
Client, cloning speeds may vary depending on network performance.
9.5 Using the USB Boot Client Over Different Subnets
The USB Boot Client and the ZXi-10G can work over different subnets if both subnets can see each
other on the network. Additional steps need to be taken when accessing a different subnet.
1.
Follow the steps in
Section 9.4
to boot with the USB Boot Client.
2.
Turn the ZXi-10G on.
3.
Navigate to
Manage Repositories
and tap or click the
iSCSI
tab.
4.
Tap or click
Network Settings
.
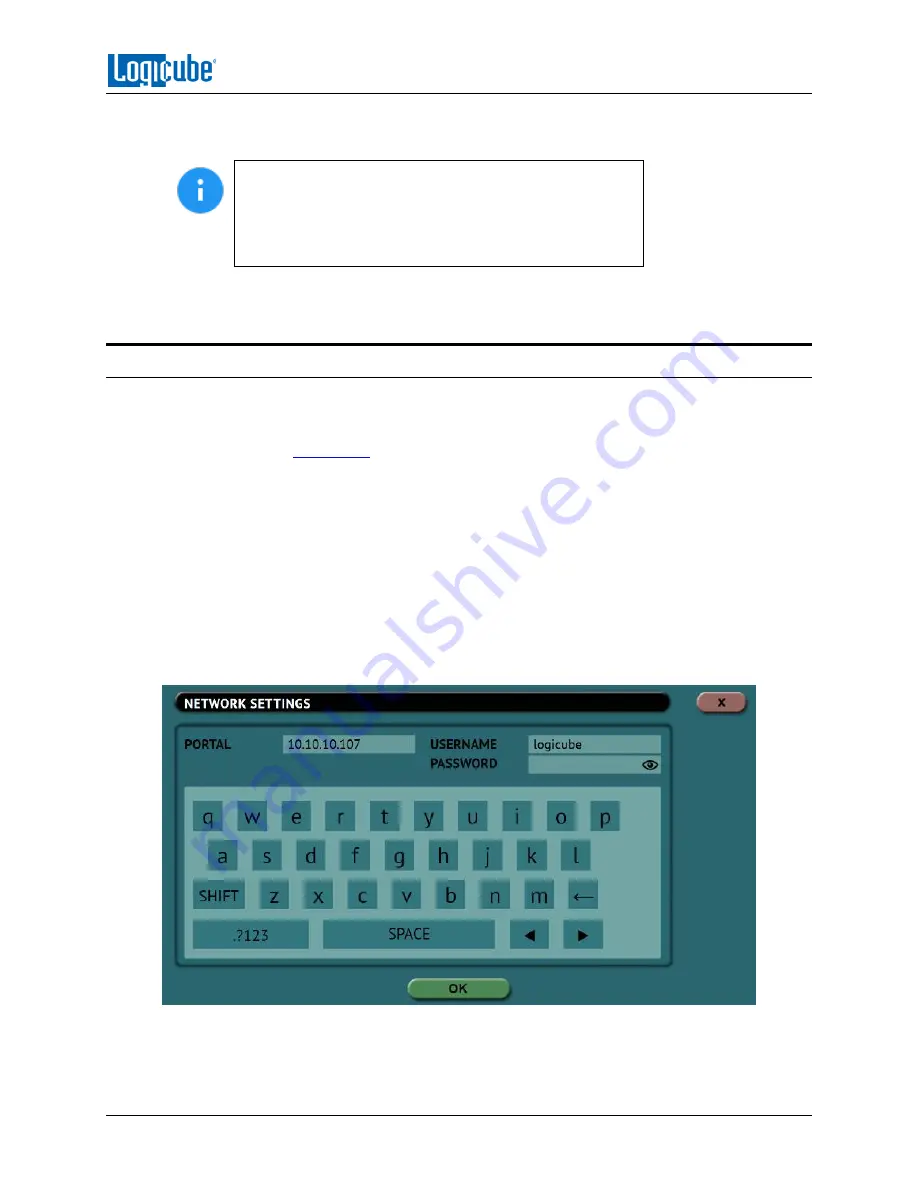
In the
Network Settings
screen, enter the following information:
a.
PORTAL
–
The IP address of the iSCSI remote device (on the different subnet).
Depending on your network setup, port 3260 may need to be added to the portal (for
example 10.10.10.107:3260)
b.
USERNAME: logicube (all lower case).
c.
PASSWORD: leave this blank.
5.
When finished, tap or click
OK
.


