15
ADJUSTABLE BED FRAME - OWNER’S MANUAL //
STEP 4: CONNECTING THE CABLES
1. Insert the 4 Motor Cables
from the Side Rails
(A, B)
into
the Plug Ports on the Control
Box
(I)
. Ensure that the color
of the Plug matches the color
of the Plug Port.
2. Insert the Power Converter
Cable
(J)
into the Control
%R[/D\WKH&DEOHÀDWDORQJ
WKHÀRRUWRUHGXFHWKHULVNRI
tripping.
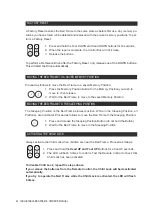
CAUTION
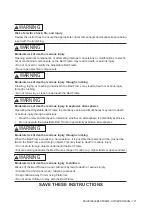
Risk of minor or moderate injury through crushing
While screwing in the Crossbar Knobs, you will need to lift the moving parts of the Side Rails.
Allowing these parts to fall may lead to minor or moderate injury through crushing.
• Ensure moving parts do not fall down during assembly
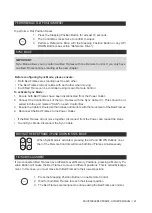
CAUTION
Risk of minor or moderate injury through crushing
*ULSSLQJWKH6LGH5DLOVPRYLQJSDUWVPD\OHDGWRPLQRURUPRGHUDWHLQMXU\WKURXJKFUXVKLQJ
• 'RQRWWRXFKPRYLQJSDUWVZKHQOLIWLQJRUPRYLQJWKH6LGH5DLOV2QO\JULSWKH¿[HGSDUWV
A
B
J
I
4. Connect the Crossbars
(D)
to the Side Rail (Left)
(B)
as shown in steps 1-3.
D
D
B
A
R
16 //ADJUSTABLE BED FRAME - OWNER’S MANUAL
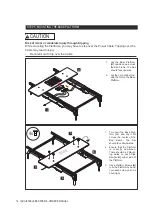
1. Turn over the Base Plat-
form
(H)
DQG OD\ LW ÀDW
across the center of the
Bed Frame. The Net
should face downwards.
2. Ensure that the Platform
is correctly positioned.
There should be 2 Mount-
ing Holes on each Side
Rail
(A, B)
either side of
the Platform.
3. Use 4 Platform Screws
(N)
WR¿[WKH3ODWIRUPE\KDQG
Turn each screw until it is
hand-tight.
H
A
B
N
STEP 5: MOUNTING THE BASE PLATFORM
1. Lay the Base Platform
(H)
upside down across
the Bed Frame. The Net
should face upwards.
2. Lay the Control Box
(I)
in-
side the Net on the Base
Platform.
H
I
BASE
4x
CAUTION
Risk of minor or moderate injury through tripping
While mounting the Platforms, you may have to step over the Power Cable. Tripping over the
Cable may lead to injury.
• Be careful not to trip over the Cable
17
ADJUSTABLE BED FRAME - OWNER’S MANUAL //
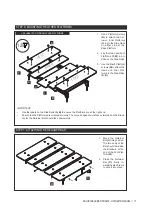
STEP 7: ATTACHING THE RETAINER BAR
1. Move the Retainer
Bar
(O)
into position.
The two ends of the
Bar should be inside
the Brackets at the
end of the Foot Plat-
form
(M).
2. Press the Retainer
Bar
(O)
¿UPO\ WR-
wards the Bed Frame
to click it into place.
1. Use 4 Platform Screws
(N)
to attach the nar-
rower, Inner Platforms
(G, L)
to the Side Rails
on either side of the
Base Platform.
2. Lay the Head and Foot
Platforms
(F, M)
in po-
sition on the Side Rails.
3. 8VHWKH¿QDO3ODWIRUP
screws
(N)
to attach the
Head and Foot Plat-
forms to the Side Rails.
(A, B).
STEP 6: MOUNTING THE OTHER PLATFORMS
M
O
IMPORTANT:
•
Use the labels on the Side Rails
(A, B)
to ensure the Platforms are at the right end.
•
Ensure the the Platforms are oriented correctly. The curved edges should face outwards and the Brack-
ets for the Retainer Bar should face downwards.
INNER
FOOT
HEAD
G
L
N
M
F
H
12x
USE LABELS ON SIDE RAILS AND PLATFORMS


