


Doc. Ref.No: Q875-0143/ENG
Issue 2
Met 30+ Operating Manual
12/01/10
->[ ]>-
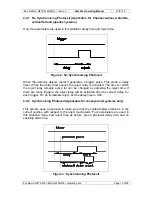
While these symbols are on the display a ferrite rod must be passed through the
detector’s aperture. The bottom line shows a bargraph, which can be used to see
how good the size of signal from ferrite is being detected. A minimum of ten circles is
required for correct vibration setup.
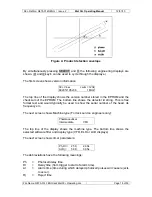
When the following display is shown the vibration angle will have been re-calibrated
to zero.
->[ 0.0°]>-
<SELECT>
To confirm vibration angle pass the ferrite rod through the aperture and the phase
angle displayed in brackets should read around zero. The displayed phase angles of
all the products set up in the machine will have values relative to the new zero
vibration angle and will NOT need adjustment. To exit press SELECT
5.5.4 Set System Clock (T):
The display shows the current date (DD/MM/YY) and time (HH:MM:SS):
Enter date and time :
25/01/07 14:24:18
Initially the date will be high-lighted. Use the / keys to change the date. Press
SELECT to move onto the month and adjust this as necessary. Pressing SELECT
again will allow the year to be changed, then the hours and then the minutes.
5.5.5 Communications Setup (C) :
On selecting this, a sub-menu is displayed:
Port A
Port B
Det Id
Exit
The first option allows communication parameters to be changed for Port A, which is
the RS232 port. Firstly, the baud rate needs to be selected. Press / until the
correct baud rate is displayed and then press SELECT. Each setting is selected in
the same way and includes the following allowed values, with the factory default
setting shown in bold:
Baud Rate
300, 600, 1200, 2400, 4800,
9600
, 19200, 38400
Parity
‘
N
’one, ‘E’ven, ‘O’dd
Data Bits
6, 7,
8
Handshake
‘H’ (Enabled), ‘
-
‘ (Disabled)
File Name: Q875-0143 ENG Iss2 Met30+ Operating.doc
Page 28 of 58