34
Document #: LIN_EO_SM_IMPAPERION2424_4607818 – 07/21
Operation and Programming
Section 6
Figure 25
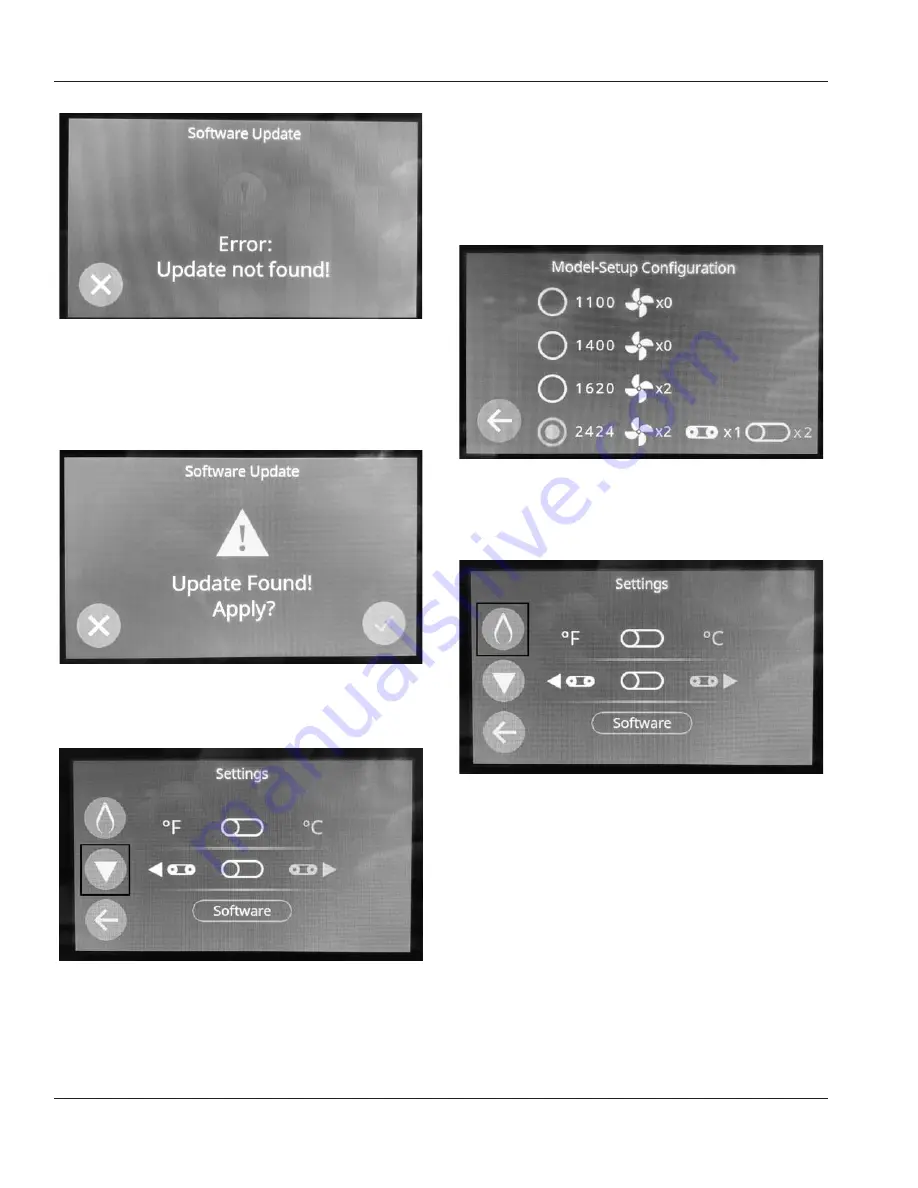
Once a USB drive with the correct files is plugged in and
the “Software” button is pressed, the following screen will
appear as shown below. To proceed with the update, press
the “√” button. To cancel the update, press the “X” button.
(Figure 26)
Figure 26
6. Model Selection – From the settings main menu, Press
the “
¡
” twice as highlighted in (Figure 27) below.
Figure 27
The model setup screen is used to select which Lincoln oven
the UI should be configured for. This should be set to “2424”
as shown below in (Figure 28). Beside the model selected is
the split belt toggle. This should be set to “x2” if the oven
is in a split belt configuration.
This should be configured
immediately on the first startup and after any UI updates
.
Figure 28
7. Temperature Calibration – From the settings main menu
click the temperature calibration button, highlighted
below in (Figure 29).
Figure 29
In the temperature calibration screen the upper and lower
fan speed are set to 100% and the set point temperature to
500°F. Once the oven has reached the set point temperature,
wait 5-10 minutes to allow the temperature to stabilize as
shown in (Figure 30).
Measure the temperature inside the cavity with a probe
and a thermometer. Place the probe 10” in from either side,
centered from front to back. Use the “
¡
” and “
¡
” buttons
to match the temperature displayed on the screen to the
temperature shown on the thermometer.
Содержание Impinger Aperion 2424E
Страница 44: ...44 Document LIN_EO_SM_IMPAPERION2424_4607818 07 21 Notes ...
Страница 45: ...Document LIN_EO_SM_IMPAPERION2424_4607818 07 21 45 Notes ...
Страница 46: ...46 Document LIN_EO_SM_IMPAPERION2424_4607818 07 21 Notes ...
Страница 47: ...Document LIN_EO_SM_IMPAPERION2424_4607818 07 21 47 Section 8 Diagrams THIS PAGE INTENTIONALLY LEFT BLANK ...


