2. Product Overview
MMX4x2 series – User's Manual
19
Applied firmware package: v1.6.0b19 | LDC software: v2.5.13b5
2.6.
Front Panel Buttons
2.6.1.
OUT 1 and OUT 2 Video Select Buttons
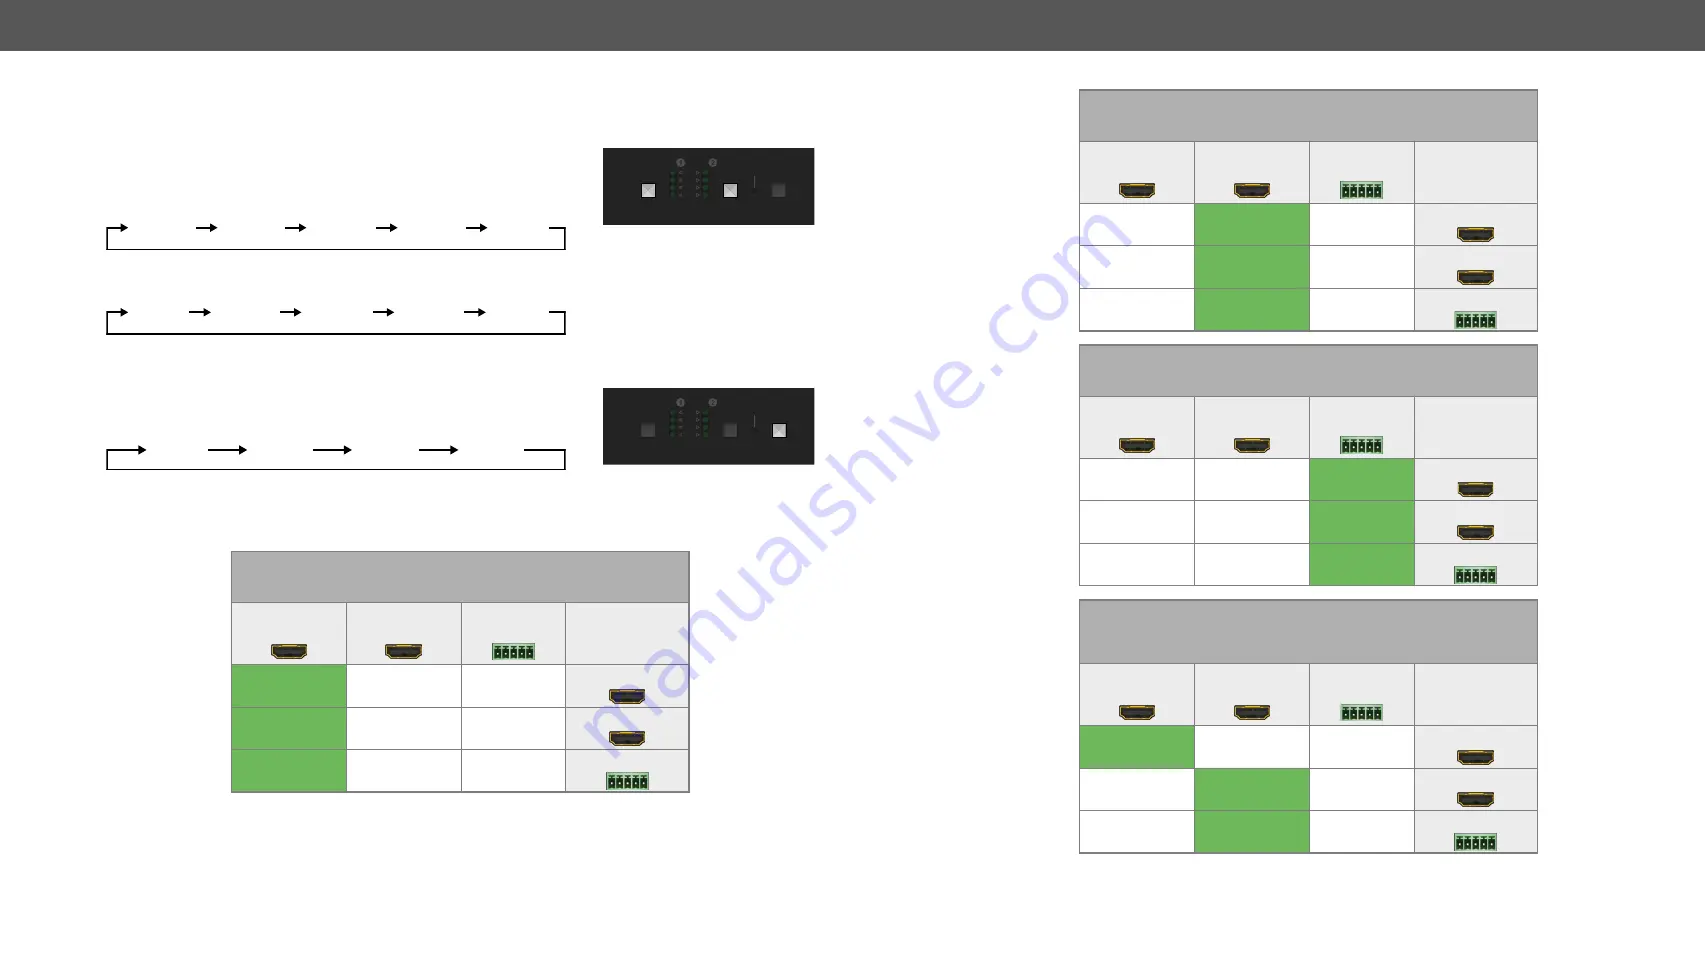
You can select the input source for the desired output port by pushing the
buttons. The sequence is the following for each device.
MMX4x2-HDMI:
#autoselect
MMX4x2-HT200:
2.6.2. Set Audio Config Button
You can select the pre-programmed audio configuration mode by pushing
the button. The sequence is the following:
When the
Set audio config
button is pressed, the given audio config is loaded and the corresponding
<IN#>
LEDs blink in amber six times. E.g. if
Config #3
is loaded, the
<IN3>
LEDs blink six times.
Config #1
Copy HDMI OUT 1 audio to HDMI OUT 2 and Analog Audio Out.
A1 (HDMI OUT 1,
Stream 1)
A2 (HDMI OUT 2,
Stream 2)
A3 (Analog In)
O1 (HDMI OUT 1)
O2 (HDMI OUT 2)
O3 (ANALOG OUT)
AUDIO OUT
LIVE
OUT 1 AUTO
I
N 2
I
N 1
I
N 3
I
N 4
OUT
OUT
OUT 2 AUTO
OUT1
VIDEO SELECT
OUT2
RESET
VIDEO SELECT
SET AUDIO
CONFIG
HDMI IN
1
HDMI IN
2
HDMI IN
3
HDMI IN
4
Autoselect
TPS IN
1
HDMI IN
2
HDMI IN
3
HDMI IN
4
Autoselect
AUDIO OUT
LIVE
OUT 1 AUTO
I
N 2
I
N 1
I
N 3
I
N 4
OUT
OUT
OUT 2 AUTO
OUT1
VIDEO SELECT
OUT2
RESET
VIDEO SELECT
SET AUDIO
CONFIG
Config #1
Config #2
Config #3
Config #4
Config #2
Copy HDMI OUT 2 audio to HDMI OUT 1 and Analog Audio Out.
A1 (HDMI OUT 1,
Stream 1)
A2 (HDMI OUT 2,
Stream 2)
A3 (Analog In)
O1 (HDMI OUT 1)
O2 (HDMI OUT 2)
O3 (ANALOG OUT)
Config #3
Use audio from Analog Input on all outputs.
A1 (HDMI OUT 1,
Stream 1)
A2 (HDMI OUT 2,
Stream 2)
A3 (Analog In)
O1 (HDMI OUT 1)
O2 (HDMI OUT 2)
O3 (ANALOG OUT)
Config #4
Keep Original Audio on HDMI outputs, de-embed from HDMI OUT 2
to Analog Audio Out.
A1 (HDMI OUT 1,
Stream 1)
A2 (HDMI OUT 2,
Stream 2)
A3 (Analog In)
O1 (HDMI OUT 1)
O2 (HDMI OUT 2)
O3 (ANALOG OUT)


