background image

1.


Introduction

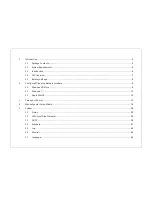
................................................................................................................................................................5


1.1.


Package Contents

.............................................................................................................................................5


1.2.


System Requirements

.......................................................................................................................................5


1.3.


Introduction

.....................................................................................................................................................6


1.4.


LED Overview

...................................................................................................................................................7


1.5.


Before you Begin

..............................................................................................................................................8


2.


Configure PC/Laptop Network Interface

.....................................................................................................................9


2.1.


Windows XP/Vista

............................................................................................................................................9


2.2.


Windows 7

.....................................................................................................................................................12


2.3.


Apple MacOS

.................................................................................................................................................14


3.


Setup your Router

.....................................................................................................................................................15


4.


Manually enter Setup Wizard

....................................................................................................................................18


5.


System

......................................................................................................................................................................30


5.1.


Status

.............................................................................................................................................................30


5.2.


LAN (Local Area Network)

..............................................................................................................................34


5.3.


DHCP

.............................................................................................................................................................38


5.4.


Schedule

........................................................................................................................................................41


5.5.


Log

.................................................................................................................................................................43


5.6.


Monitor

..........................................................................................................................................................44


5.7.


Language

.......................................................................................................................................................45


Содержание WBR-3020

Страница 1: ......

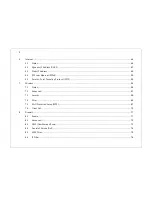
Страница 2: ...1 5 Before you Begin 8 2 Configure PC Laptop Network Interface 9 2 1 Windows XP Vista 9 2 2 Windows 7 12 2 3 Apple MacOS 14 3 Setup your Router 15 4 Manually enter Setup Wizard 18 5 System 30 5 1 Status 30 5 2 LAN Local Area Network 34 5 3 DHCP 38 5 4 Schedule 41 5 5 Log 43 5 6 Monitor 44 5 7 Language 45 ...

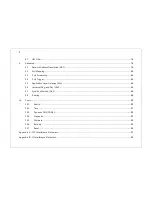
Страница 3: ...E 50 6 5 Point to Point Tunneling Protocol PPTP 52 7 Wireless 54 7 1 Status 54 7 2 Advanced 57 7 3 Security 59 7 4 Filter 65 7 5 Wi Fi Protected Setup WPS 67 7 6 Client List 70 8 Firewall 71 8 1 Enable 71 8 2 Advanced 72 8 3 DMZ Demilitarized Zone 73 8 4 Denial of Service DoS 74 8 5 MAC Filter 75 8 6 IP Filter 76 ...

Страница 4: ...r 83 9 5 Application Layer Gateway ALG 84 9 6 Universal Plug and Play UPnP 85 9 7 Quality of Service QoS 86 9 8 Routing 89 10 Tools 90 10 1 Admin 90 10 2 Time 91 10 3 Dynamic DNS DDNS 92 10 4 Diagnosis 93 10 5 Firmware 94 10 6 Back up 95 10 7 Reset 96 Appendix A FCC Interference Statement 97 Appendix B IC Interference Statement 99 ...

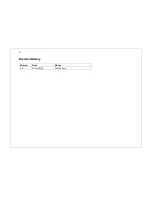
Страница 5: ...4 Revision History Version Date Notes 1 0 2011 04 25 First Release ...

Страница 6: ...these items are incorrect missing or damaged contact your reseller or distributor Keep the original package contents in case you need to return the product for repair or replacement 1 2 System Requirements RJ 45 Ethernet Based Internet ADSL or Cable Modem Computer with Wireless Network function Windows Mac OS or Linux based operating systems Internet Explorer Firefox or Safari Web Browser Software...

Страница 7: ... MIMO Multiple In Multiple Out antenna technology provides enhanced wireless coverage so you can enjoy wireless connectivity anywhere in your home With WPA WPA2 encryption and SPI firewall the WBR 3020 Router helps keep your network protected The Router also supports Wi Fi Protected Setup WPS for simple and secure wireless connection Combining multiple connections with high speed and flexibility s...

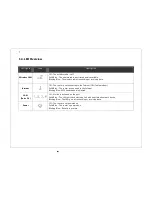
Страница 8: ... is not connected to the Internet DSL Cable modem Solid Blue The router is connected to the Internet Blinking Blue WPS handshake is initialized LAN Ports 1 4 Off No link is detected on the port Solid Blue The LAN port has detected a link with an attached network device Blinking Blue The LAN port is transmitting or receiving data Power Off The router is not powered on Solid Blue The router is power...

Страница 9: ...l devices which are potential sources of interference such as microwaves cordless phones etc Avoid placing the Router on or near metal objects such as a solid metal door file cabinets metal furniture and reflective surfaces such as glass or mirrors Avoid placing the Router in enclosed spaces such as a closet cabinet or wardrobe Minimize obstructions between the Router and the wireless devices Any ...

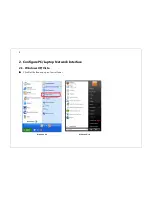
Страница 10: ...9 2 Configure PC Laptop Network Interface 2 1 Windows XP Vista Click Start button and open Control Panel Windows XP Windows Vista ...

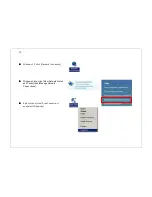
Страница 11: ...10 Windows XP click Network Connection Right click on Local Area Connection and select Properties Windows Vista click View Network Status and Tasks then Manage Network Connections ...

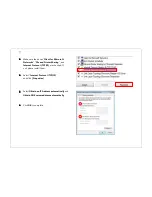
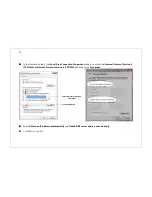
Страница 12: ... File and Printer Sharing and Internet Protocol TCP IP are checked If not please install them Select Obtain an IP Address automatically and Obtain DNS server address automatically Click OK to complete Select Internet Protocol TCP IP and click Properties ...

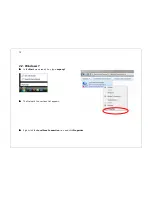
Страница 13: ...12 2 2 Windows 7 In the Start menu search box type ncpa cpl The Network Connections List appears Right click the Local Area Connection icon and click Properties ...

Страница 14: ...click either Internet Protocol Version 4 TCP IPv4 or Internet Protocol Version 6 TCP IPv6 and then click Properties Select Obtain an IP Address automatically and Obtain DNS server address automatically Click OK to complete Properties Button Internet Protocol Version 4 TCP IPv4 ...

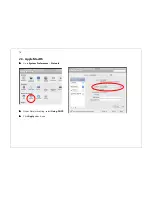
Страница 15: ...14 2 3 Apple MacOS Go to System Preferences Network Under Network setting select Using DHCP Click Apply when done ...

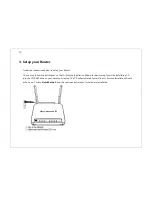
Страница 16: ...structions on the LG Ericsson Installation Wizard for basic setup Insert the Installation CD into the CD ROM drive on your desktop or laptop The CD will automatically start The LG Ericsson Installation Wizard will pop up Click on Quick Setup follow the onscreen instructions for hardware installation ...

Страница 17: ...16 ...

Страница 18: ...17 ...

Страница 19: ...s http 192 168 2 1 Note If you have changed the default LAN IP Address of the WIRELESS ROUTER make sure that you enter the correct IP Address 2 The default username and password are admin and admin Once you have entered the correct username and password click the LOGIN button to open the Web based main menu ...

Страница 20: ...19 3 You will see the following webpage if login successful ...

Страница 21: ...20 4 Click Wizard on the left menu to open the Setup Wizard Click Next to begin the Wizard ...

Страница 22: ...21 5 Select the Operation Mode Make sure you have the proper cables connected as described in the Hardware Installation section ...

Страница 23: ...for the correct WAN Internet settings b The most appropriate WAN type will be determined and selected automatically If the detected type is incorrect select Others to set up the WAN settings manually Note DHCP is for Cable connections PPPoE is for DSL connections ...

Страница 24: ...e PPP over Ethernet PPPoE if you have a DSL connection Static IP Address Select this option if your Internet Service Provider ISP has assigned you a permanent fixed static IP address Enter the IP address assigned by your ISP subnet mask default gateway IP address and the IP address of your ISP s primary DNS server If a secondary DNS server address is available also enter the address here ...

Страница 25: ...y accept traffic from the MAC address of that computer If your ISP has registered the MAC address of your computer s Ethernet LAN card connect only the computer with the authorized MAC address and click the Clone MAC Address button This function allows your router to clone the authorized MAC address of the registered computer The correct MAC address will be used to initiate the connection to the I...

Страница 26: ...u have a DSL connection Enter the username and password provided by your ISP PPP over Ethernet Username Username assigned to you by the ISP Password Password for this username Service You can assign a name for this service Optional MTU The maximum size of packets Do not change unless mentioned by the ISP ...

Страница 27: ...26 Point to Point Tunneling Protocol PPTP PPTP is used by a few ISPs It is used primarily in Austrian DSL services ...

Страница 28: ...if specified by ISP MAC The MAC Address that is used to connect to the ISP PPTP Settings Login Username assigned to you by the ISP Password Password for this username Service IP Address The IP Address of the PPTP server Connection ID This is optional Only required if specified by ISP MTU The maximum size of packets Do not change unless mentioned by the ISP ...

Страница 29: ... of security to be used WPA2 PSK as the Encryption method and AES as the Authentication type Note 802 11n wireless speeds may not be achievable if the security is setup as the Lowest and Low levels SSID Enter the name of your wireless network Key Enter the security key for your wireless network ...

Страница 30: ...29 e Make sure the settings are correct Click Reboot to apply the settings ...

Страница 31: ...ation mode of the Router Uptime The duration of time that the Router has been operating Current Date Time The system time of the Router If this is incorrect you can set the correct time in the Tools Time page Hardware version and Serial Number Hardware information of the Router Application version Firmware version of the Router ...

Страница 32: ... is your WAN connection type IP address The WAN IP Address of the Router Subnet Mask The WAN Subnet Mask of the Router MAC address The WAN MAC address of the Router Primary and Secondary DNS The IP addresses of the Primary and Secondary DNS servers assigned to the WAN connection ...

Страница 33: ...32 LAN Settings IP address The LAN IP Address of the Router Subnet Mask The LAN Subnet Mask of the Router DHCP Server Whether the DHCP server is Enabled or Disabled ...

Страница 34: ...ly in use ESSID The SSID Network Name of the wireless network The WBR 3020 supports up to 4 SSIDs Security The type of wireless encryption enabled BSSID The MAC address of this SSID Associated Clients The number of wireless clients connected to this SSID ...

Страница 35: ...34 5 2 LAN Local Area Network This page allows you to modify the LAN settings of the Router ...

Страница 36: ...dress The LAN IP Address of the Router IP Subnet Mask The LAN Subnet Mask of the Router 802 1d Spanning Tree When Enabled the Spanning Tree Protocol STP will prevent network loops in your LAN network Default Disabled ...

Страница 37: ...AN devices Default Enabled Lease Time The amount of time that a computer may have an IP address before it is required to renew the lease Default Forever Start End IP The range of IP addresses that the DHCP server will allocate to LAN devices Domain name The domain name for this LAN network ...

Страница 38: ... manually DNS Relay When DNS Relay is enabled the Router plays the role of a DNS server DNS requests sent to the Router are forwarded to the ISP s DNS server This provides a constant DNS address that LAN computers can use even when the Router obtains a different DNS server address from the ISP upon re establishing the WAN connection Do not select this option if you implement a LAN side DNS server ...

Страница 39: ...38 5 3 DHCP This page shows the status of the DHCP server and also allows you to control how the IP addresses are allocated ...

Страница 40: ...esses from the Router s DHCP Server DHCP Client Table IP address The LAN IP address of the client computer MAC address The LAN MAC address of the client computer Expiration Time The time that the allocated IP address will expire Refresh Click this button to update the DHCP Client Table ...

Страница 41: ...P address that will be allocated to a LAN client by associating the IP address with its MAC address Enter the IP address you would like to manually assign to a specific MAC address and click Add to add the condition to the Static DHCP Table ...

Страница 42: ...41 5 4 Schedule This page allows you to schedule times that the Firewall and Power Saving features will be activated deactivated Click Add to create a Schedule entry ...

Страница 43: ...Assign a name to the schedule Service Type of service Days Define the Days to activate or deactivate the scheduled service Time of day Define the Time of day to activate or deactivate the scheduled service Note Use 24 hour clock format ...

Страница 44: ...43 5 5 Log This page displays the system log of the Router When powered down or rebooted the log will be cleared Log Save Save the log to a file Clear Clears the log Refresh Updates the log ...

Страница 45: ...44 5 6 Monitor This page displays histograms of the WAN and Wireless LAN traffic The information is automatically updated every five seconds ...

Страница 46: ...45 5 7 Language This page allows you to change the Language of the User Interface ...

Страница 47: ... 6 Internet The Internet section on the left menu allows you to manually configure the WAN connection type and related settings 6 1 Status This page shows the current status of the Router s WAN connection ...

Страница 48: ...card in your computer when your account is first opened They will only accept traffic from the MAC address of that computer If your ISP has registered the MAC address of your computer s Ethernet LAN card connect only the computer with the authorized MAC address and click the Clone MAC Address button This function allows your router to clone the authorized MAC address of the registered computer The...

Страница 49: ...P MAC address The MAC Address that is used to connect to the ISP DNS Servers Two DNS servers can be assigned for use by your LAN devices There are two modes available From ISP The DNS server s IP address is assigned by your ISP User Defined Set the DNS server s IP address manually ...

Страница 50: ...IP address of your ISP s primary DNS server If a secondary DNS server address is available also enter it here Static IP Address IP address Enter the IP address assigned by your ISP IP Subnet Mask Enter the subnet mask of the IP address Default Gateway Enter the IP address of the default gateway Primary DNS Enter the IP address of the Primary DNS server Secondary DNS Enter the IP address of the Sec...

Страница 51: ...50 6 4 PPP over Ethernet PPPoE This protocol is used by most DSL services worldwide Select this option if you have a DSL connection Enter the username and password provided by your ISP ...

Страница 52: ...oose the method that the router maintains connection with the ISP Keep Connection The device will maintain a constant connection with the ISP Automatic Connection The device will only initiate connection to the ISP when there is an Internet connection request made from a LAN device Manual Connection The user will need to manually connect to the ISP by clicking the Connect button Idle Timeout If th...

Страница 53: ...52 6 5 Point to Point Tunneling Protocol PPTP PPTP is used by very few ISPs It is used primarily in Austrian DSL services ...

Страница 54: ...MTU The maximum size of packets Do not change unless mentioned by the ISP Type You can choose the method that the router maintains connection with the ISP Keep Connection The device will maintain a constant connection with the ISP Automatic Connection The device will only initiate connection to the ISP when there is an Internet connection request made from a LAN device Manual Connection The user w...

Страница 55: ...54 7 Wireless The Wireless section allows you to configure the wireless settings 7 1 Status The Status page displays the current wireless settings of the Router ...

Страница 56: ...ould like to enable You can create up to 4 separate wireless networks by enabling 4 SSIDs SSID Enter the name of your wireless network You can use up to 32 characters Example Life Is Good Guest Network etc Auto Channel When Enabled the Router will scan the wireless signals around your area and select the channel with the least interference When Disabled you will need to configure the Channel setti...

Страница 57: ...enter the MAC addresses of the Access Points that you want included in the WDS links There can be a maximum of four access points Important A WDS link is bidirectional so this AP must know the MAC Address of the other AP and the other AP must also have a WDS link back to this AP Make sure the APs are configured with the same Channel and Security settings Compatibility between different brands and ...

Страница 58: ...57 7 2 Advanced This page allows you to configure advanced wireless settings It is recommended that default settings are used unless you have experience with these advanced functions ...

Страница 59: ...ge informs all wireless clients that the access point will be sending Multicast data N Data Rate You can limit the transfer rates between the device and wireless clients Each Modulation Coding Scheme MCS refers to a specific transfer speed Channel Bandwidth Set whether each channel uses 20 or 40Mhz To achieve maximum 802 11n speeds 40Mhz channels must be used Preamble Type A preamble is a message ...

Страница 60: ... the Encryption drop down list We recommend choosing WPA PSK as the Encryption type and WPA2 AES as the WPA type for your home network Enter a passphrase security key for your wireless network and click Apply Security SSID Selection Select the SSID to apply the security settings Broadcast SSID If Disabled the Router will not broadcast the SSID The SSID will be invisible to wireless clients ...

Страница 61: ...A PSK and offers even greater security using the AES Advanced Encryption Standard method of encryption WPA RADIUS This version of WPA requires a Radius Server on your LAN to provide the client authentication according to the 802 1x standard Data transmissions are encrypted using the WPA standard If this option is selected This Access Point must have a client login on the Radius Server Each user mu...

Страница 62: ...61 802 1x Authentication RADIUS Server IP Address The IP Address of the RADIUS Server RADIUS Server port The port number of the RADIUS Server RADIUS Server password The RADIUS Server s password ...

Страница 63: ...a is encrypted using the default key before being transmitted You must enter at least the default key For 64 bit Encryption the key size is 10 characters in HEX 0 9 and A F 128 bit data is encrypted using the default key before being transmitted You must enter at least the default key For 128 bit Encryption the key size is 26 characters in HEX 0 9 and A F Default Key Select the key you wish to be ...

Страница 64: ...PA type Select the preferred WPA encryption type The recommended WPA type is WPA2 AES Make sure your wireless clients use the same settings Pre shared Key Type Select whether you would like to enter the Key in Passphrase or HEX format Default Passphrase you can use any character from 0 9 and A Z with a length from 8 to 63 characters Pre shared Key This is the key or password to the wireless networ...

Страница 65: ...n type Make sure your wireless clients use the same settings RADIUS Server IP address Enter the IP address of the RADIUS Server RADIUS Server Port Enter the port number used for connecting to the RADIUS server RADIUS Server password Enter the password required to connect to the RADIUS server ...

Страница 66: ...lows you to create filters to control which wireless clients can connect to the Router When Wireless Access Control is enabled only wireless clients with the MAC addresses entered into the Filtering Table are allowed to connect ...

Страница 67: ...for this entry MAC address Enter the MAC address of the wireless client allowed Add Click this button to add the entry Reset Click this button to reset the MAC address and Description fields MAC Address Filtering Table Only clients listed in this table will be allowed to connect to the wireless network Delete Selected Delete the selected entries Delete All Delete all entries Reset Un check all sel...

Страница 68: ...standard The goal is to simplify the set up of security enabled wireless networks in the home and small office environments The WPS function simplifies the steps required to connect to a secured wireless network Two WPS methods are supported WPA via Push Button PBC and WPS via PIN PIN ...

Страница 69: ...lients SSID The SSID name of the wireless network used when connecting using WPS Authentication Mode The encryption method used by the WPS process Passphrase Key This is the passphrase key that is randomly generated during the WPS process It is required if wireless clients that do not support WPS attempt to connect to the wireless network WPS Via Push Button Click this button to initialize the WPS...

Страница 70: ...ck the Wireless tab on the left menu and then click the WPS tab on the top menu c Next to WPS Via Push Button click Start to Process to establish the connection 2 Pin Code Method PIN The page displays the default PIN code of your wireless router Use this PIN code to initiate the WPS process from the wireless client configuration utility Note that this process may be different for each brand model ...

Страница 71: ...70 7 6 Client List This page shows the wireless clients that are connected to the Router ...

Страница 72: ...on allows you to configure Firewall and Access Control settings 8 1 Enable This page allows you to Enable Disable the Firewall features When Enabled Denial of Service DoS and SPI Stateful Packet Inspection features are also be enabled ...

Страница 73: ...72 8 2 Advanced You can choose whether to allow VPN Virtual Private Network packets to pass through the Firewall ...

Страница 74: ...work This feature is normally not used as it presents significant security risks to the device that you designate for the DMZ The DMZ device is not protected by the built in firewalls Internet filters or router web filters and is open to attacks from hackers The DMZ PC will receive all unknown connections and data If the DMZ feature is enabled enter the IP address of the PC to be used as the DMZ P...

Страница 75: ...S Denial of Service DoS is a type of Internet attack that sends a high amount of data to you with the intent to overload your Internet connection Enable the DoS firewall feature to automatically detect and block these DoS attacks ...

Страница 76: ...o enable the MAC filtering feature Deny all clients with MAC addresses listed below to access the network When selected the computers listed in the MAC Filtering table will be Denied to access the Internet Allow all clients with MAC addresses listed below to access the network When selected only the computers listed in the MAC Filtering table will be Allowed to access the Internet ...

Страница 77: ...devices with those IP Addresses listed on the IP Filtering Table from accessing certain ports This can be used to control which Internet applications the computers can access Note You will need to have knowledge of what Internet port numbers each application uses ...

Страница 78: ...he network When selected the computers with IP addresses specified on the table will be Denied access to the indicated Internet port range Allow all clients with IP addresses listed below to access the network When selected the computers with IP addresses specified on the table will be Allowed access only to the indicated Internet port range ...

Страница 79: ...URL Filter You can deny access to certain websites by blocking keywords in the URL web address For example test123 has been added to the URL Blocking Table Any web address that includes test123 will be blocked ...

Страница 80: ... of the Router 9 1 Network Address Translation NAT This page allows you to Enable Disable the Network Address Translation NAT feature The NAT feature is required to share one Internet account with multiple LAN users It also is required for certain Firewall features to work properly ...

Страница 81: ... a computer on your LAN network This helps you host servers behind the NAT and Firewall In the example below there is a FTP Server that requires ports 21 to 22 When there is a connection from the Internet on those ports it will be redirected to the FTP Server at IP address 192 168 2 150 ...

Страница 82: ...ture Description Enter a name or description for this entry Local IP The local IP address of the computer the server is hosted on Protocol Select to apply the feature to TCP UDP or Both types of packet transmissions Port range The range of ports that this feature will be applied to ...

Страница 83: ...Internet on port 100 it will be forwarded to the computer with the IP address 192 168 2 100 and changed to port 80 Port Forwarding Enable Port Forwarding Check this box to enable the Port Forwarding feature Description Enter a name or description for this entry Local IP The local IP address of the computer the server is hosted on Protocol Select to apply the feature to TCP UDP or Both types of pac...

Страница 84: ...t Trigger feature Popular applications This is a list of some common applications with preset settings Select the application and click Add to automatically enter the settings Trigger port This is the outgoing outbound port numbers for this application Trigger type Select whether the application uses TCP UDP or Both types of protocols for outbound transmissions Public Port These are the inbound in...

Страница 85: ... Application Layer Gateway ALG Certain applications may require the use of the ALG feature to function correctly If you use any of the applications listed on the table below select the feature and click Apply ...

Страница 86: ...rted applications to seamlessly bypass the Firewall Universal Plug and Play UPnP Enable the UPnP Feature Check this box to enable the UPnP feature to allow supported devices to be visible on the network Allow users to make port forwarding changes through UPnP Check this box to allow applications to automatically set their port forwarding rules to bypass the firewall without any user set up ...

Страница 87: ... for this feature to function properly the user should first set the Uplink and Downlink bandwidth provided by your Internet Service Provider Total Bandwidth Settings Uplink Set the Uplink bandwidth provided by your Internet Service Provider Downlink Set the Downlink bandwidth provided by your Internet Service Provider Priority Queue Sets the QoS method to Priority Queue Bandwidth Allocation Sets ...

Страница 88: ...d first Unlimited Priority Queue Local IP Address The computer with this IP Address will not be bound by the QoS rules High Low Priority Queue Protocol The type of network protocol High Low Priority Sets the protocol to High or Low priority Specific Port Each protocol uses a specific port range Please specify the ports used by this protocol ...

Страница 89: ...load or Both directions Local IP range Enter the IP address range of the computers that you would like the QoS rules to apply to Protocol Select from this list of protocols to automatically set the related port numbers Port range Each protocol uses a specific port range Specify the ports used by this protocol Policy Choose whether this rule is to set a limit on the Maximum amount of bandwidth allo...

Страница 90: ...tatic Routing Enable Static Routing Check this box to enable the Static Router feature Destination LAN IP Enter the IP address of the destination LAN Subnet Mask Enter the Subnet Mask of the destination LAN IP address Default Gateway Enter the IP address of the Default Gateway for this destination IP and Subnet Hops Specify the maximum number of Hops in the static routing rule Interface Select whe...

Страница 91: ... the current password New Password Enter your new password Repeat New Password Enter your new password again for verification Remote Management Host Address You can only perform remote management from the specified IP address Leave blank to allow any host to perform remote management Port Enter the port number you want to accept remote management connections Enable Tick to Enable the remote manage...

Страница 92: ... method you want to set the time Time Zone Select the time zone for your current location NTP Time Server Enter the address of the Network Time Protocol NTP Server to automatically synchronize with a server on the Internet Daylight Savings Check whether daylight savings applies to your area ...

Страница 93: ... providers 2 After registration follow the Service provider s procedure to obtain your desired Domain name 3 Enter your DDNS data on the device s DDNS screen and enable the DDNS feature 4 The Wireless Router will automatically ensure that your current IP Address is recorded at the DDNS service provider s Domain Name Server 5 From the Internet users will be able to connect to your Virtual Servers o...

Страница 94: ...page allows you to determine if the Router has an active Internet connection Diagnosis Address to Ping Enter the IP address you would like to see if a successful connection can be made Ping Result The results of the Ping test ...

Страница 95: ...ate to the location of the firmware file 2 Select the firmware file Its name will appear in the Upgrade File field 3 Click the Apply button to start the firmware upgrade Note The Wireless Router is unavailable during the upgrade process and must restart when the upgrade is completed Any connections to or through the Wireless Router will be lost during the upgrade ...

Страница 96: ...res the Router to its factory default settings Backup Settings Saves the Router s current configuration settings to a file Restore Settings Restores a previously saved configuration file Click Browse to select the file Then click Upload to load the settings ...

Страница 97: ...96 10 7 Reset This page allows you to reset restart the Router The current configuration settings will not be lost ...

Страница 98: ...in a particular installation If this equipment does cause harmful interference to radio or television reception which can be determined by turning the equipment off and on the user is encouraged to try to correct the interference by one of the following measures Reorient or relocate the receiving antenna Increase the separation between the equipment and receiver Connect the equipment into an outle...

Страница 99: ...ent This equipment complies with FCC radiation exposure limits set forth for an uncontrolled environment This equipment should be installed and operated with minimum distance 20cm between the radiator your body We declare that the product is limited in CH1 CH11 by specified firmware controlled in the USA This transmitter must not be co located or operating in conjunction with any other antenna or ...

Страница 100: ...ence that may cause undesired operation IMPORTANT NOTE Radiation Exposure Statement This equipment complies with IC radiation exposure limits set forth for an uncontrolled environment This equipment should be installed and operated with minimum distance 20cm between the radiator your body This device has been designed to operate with an antenna having a maximum gain of 2 dBi Antenna having a highe...

Страница 101: ......
Отзывы: