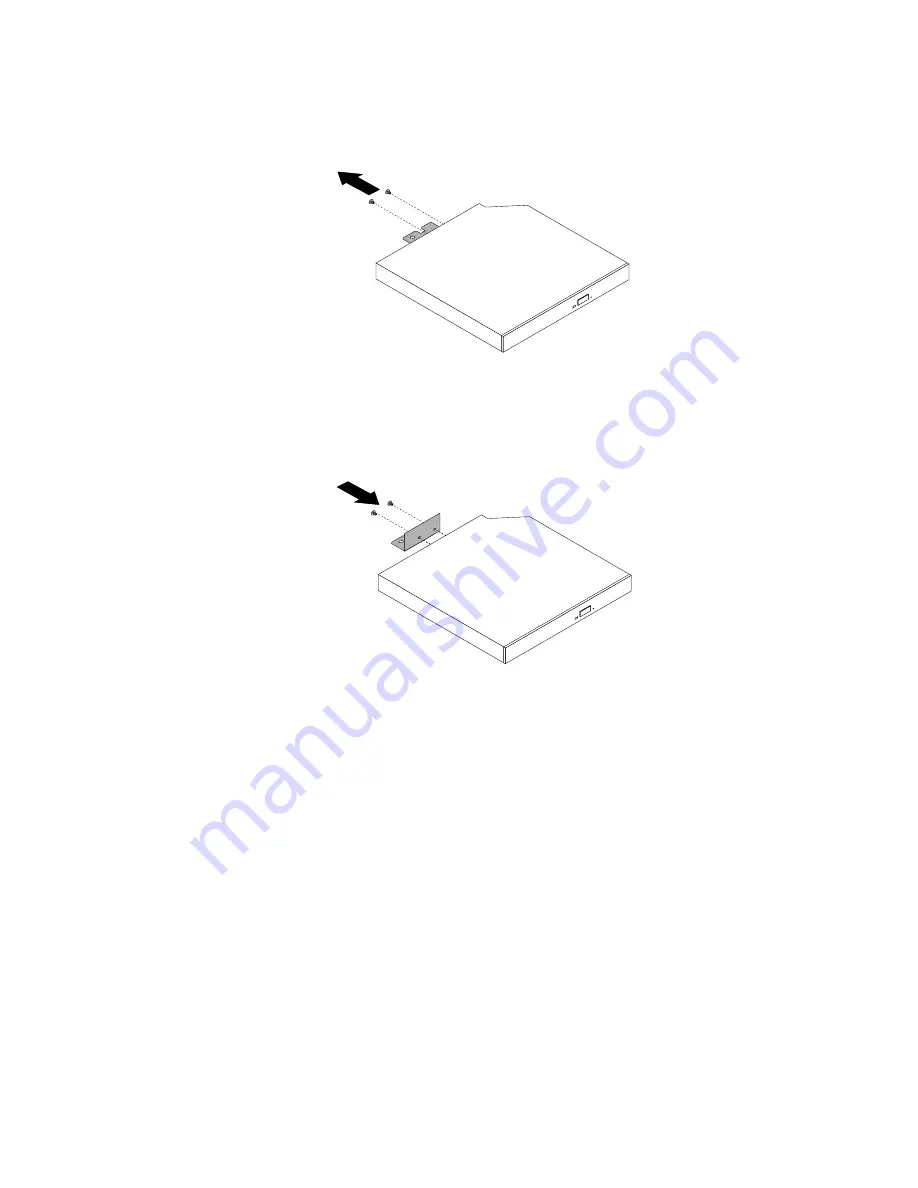
5. Remove the two screws that secure the optical drive metal plate and then remove the metal plate
from the optical drive.
Figure 19. Removing the optical drive metal plate
6. Align the two screw holes in the optical drive metal plate with the corresponding holes in the new optical
drive and then install the two screws to secure the metal plate on the new optical drive.
Figure 20. Installing the optical drive metal plate
Chapter 5
.
Installing or replacing hardware
43
Содержание M93/p Tiny
Страница 1: ...ThinkCentre M93 p Tiny User Guide Machine Types 10A4 10A5 10AA and 10AB ...
Страница 6: ...iv ThinkCentre M93 p Tiny User Guide ...
Страница 36: ...24 ThinkCentre M93 p Tiny User Guide ...
Страница 136: ...124 ThinkCentre M93 p Tiny User Guide ...
Страница 142: ...130 ThinkCentre M93 p Tiny User Guide ...
Страница 146: ...134 ThinkCentre M93 p Tiny User Guide ...
Страница 149: ...Appendix E China Energy Label Copyright Lenovo 2013 2014 137 ...
Страница 150: ...138 ThinkCentre M93 p Tiny User Guide ...
Страница 152: ...140 ThinkCentre M93 p Tiny User Guide ...
Страница 156: ...144 ThinkCentre M93 p Tiny User Guide ...
Страница 157: ......
Страница 158: ......


