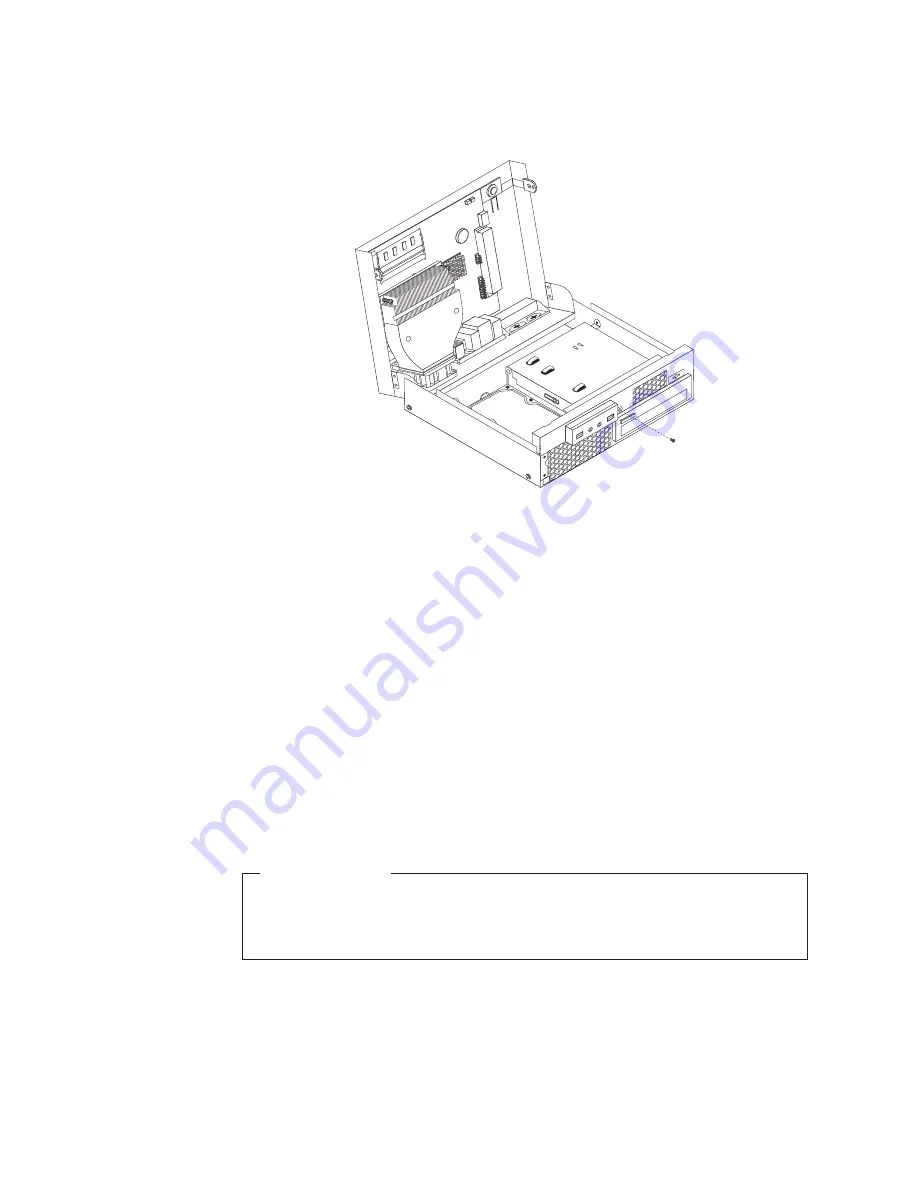
5.
Remove the screw that secures the front audio and USB assembly to the
chassis.
6.
Locate the power switch assembly beside the front audio and USB assembly.
Remove the power switch assembly by releasing the tab that secures the
power switch assembly to the chassis.
7.
Completely remove the failing front audio and USB assembly from the
chassis.
8.
Install the new front audio and USB assembly into the chassis and align the
screw hole in the front audio and USB assembly with the corresponding hole
in the chassis.
9.
Install the screw to secure the new front audio and USB assembly to the
chassis.
10.
Install the new power switch assembly into the chassis.
11.
Connect the front USB, front panel, and front audio cables to the system
board. See “Locating parts on the system board” on page 11.
12.
Reinstall the front bezel. See “Removing and reinstalling the front bezel” on
page 15.
What to do next:
v
To work with another piece of hardware, go to the appropriate section.
v
To complete the installation or replacement, go to “Completing the parts
replacement” on page 31.
Figure 18. Removing the front audio and USB assembly
26
User Guide
Содержание 3692A3U
Страница 2: ......
Страница 3: ...ThinkCentre User Guide ...
Страница 6: ...Index 65 iv User Guide ...
Страница 8: ...vi User Guide ...
Страница 20: ...12 User Guide ...
Страница 42: ...34 User Guide ...
Страница 52: ...44 User Guide ...
Страница 60: ...52 User Guide ...
Страница 70: ...62 User Guide ...
Страница 76: ...68 User Guide ...
Страница 77: ......
Страница 78: ...Part Number 71Y7204 Printed in USA 1P P N 71Y7204 ...


