
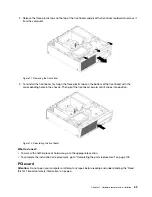
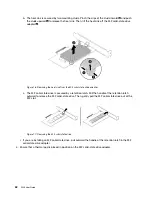

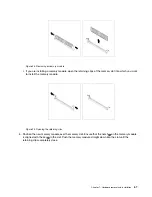

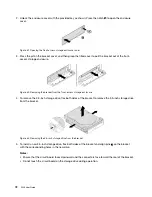
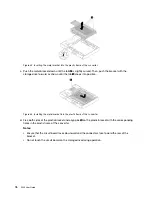
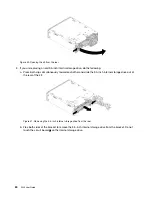
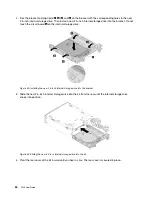

Figure 30. Installing the optical drive
7. Connect any required cables. For the optical drive, connect the power cable and the signal cable to the
rear of the optical drive.
What to do next:
• To work with another piece of hardware, go to the appropriate section.
• To complete the installation or replacement, go to “Completing the parts replacement” on page 105.
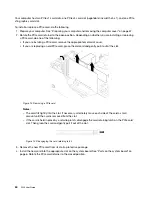
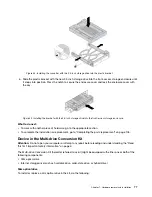
Hard disk drive in the front-access storage enclosure
Attention:
Do not open your computer or attempt any repair before reading and understanding the “Read
this first: Important safety information” on page iii.
You can install or replace a storage drive in the front-access storage enclosure. The storage drive also can
be hot-swappable, which means that you can install or replace the drive without even turning off your
computer. Therefore, lock the enclosure cover to prevent the unexpected removal. The keys are attached at
the rear of the computer. Store the keys in a secure place.
The hard disk drive in the front-access storage enclosure is hot-swappable only when the following
requirements are met:
• The SATA cable of the front-access storage enclosure is connected to the eSATA connector on the
system board. To verify the cable connection, see “Preparing your computer and removing the computer
cover” on page 57 and “Parts on the system board” on page 6 for more information.
• The operating system of your computer does not reside on the hard disk drive installed in the front-access
storage enclosure.
Attention:
If any of the above requirements are not met, do not install or replace the hard disk drive when
the computer is turned on. Otherwise, data on the hard disk drive might get damaged.
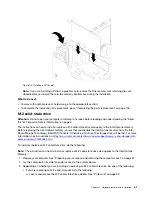
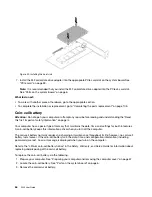
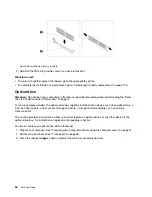
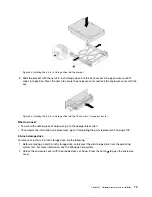
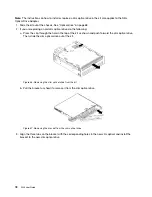
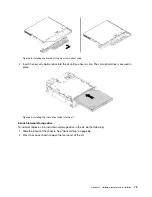
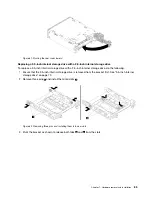
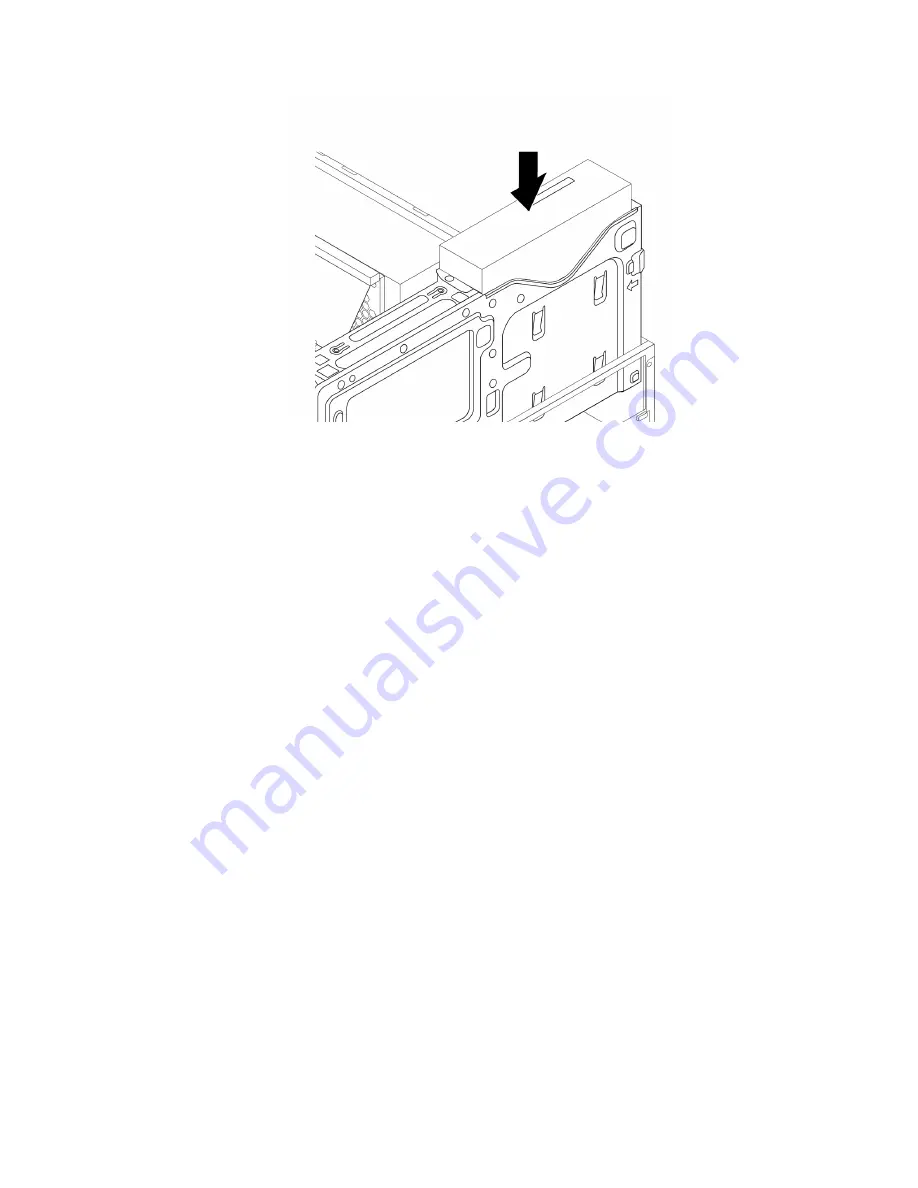
3.5-inch storage drive
To remove or install a 3.5-inch storage drive, do the following:
1. Before removing an old 3.5-inch storage drive, safely eject the old storage drive from the operating
system first. For more information, see the Windows help system.
Hardware removal and installation
71
Содержание 30BG
Страница 1: ...P320 User Guide Machine Types 30BJ 30BK and 30BS ...
Страница 12: ...x P320 User Guide ...
Страница 28: ...16 P320 User Guide ...
Страница 40: ...28 P320 User Guide ...
Страница 46: ...34 P320 User Guide ...
Страница 56: ...44 P320 User Guide ...
Страница 120: ...108 P320 User Guide ...
Страница 124: ...112 P320 User Guide ...
Страница 126: ...114 P320 User Guide ...
Страница 128: ...116 P320 User Guide ...
Страница 136: ...124 P320 User Guide ...
Страница 138: ...Ukraine RoHS India RoHS RoHS compliant as per E Waste Management Rules Taiwan RoHS 126 P320 User Guide ...
Страница 140: ...4 Follow the instructions on the screen 128 P320 User Guide ...
Страница 142: ...130 P320 User Guide ...
Страница 144: ...132 P320 User Guide ...
Страница 145: ......
Страница 146: ......