


FLIP
®
01.01.2019
English / Englisch
MAINTENANCE WORK AND REPLACEMENT OF WEARING PARTS
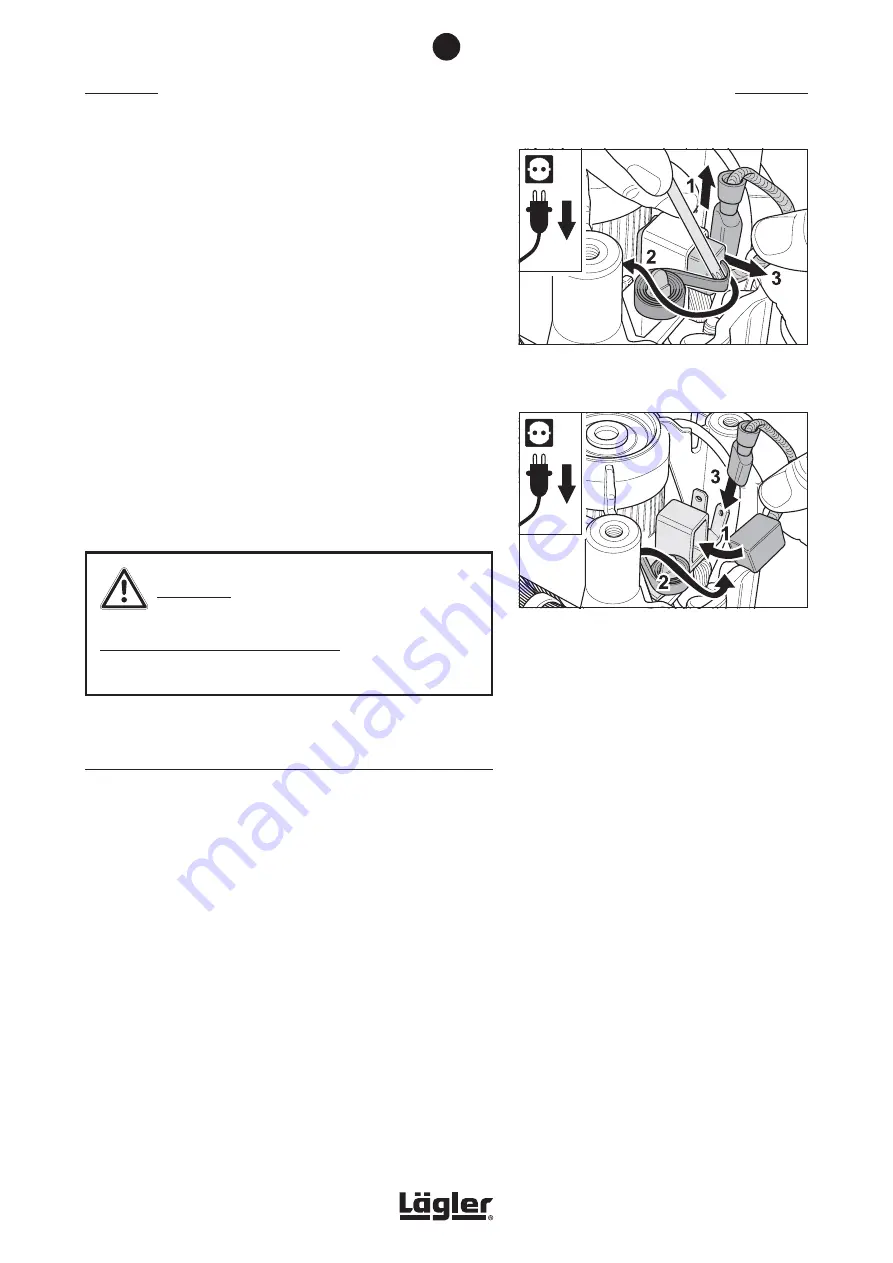
Fig. 54
Pull off the connector (1), turn the brass pressure
clamp to the side (2) and remove the carbon
brush (3).
Fig. 55
Insert the new carbon brush (1), turn the brass
pressure clamp back (2) and attach the connec-
tor (3).
3
Pull off the connector of
one
of the carbon brushes from the
carbon holder (fig. 54, 1).
4
Turn the brass pressure clamp of the carbon holder to the
side using the universal spanner (fig. 54, 2) and remove the
worn-out carbon brush (fig. 54, 3).
5
Insert the new carbon brush (fig. 55, 1) and turn back the
brass pressure clamp of the carbon holder (fig. 55, 2).
6
Attach the carbon brush connector to the contact in the
carbon holder provided (fig. 55, 3). Install the carbon brush
cable like the other old carbon brushes that are still installed.
This will prevent a later pinching of the cable.
7
Replace the second carbon brush in the same manner.
8
Install the handle on the motor housing.
WARNING!
RISK OF DEATH from electrical shock:
Do not pinch any cables while installing the handle!
7.7 CHECKING THE DUST SUCTION SYSTEM
In order to ensure optimal dust suction for your own safety and
the safety of others, the following points must be taken into
consideration.
•
Use only original LÄGLER
®
dust bags for the FLIP
®
(part
number in
Section 11, Spare parts FLIP
®
)!
•
Do not use any dust bags which have been damaged, washed,
patched or repair in any other way!
•
Ensure that the guide rollers are correctly positioned!
•
Check the dust suction system for any clogged-up material
or deposits!
•
Make sure that the dust bag and locating flange are
connected properly!
7
37
Содержание Flip
Страница 62: ...FLIP 01 01 2019 English Englisch NOTES 62...