LaCie LightScribe Labeler
User Manual
page
Your LaCie LightScribe Labeler
3. Get acquainted with the LaCie LightScribe Labeler
This chapter will help you become familiar with the
different LaCie LightScribe Labeler application win-
dows. These sections will help you to identify and locate
different tools and capabilities, while also giving you an
overview of what each tool is and what it is capable of
doing.
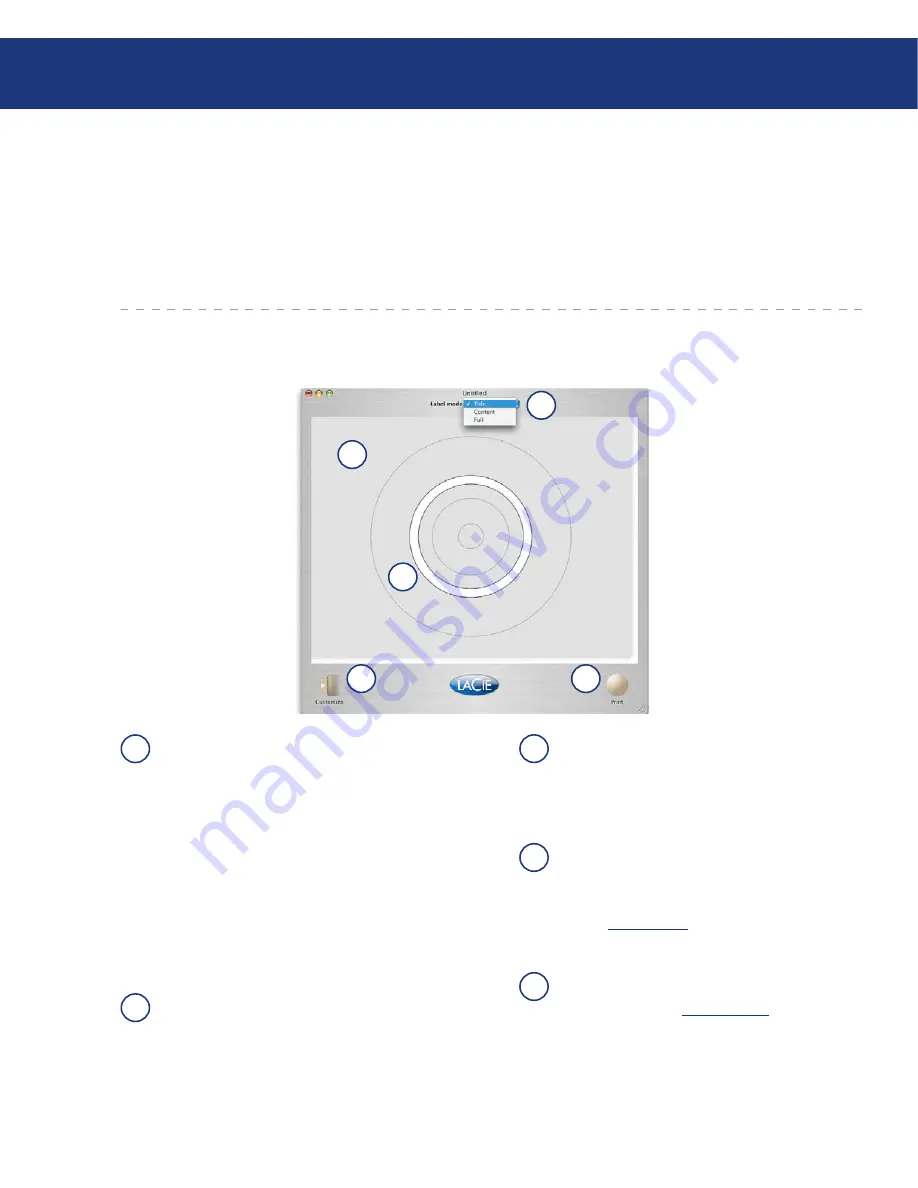
3.1. Main Window
Label mode –
This is where you select the print-
able area for the label: Title, Content or Full.
• In Title Label mode, only a narrow band is
burned, and the image is burned in the short-
est amount of time.
• In Content Label mode, a wider band is
burned and the image burned takes a little
longer than the Title Label mode.
• In Full Label mode, the entire disc surface
may be covered, and images and linear text
may be added.
Design Area –
This is the space in which you
will be able to design your LightScribe label.
The LaCie LightScribe Labeler is WYSIWYG
(What You See Is What You Get).
Label Area –
This is the white space within
the Design Area that will be printed, and it is
dependent upon the choosen Label mode (Title,
Content or Full).
Customize –
Click on this button to open the
Customize Tool drawer. This drawer contains all
of the tools to customize your label. Please see
page 5,
Tool Drawer
for more information.
Print –
Click on this button to open the print,
preview and label setup options dialog box.
Please see page 19,
Print A Label
for more
information.
A
B
C
D
E
A
B
C
D
E


