


LaCie LightScribe Labeler
User Manual
page
Using the LightScribe Labeler
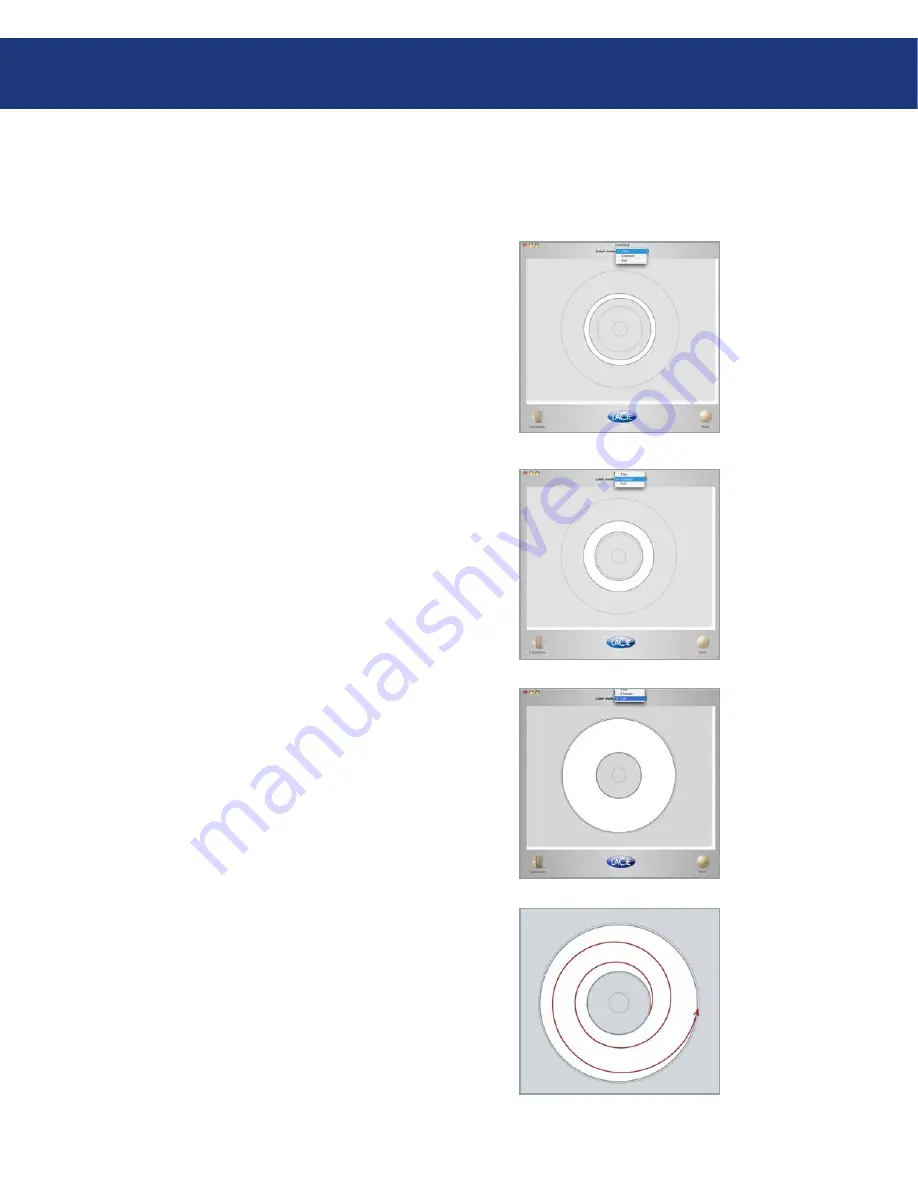
Before you begin to create your label, first choose
which type of label you’d like to build: Title, Content
or Full.
When choosing your Label mode, keep in mind the
following:
Title –
burns within the narrow white band within
the Label Area. If an image or text is added, only
the area of the image or text within the Label Area
will be printed. Any part of the image or text that is
covered in grey will not be printed.
•
4.2. Creating a Customized Label
Content –
burns within the wider white band called
Label Area
. If an image or text is added, only the area
of the image within the Label Area will be printed.
Any part of the image or text that is covered in grey
will not be printed.
•
Full –
burns the entire surface of the disc, allowing
you to add curved and linear text, objects and images.
This option provides the most flexibility for creating
personalized discs due to the larger Label Area.
The LaCie d2 DVD±RW Drives with LightScribe
burn labels in a circular pattern, starting with the inner-
most part of the disc and moving outward. The closer
your design is to the outmost border of the disc, the
more time it takes to print. If you burn a disc under Full
Label mode, the process takes longer than burning in
Title Label mode.
Once you’ve chosen Label mode, you’re ready to be-
gin creating your label. Note that you can change the
label mode while designing your label.
•


