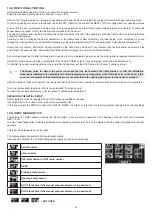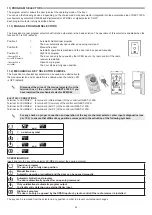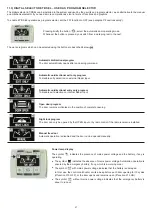
23
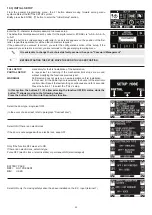
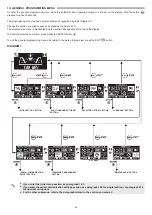
Select the door type: single leaf OFF.
(In the event of a dual leaf, refer to paragraph "Dual leaf door").
FULL SETUP:
mandatory for the first installation of the automation.
PARTIAL SETUP:
to repeat leaf run learning if the mechanical limit stops are moved,
without modifying the functions previously set.
WARNING!
Partial setup does not work on a new automation on first installation.
In this case, if it the Partial option is selected, the buzzer of the electronic
control unit will report the fault emitting a continuous sound for 4 seconds.
Press the button F1 to select the “FULL” setup.
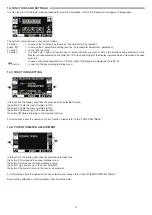
In this section, the buttons F1 / F3 allow selecting the function OFF/ON status, while the
button
allows moving to the following function.
Press the button F2 to return to the previous function.
Enter the 10‑character technical password to access setup.
The default technical password set by Label for the digital selector ET-DSEL is “A-A-A-A-A-A-A-
A-A-A”
Press the button in correspondence with letter A; an asterisk appears on the position of the first
letter; repeat this operation for all the other characters required.
If the password you entered is correct, you enter the configuration section of the setup; if the
password you entered is incorrect, you are returned to the general programming menu.
It is advisable to change the technical default password. See para. "Password Management".
BEFORE STARTING THE SETUP, MOVE THE DOOR TO CLOSED POSITION.
10.3) INITIAL SETUP
From the general programming menu, the F1 button allows moving forward among menu
symbols. Select the INITIAL SETUP symbol.
Briefly press the ENTER
button to enter the "Initial Setup" section.
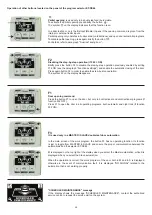
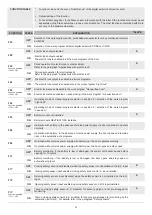
Only if the function S02 was set to ON
If there is an electric lock, select its type:
Pulse OFF (electric lock or electric strike) or permanent ON (electromagnet).
Select ON if there is an electric lock.
If the door is not equipped with an electric lock, keep OFF.
BATTERY PACK
OFF
= NOT PRESENT
ON
= USED
Select ON only if a closing safety sensor has been installed on the E.C. input (terminal 7)
Содержание NEXT 120s
Страница 2: ......
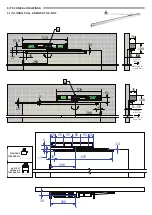
Страница 11: ...11 X 36mm X 6 mm 6 2 SLIDING PUSH ARM NEXT120 BDS STANDARD TAPERED PIN NEXT EXT EXTENSION TAPERED PIN ...
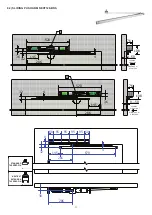
Страница 12: ...12 x X 36mm X 6 mm 6 3 ARTICULATED PUSH ARM NEXT120 BAS STANDARD TAPERED PIN NEXT EXT EXTENSION TAPERED PIN ...
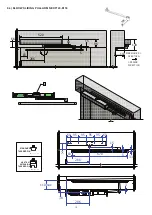
Страница 13: ...13 X 91mm X mm 6 4 ELBOW SLIDING PULL ARM NEXT120 B150 STANDARD TAPERED PIN NEXT EXT EXTENSION TAPERED PIN ...
Страница 14: ...14 X 91mm X mm 6 5 ELBOW SLIDING PULL ARM NEXT120 B250 STANDARD TAPERED PIN NEXT EXT EXTENSION TAPERED PIN ...
Страница 62: ...62 ...
Страница 63: ...63 ...

