3-22
Disassembly/Assembly
PC3x Keyboard Assembly
Removing Keys
The following procedure assumes you have removed the top enclosure from the PC3x.
1. Follow the procedure to remove the keyboard.
Note:
If you are merely replacing one or more keys, it is not necessary to entirely remove the
keyboard from the PC3x. Once you have followed the procedure to remove the keyboard, you
can slide it toward the rear panel to give you enough access to remove and replace keys.
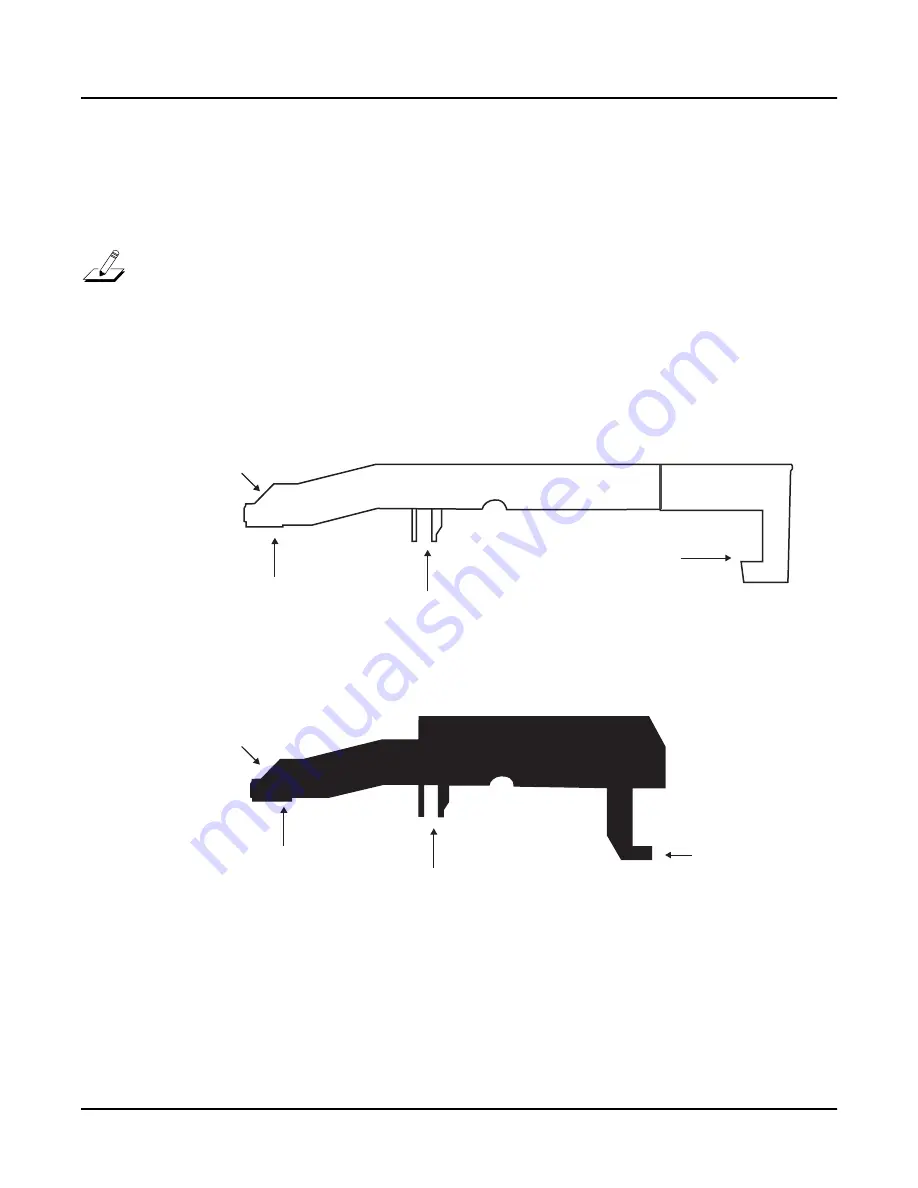
2. The following diagrams illustrate the outlines of the natural and sharp keys and the
location and functions of the components described in the following procedures.
Natural/White Key
Figure 3-16
Natural/white key
Figure 3-17
Sharp/black key
Strikes the front and rear key
contact on key depression
Hooks under the front
of the keyboard chassis
Pivot
location
Key Spring
location
Pivot
location
Strikes the front and rear key
contact on key depression
Hooks through
the keyboard chassis
Key Spring
location
Содержание PC3x
Страница 14: ...1 6 Introduction PC3x Front Panel...
Страница 24: ...2 10 Diagnostics Description of Tests...
Страница 50: ...3 26 Disassembly Assembly PC3x Keyboard Assembly...
Страница 72: ...4 22 Troubleshooting Maintenance Converting the Voltage...

