7
GETTING STARTED
Install a hard disk drive into your DVR.
Connect cameras (up to 4) to DVR.
Connect other peripheral devices (mouse, external motion sensors or alarm) if necessary. And
PS/2 Mouse must be connected to DVR before startup system.
Plug the power cord into the power jack on the wall.
Start TV Monitoring and Recording.
Make sure that a hard disk drive and camera(s) are properly installed.
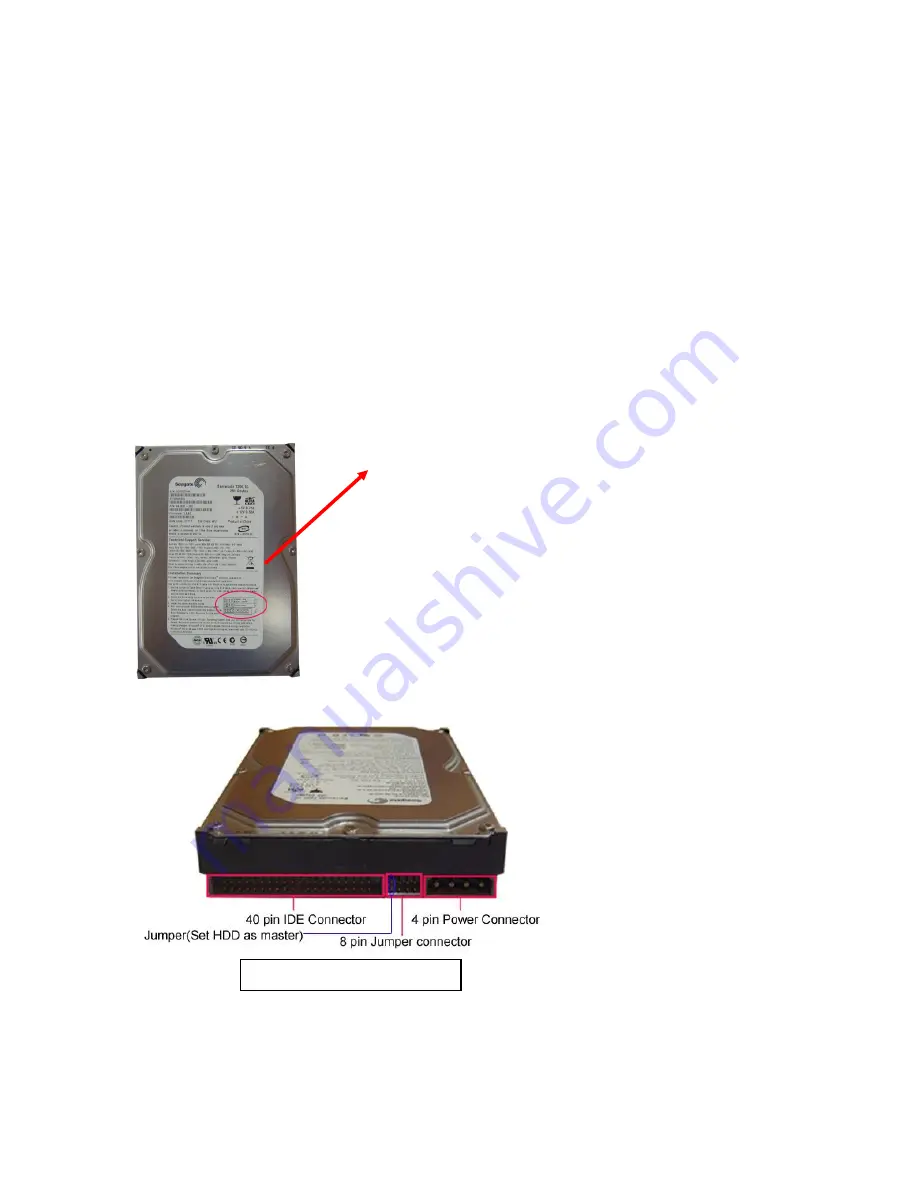
The hard disk (IDE) jumper setting must be set to “master” jumper setting.
If the power is turned off while recording (i.e. a power failure), the DVR will enter “Power
Recovery” modes at start up, detect that it has been shut down, and then reinitiate the
recording process.
HARDWARE SETUP
IDE Hard Disk Drive Installation
(A) Make sure that HDD Jumper setting as “Master”
Before installing hard drive, set jumper as “Master”.
The master jumper setting varies depending on the hard
drive manufactures. Refer to manufacture’s manual for
master jumper setting. For example, the model of HDD
is Seagate.
(B) Connect the ribbon cable (IDE) cable & power cable
Back side of hard disk


