- 14 -
MG 3000329394 - 03
1.11
S
CAN
ORIGIN
POSITION
ADJUSTMENT
1.11.1
M
AKALU
_210
SOFTWARE
PRESENTATION
This section explains how to set X and Y scanner threshold.
It could be necessary in case of black line observed on the border of copies or scan.
For this point, you need to use the Makalu_210 software.
The Makalu_210 Software is available in the data base GITIS reference 253276504 (MAKALU 210:
SERVICE SOFTWARE)
This software is developing with VB6.
The help file conform to Microsoft standards, is integrated in the package. This help can be called with
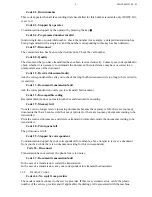
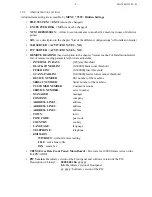
key F1 and by "Menu – Helps - ?” It does not manage the context help.
1.11.2
M
AKALU
_210
SOFTWARE
SET
UP
The software is provided as compressed file RAR type.
Step 1
: Unrar the file in the directory of your choice
• "MAKALU_210_Vx_setup.exe",
• "HFXv2_Scan_OEMGeneric_20081212_422.zip" and
• "SCT_U31_MAKALU_SP_627 Makalu HFC and HFF V2 printer and scanner drivers
installation.doc"
Step 2
: Install the Scanner driver type WIA-TWAIN Network. A version of these drivers is provided
with the package (HFXv2_Scan_OEMGeneric_20081212_422.zip) with installation documents
(SCT_U31_MAKALU_SP_627 Makalu HFC and HFF V2 printer and scanner drivers installation.doc)
You can also install the drivers provided in CD" Companion ". In this case refer to the installation files
and documents of CD.
Step 3
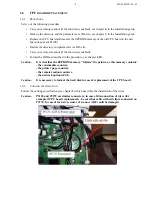
: To launch the file «MAKALU_210_Vx_setup.exe”. The installation starts automatically. Select
your language used during installation when the question is asked to you. If you want a short cut on the
desk select this option. Answer "yes" the question about the installation of the "Routines Visual
BASIC".
At the end of the installation the software is launched automatically.
Step 4
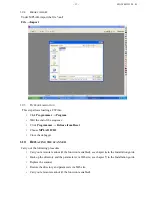
: After the launching of MAKALU 210, select the scanner to be used (Menu Configuration -
Scanner)
Step 5
: Do not forget to configure address IP of the scanner before carrying out scans (Menu
Configuration - Scanner IP if the drivers use "HFÒEMAN.EXE "), or refer to the documentation of the
driver if you don’t use driver provided in the package.
Notice 1
: The installation requires the rights level "administrator" on the PC. If you don’t have, contact
your administrator to obtain these rights
Notice 2
: The software is compatible VISTA. On the other hand according to your configuration of
Vista, the installation and the use of the software can ask for different level of rights.
Содержание bizhub 43
Страница 1: ...MULTIFUNCTION bizhub 43 TECHNICAL DOCUMENT 253 363 295 B KONICA MINOLTA...
Страница 2: ...3000 359 745 02 2...
Страница 17: ...13 DN 3000329392 03 Architecture module...
Страница 158: ...4 NI IPL 3000361031 01...
Страница 160: ...6 NI IPL 3000361031 01 PLANCHE 1 FIGURE 1...
Страница 162: ...8 NI IPL 3000361031 01 PLANCHE 2 FIGURE 2...
Страница 164: ...10 NI IPL 3000361031 01 PLANCHE 3 FIGURE 3...
Страница 166: ...12 NI IPL 3000361031 01 PLANCHE 4 FIGURE 4...
Страница 168: ...14 NI IPL 3000361031 01 PLANCHE 5 FIGURE 5...
Страница 170: ...16 NI IPL 3000361031 01 PLANCHE 6 FIGURE 6...
Страница 172: ...18 NI IPL 3000361031 01 PLANCHE 7 FIGURE 7...
Страница 174: ...20 NI IPL 3000361031 01 PLANCHE 8 FIGURE 8...
Страница 176: ...22 NI IPL 3000361031 01 PLANCHE 9 FIGURE 9...
Страница 178: ...24 NI IPL 3000361031 01 PLANCHE 10 FIGURE 10...
Страница 180: ...26 NI IPL 3000361031 01 PLANCHE 11 FIGURE 11...
Страница 182: ...28 NI IPL 3000361031 01 PLANCHE 12 FIGURE 12...
Страница 184: ...30 NI IPL 3000361031 01 PLANCHE 13 FIGURE 13...
Страница 186: ...32 NI IPL 3000361031 01 PLANCHE 14 FIGURE 14...
Страница 188: ...34 NI IPL 3000361031 01 PLANCHE 15 FIGURE 15...
Страница 190: ...36 NI IPL 3000361031 01 PLANCHE 16 FIGURE 16...
Страница 192: ...38 NI IPL 3000361031 01 PLANCHE 17 FIGURE 17...
Страница 194: ...40 NI IPL 3000361031 01 PLANCHE 18 FIGURE 18 1 2 3 4 5 6...
Страница 196: ...42 NI IPL 3000361031 01 PLANCHE 19 FIGURE 19 1 2 3 4 5 6...
Страница 198: ...44 NI IPL 3000361031 01 PLANCHE 20 FIGURE 20 1 2 3 4...
Страница 200: ...46 NI IPL 3000361031 01 PLANCHE 21 FIGURE 21 1 2 3 4 5 6 7 8 9 10 12 11 13 14 15 16 17 18 19 20 21 22...
Страница 202: ...48 NI IPL 3000361031 01 PLANCHE 22 FIGURE 22 1 2 3 4 5 5 6 7 8...
Страница 204: ...50 NI IPL 3000361031 01 PLANCHE 23 FIGURE 23 1 2 4 3 5 6...
Страница 206: ...52 NI IPL 3000361031 01 1 5 6 2 3 4 J244 PLANCHE 24 FIGURE 24...
Страница 208: ...54 NI IPL 3000361031 01 1 2 3 4 5 6 PLANCHE 25 FIGURE 25...
Страница 210: ...56 NI IPL 3000361031 01 2 1 PLANCHE 26 FIGURE 26...
Страница 214: ...60 NI IPL 3000361031 01 3 1 2 4 J260 J248 J246 P247 J247 J26 PLANCHE 28 FIGURE 28...
Страница 218: ...64 NI IPL 3000361031 01 7 6 8 4 3 9 10 5 10 1 J29 J291 J290 J103 2 PLANCHE 30 FIGURE 30...
Страница 220: ...66 NI IPL 3000361031 01 3 2 1 4 PLANCHE 31 FIGURE 31...
Страница 222: ...68 NI IPL 3000361031 01 2 1 3 4 5 J43 J271 PLANCHE 32 FIGURE 32...
Страница 230: ...NI IPL 3000361031 01 76...
Страница 232: ...PERSO 3000 348 280 02 2...


