


Solving Problems with Printing Quality
236
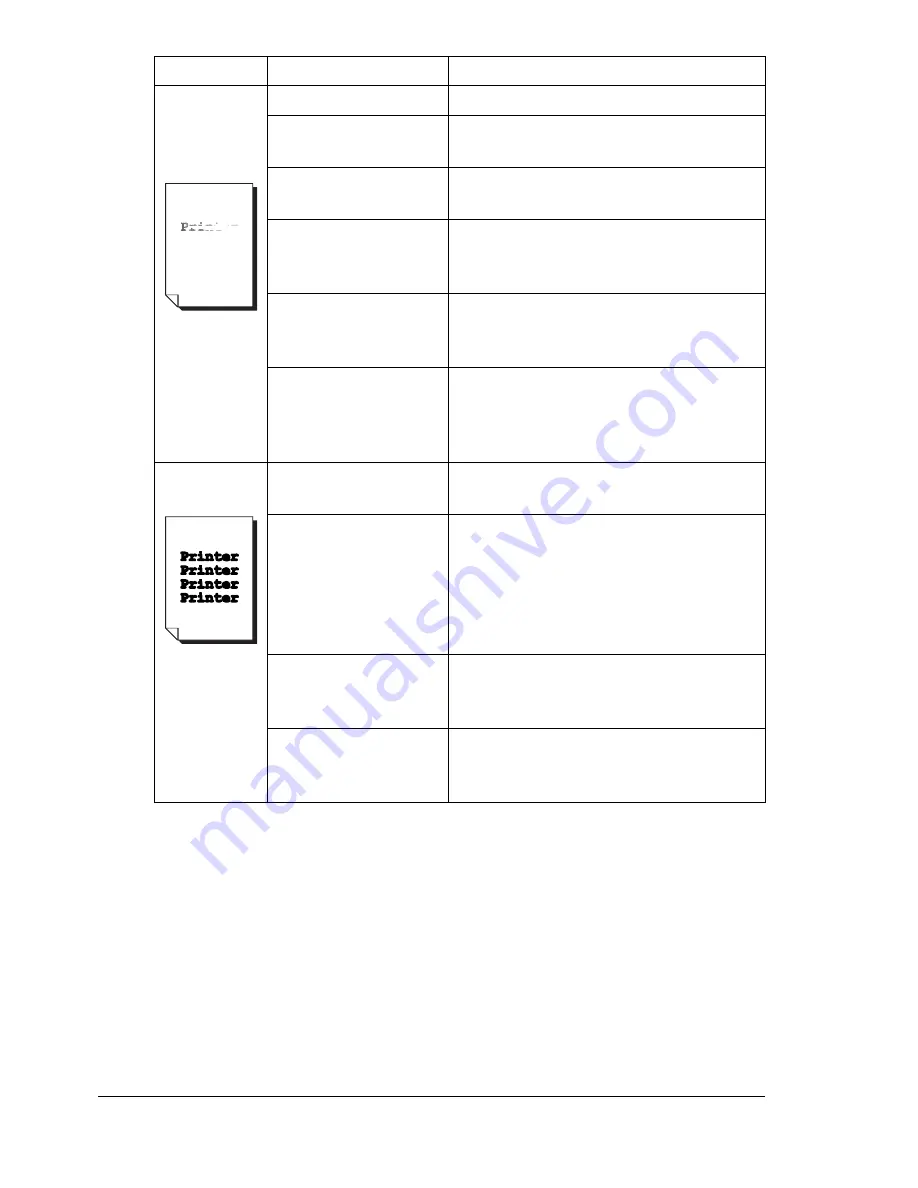
Image is too
light; there is
low image
density.
Laser lens is dirty.
Clean the laser lens.
The copy density is
set too light.
Select a darker copy density.
The media is moist
from humidity.
Remove the moist media and replace
with new, dry media.
There is not much
toner left in the car-
tridge.
Replace the toner cartridge.
One or more of the
toner cartridges may
be defective.
Remove the toner cartridges and
check for damage. If it is damaged,
replace it.
Media type is set
incorrectly.
When printing envelopes, labels, post-
cards, thick stock, glossy media, or
transparencies, specify the appropriate
media type in the printer driver.
Image is too
dark.
The copy density is
set too dark.
Select a lighter copy density.
The document was
not pressed close
enough against the
original glass.
Position the document so that it is
pressed close enough against the orig-
inal glass. For details on positioning
the document on the original glass,
refer to “Placing a document on the
original glass” on page 95.
One or more of the
toner cartridges may
be defective.
Remove the toner cartridges and
check for damage. If it is damaged,
replace it.
One or more of the
imaging units may be
defective.
Remove the imaging units and check
for damage. If it is damaged, replace it.
Symptom
Cause
Solution
Содержание A0FD011
Страница 1: ...magicolor 4690MF Printer Copier Scanner User s Guide A0FD 9561 00A 1800859 001A...
Страница 13: ...1Introduction...
Страница 23: ...2Control Panel and Configuration Menu...
Страница 40: ...Configuration Menu Overview 28 REPORTING SCAN SETTING...
Страница 46: ...Configuration Menu Overview 34 PAPER SETUP Menu PAPER SETUP TRAY1 PAPER TRAY2 PAPER...
Страница 76: ...Configuration Menu Overview 64...
Страница 77: ...3Media Handling...
Страница 100: ...Loading Media 88 6 Close Tray 3...
Страница 109: ...4Using the Printer Driver...
Страница 118: ...Printer Driver Settings 106...
Страница 119: ...5Using the Copier...
Страница 133: ...6Using the Scanner...
Страница 143: ...Scanning With the Machine 131 3 Press the or key to select SCAN TO USB MEMORY and then press the Select key...
Страница 162: ...Scanning With the Machine 150...
Страница 163: ...7Replacing Consumables...
Страница 182: ...Replacing Consumables 170 3 Remove the transfer roller 4 Prepare a new transfer roller...
Страница 198: ...Replacing Consumables 186...
Страница 199: ...8Maintenance...
Страница 204: ...Cleaning the Machine 192 3 Clean the media feed rollers by wiping them with a soft dry cloth 4 Close the tray...
Страница 211: ...9 9Troubleshooting...
Страница 220: ...Clearing Media Misfeeds 208 3 Close the right side cover...
Страница 228: ...Clearing Media Misfeeds 216 4 Remove any misfed media 5 Close the ADF cover 6 Close the ADF feed cover...
Страница 237: ...Clearing Media Misfeeds 225 4 Close the cover and slowly lower the scanner unit 5 Close the front cover...
Страница 263: ...10 10Installing Accessories...
Страница 270: ...Tray 3 Lower Feeder Unit 258...
Страница 271: ...AAppendix...
Страница 282: ...Our Concern for Environmental Protection 270...


