


Utility Menu
5
Fiery PRO80 65-55C-KM Network Scanner/ Web Connection
5-15
4
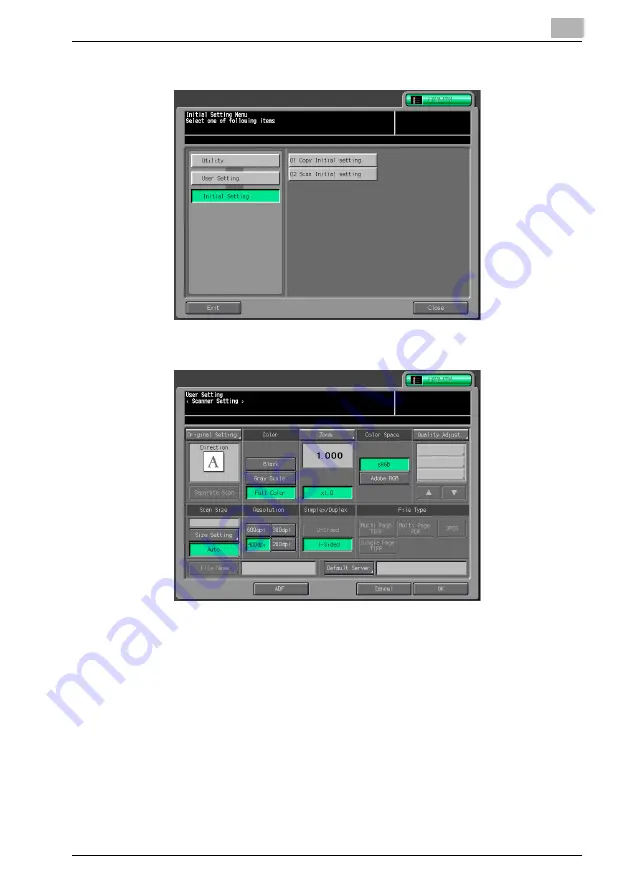
Press [02 Scan Initial setting].
5
Set the initial value of Scanner Setting screen.
–
In the Scan Default Setting screen, the registered FTP or SMB serv-
er can be selected as a Default Server.
–
Setting the ADF to ON in the Scan Default Setting screen allows the
2-Sided to be set in the Scanner Setting screen.
–
For details of other setting functions for scanning, see p. 2-24.
6
Press [OK].
7
Press [Exit] to close Utility Menu.
Содержание 65-55C-KM
Страница 123: ...Using Web Connection 6 Fiery PRO80 65 55C KM Network Scanner Web Connection 6 23 3 Click OK...
Страница 128: ...Using Web Connection 6 Fiery PRO80 65 55C KM Network Scanner Web Connection 6 28 2 Click OK 3 Click OK...
Страница 133: ...Using Web Connection 6 Fiery PRO80 65 55C KM Network Scanner Web Connection 6 33 2 Click OK 3 Click OK...
Страница 138: ...Using Web Connection 6 Fiery PRO80 65 55C KM Network Scanner Web Connection 6 38 2 Click OK 3 Click OK...
Страница 157: ...Using Web Connection 6 Fiery PRO80 65 55C KM Network Scanner Web Connection 6 57 The files in Mailbox is displayed...
Страница 173: ...Copyright 2008 2008 07 Fiery_PRO80 65 55C KM_E_v40...


