background image

www.kodak.com/go/docimaging  


  19 of 144

Caution

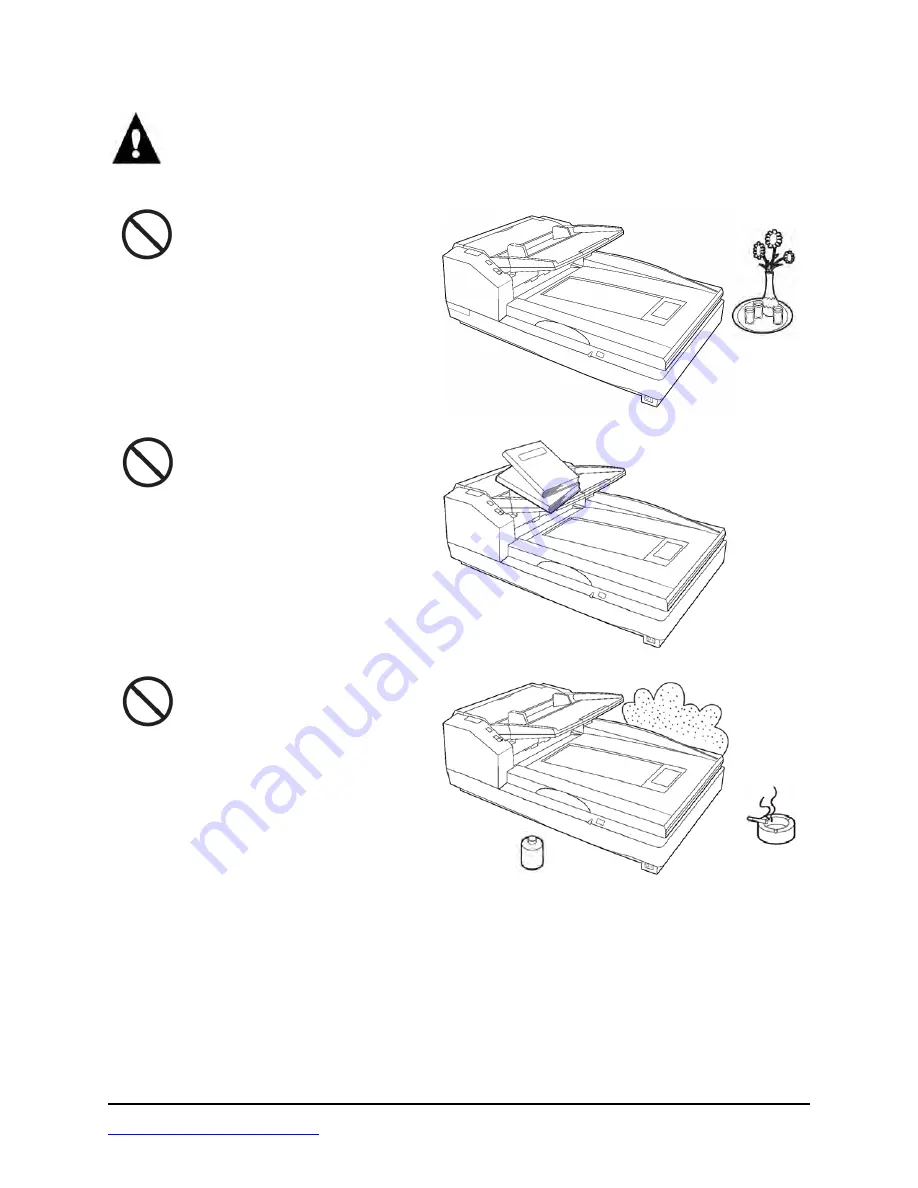
Do not place any liquids near the 
scanner. Accidental spillage of liquid 
into the scanner may cause severe 
damage. If this occurs, turn the 
scanner off and unplug the power 
cord. Please contact an authorized 
service provider.

Do not place books, paper, or other 
items on the scanner.

Do not place the scanner in an area 
where there is a lot of smoke, dust, 
chemical fumes or vibration.

Liquids

Thinner

Dust

Smoke

Содержание Truper 3210

Страница 1: ...Operator Manual Trūper 3210 Color Scanner Part Number S008892 Rev A ...

Страница 2: ...echanical magnetic optical chemical manual or otherwise without the prior written permission of the copyright owner BÖWE BELL HOWELL Scanners L L C 760 South Wolf Road Wheeling IL 60090 6232 USA BÖWE BELL HOWELL Scanners Division Now a Part of Kodak Eastman Kodak Company 343 State Street Rochester New York 14650 1177 Visit www kodak com go docimaging to obtain the most current phone number for you...

Страница 3: ...www kodak com go docimaging 3 of 144 Release Notes The following updates have been incorporated into Rev A of this manual Item Status Location in Manual Detail Initial Release New ...

Страница 4: ...lReScan Kofax and ImageControls are registered trademarks of Kofax Image Products ISIS and PixTools are registered trademarks of Pixel Translations a division of Captiva Software Corporation Adobe Acrobat and Reader are registered trademarks of Adobe Systems Incorporated Pentium is a registered trademark of Intel Corporation USB is a registered trademark of the USB Implementers Forum Trūper is a r...

Страница 5: ... 25 Unpacking the Scanner 26 Attaching the Feeder Tray 27 Initial Setup and Installation 28 Connecting the Scanner 28 Installing the Windows Scanner Driver 29 Trūper Software Installation 34 Installing the Software 34 View Manuals 46 Contents of the Installation Resource CD ROM 47 Operating the Scanner 48 Turning on the Scanner 48 LED Status Indicator 49 Document Preparation 50 General Guidelines ...

Страница 6: ...bed Glass and Document Cover Detector 90 Replacing Consumables 92 Replacing the Paper Feed Roller Module 92 Replacing the Retard Roller Module 95 Trūper User Utility 98 Starting the User Utility 98 Functions and Settings 99 User Utility Main Dialog Window 99 Restoring Shading to the Default 103 Scanner Counter 104 Help 105 Select Scanner X 105 Save Info 105 Close 105 Check Version Information 106 ...

Страница 7: ... 136 About Shading Adjustment 136 What Is the Purpose of Shading Adjustment 136 When Is Shading Adjustment Required 136 Shading Adjustment Procedure 136 Appendix 4 Adding Memory 137 Recommended DIMM Specifications 137 Installing a DIMM Module 137 Removing the Interface Board 137 Installing a DIMM Module on the Interface Board 138 Re installing the Interface Board 138 Index 139 Limited Use License ...

Страница 8: ... interference at his own expense FCC Warning To assure continued FCC compliance the user must use only shielded interface cable and the provided power supply cord Also any unauthorized changes or modifications to this equipment would void the user s authority to operate this device For Canada THIS CLASS A DIGITAL APPARATUS COMPLIES WITH CANADIAN ICES 003 CET APPAREIL NUMÉRIQUE DE LA CLASSE A EST C...

Страница 9: ...www kodak com go docimaging 9 of 144 ...

Страница 10: ...out Trūper Your Trūper scanner offers the following features Simplex and duplex scanning Flatbed scanning for exception documents Ultrasonic multifeed detection Black and white grayscale and color scanning Automatic document feeder that holds up to 200 sheets VRS technology for exceptional image quality USB 2 0 connectivity About This Manual This manual contains information about the installation ...

Страница 11: ...al 600 dpi Output Options Black and White Grayscale 8 bit and Color 24 bit Image Enhancement Auto Cropping Deskew Auto Brightness Contrast Control Auto Color Detect Auto Rotation Blank Page Deletion Bar Code Recognition and Advanced Clarity Document Size Flatbed 3210 only Approx 11 7 x 17 in 297 x 432 mm ADF3 3 The ADF supports sheets of paper up to 100 inches 2540 mm in length For scanning paper ...

Страница 12: ...out Red Green Blue Switchable Background Ultrasonic Multifeed Scan Time Bar Code Recognition Additional Contents Power Cord USB 2 0 Cable Roller Cleaning Kit CD ROM Operator Manual VRS Professional User Utility Software Printed Documents Quick Installation Checklist Bundled Software Kofax VCDemo Kofax Scan Demo Software Consumables Options See the Consumable Parts List on page 14 Imprinter Options...

Страница 13: ...nual on your Trūper Installation Resource CD ROM Bar Code Recognition This image filter recognizes the bar codes in the scanned images Refer to the application s operating manual for how to use the bar code Blank Page Deletion This feature detects and deletes blank pages based on content Blank Page Deletion is intended for batch scanning in Duplex mode Please refer to the VRS manual on your Trūper...

Страница 14: ...ning speed will vary depending on the computer memory CPU operating system and the scanning or document management software application used For additional system requirements please consult the user manual for your scanning or document management software application Part Number Description S005504 Roller Cleaning Kit S006043 Roller Exchange Kit 0123030 Imprinter Unit S005506 Imprinter Ink Cartri...

Страница 15: ...de Feeder ADF door Feeder tray Feeder extension tray Back stopper Power switch ADF door release Auto or manual feed selector Exit tray Power indicator Document cover Exit stopper STOP START button Imprinter door Top cover USB connector Fan exhaust Power cord AC input Exit door ...

Страница 16: ...www kodak com go docimaging 16 of 144 Flatbed sheet Flatbed glass Exit door release ADF glass Reference plate ADF glass Reference plate ...

Страница 17: ...the following diagrams This will allow you to use all of the features of the scanner and will assure that there is proper ventilation for the unit Top View Front View Clearance necessary to remove or install the computer interface board 7 9 in 200 mm Clearance necessary to open the imprinter door 13 8 in 350 mm Clearance necessary to open the document cover 23 6 in 600mm ...

Страница 18: ... Automatic Document Feeder ADF remove all staples and paper clips from the sheets that you want to scan Do not disassemble the scanner This will void your warranty If there is a need to disassemble the scanner please contact an authorized service provider Do not place floppy disks or any items containing magnetic data strips on the flatbed Magnets located in the flatbed sheet which is attached to ...

Страница 19: ...the scanner may cause severe damage If this occurs turn the scanner off and unplug the power cord Please contact an authorized service provider Do not place books paper or other items on the scanner Do not place the scanner in an area where there is a lot of smoke dust chemical fumes or vibration Liquids Thinner Dust Smoke ...

Страница 20: ...the scanner is not used for an extended period Do not place the scanner on an uneven or unstable surface Do not use the feeder tray or the flatbed cover as a handle At least two people should carry the scanner They should lift and hold the scanner securely with hands placed under the front and back sides ...

Страница 21: ...t the light of the scanner lamp You may damage your eyes Do not place the scanner in direct sunlight or in a cold draft Do not place the scanner in a vertical position The scanner cannot function in this position Place the scanner only in a horizontal position Hot Cold ...

Страница 22: ...ditioning vent Do not place the scanner in a room with extremely high or low humidity Do not place the scanner near other appliances or near machinery that generates large amounts of electro magnetic interference EMI Do not place the scanner on carpet Static electricity can cause the scanner to malfunction ...

Страница 23: ...er The scanner must be connected to a grounded outlet The scanner should be used only with the power cord that is supplied with the scanner or with a power cord that has been approved by a certified electrical contractor Do not use an extension cord Handling the CD ROM To prevent accidental damage to CD ROMs handle them carefully as shown below Do not touch or write on the surface of the disc Do n...

Страница 24: ...w kodak com go docimaging 24 of 144 Do not place heavy objects on the disc case or drop the case To clean the disc hold the disc by its edges and wipe it from the center to the edges with a dry soft cloth ...

Страница 25: ...D ROM drive Click OK Select your language and click OK Then locate the manual as described above Verify the computer system requirements Refer to Computer System Requirements on page 14 Attach the feeder tray to the scanner Connect the scanner Refer to Initial Setup and Installation on page 28 Install the software Refer to Initial Setup and Installation on page 28 You can also access the Trūper 32...

Страница 26: ... missing parts please contact the reseller where you purchased the Trūper scanner  Note It is highly recommended that you keep the original carton and all the packing materials in case you need them later See the Repacking Instructions on page 112 CD ROM with Operator manual VRS and driver software Roller cleaning paper 3 pieces Shading paper Blower USB 2 0 cable Feeder tray Power cord ...

Страница 27: ...ted in the left side of the feeder into the hole located on the left arm of the feeder tray Install the right side of the feeder tray by inserting the pin located in the right side of the feeder into the hole located on the right arm of the feeder tray A small amount of pressure will be required to align the pin with the hole 1 2 ...

Страница 28: ... input on the back of the scanner and connect the other end to a power outlet Connect the supplied USB cable to an available USB 2 0 port on the computer and connect the other end to the USB connector on the scanner Use the supplied USB cable Do not connect the scanner to a USB hub A hub connection is not guaranteed to work 1 2 3 Power cord USB cable AC input USB connector ...

Страница 29: ...ndows Scanner Driver Press the scanner power switch to the ON position The LED will at first display a flashing orange light The scanner is ready when the LED displays a steady green light Turn on the power for the computer 1 LED Power switch ON position 2 ...

Страница 30: ...indows Vista log on with Administrator privileges Windows will detect the scanner and start the Found New Hardware Wizard Follow the procedure described in the following steps and diagrams 1 Click Next 2 Select Search for a suitable driver for my device then click Next 3 ...

Страница 31: ...k com go docimaging 31 of 144 3 Select CD ROM drives then click Next 4 Insert the Trūper Installation Resource CD ROM into the appropriate drive on the computer 5 When Windows finds the device driver click Next ...

Страница 32: ...e Browse option in the Files Needed dialog box Browse to the folder D minidriver where D is the letter for the drive that contains the Trūper CD ROM If there is no request for files needed continue with the next step 7 If the Windows XP compatibility message appears click Continue Anyway ...

Страница 33: ...odak com go docimaging 33 of 144 8 The Found New Hardware Wizard will now complete the installation of the driver When the wizard has finished click Finish to complete the installation 9 Restart the computer ...

Страница 34: ...ep If the installation menu does not appear select the Windows option Start Run and type D where D is the letter of drive that contains the Trūper CD ROM Locate the file setup exe on the CD ROM and double click the file to open the installation menu Select your language from the language dialog box then click OK From the Installation CD s Main menu click on the image of the scanner located on the ...

Страница 35: ...ion procedure If loading on a PC running Windows 2000 XP or Vista you will need to log on to the PC with Administrator privileges in order to complete the installation Please refer to your Windows User manual or call your information technology department to find out how to log on with Administrator privileges Step 1 User Utility 1 Click Step 1 User Utility The User Utility must be installed to pr...

Страница 36: ...ment and click Yes to accept the agreement 3 Click Next to select the default destination folder for the program files recommended To install the files in a different folder click Browse and select a different destination then click OK in the Choose Folder window ...

Страница 37: ...www kodak com go docimaging 37 of 144 4 Click Next to select the default folder for program icons The User Utility Setup is performing the installation ...

Страница 38: ...www kodak com go docimaging 38 of 144 5 When the setup is complete click Finish The Trūper User Utility Help files will automatically install ...

Страница 39: ...maging 39 of 144 6 Click Next to continue 7 When the setup is complete click Finish Step 2 ISIS TWAIN Driver 1 Click Step 2 ISIS TWAIN Driver The BBH 3210 ISIS TWAIN driver must be installed to properly operate the scanner ...

Страница 40: ... go docimaging 40 of 144 2 Read the license agreement and click Yes to accept the agreement 3 Close all other Windows programs then click Next The Setup displays the progress of the installation using progress bars ...

Страница 41: ...u restart the PC log on with Administrator privileges Click Start on the PC s Desktop and select Run In the Run dialog box type D setup exe where D is the letter for the drive that contains the Trūper Installation CD ROM Click OK to start the setup Select your language Click on the image of the scanner you are installing Trūper 3210 scanner Select Install Software from the Install Software screen ...

Страница 42: ...oftware is considered a silent install No additional screens will display or be visible during the installation procedure however as the installation begins the message VRS is Installing Please wait This message will disappear when VRS has finished will display on the Install Software screen This indicates the installation of VRS is occurring no other screens will display during the installation p...

Страница 43: ...maging 43 of 144 When the message VRS is Installing Please wait This message will disappear when VRS has finished disappears or is no longer displayed the installation of VRS is complete 3 Click Yes to restart the computer ...

Страница 44: ...on to Kofax VRS Scanner This is the certified ISIS driver for this configuration DO NOT select Bowe Bell and Howell 3210 For TWAIN applications set Scanner Selection to Kofax Software VRS TWAIN Contact your application reseller for more information Scanning Applications with Direct ISIS connectivity Occasionally an ISIS application based on PixTools may not support the recommended VRS based ISIS d...

Страница 45: ...N connectivity select the following driver TWAIN Application Scanner Selection Bowe Bell and Howell 3210 This is the certified TWAIN driver for direct connectivity Optional Utilities 1 Click Optional Utilities from the Install Software screen 2 From the Optional Utilities screen install any of the options available depending on your needs HiZoom used for measuring RGB values on a scanned image Sca...

Страница 46: ...need Adobe Acrobat Reader Insert the CD ROM in the computer Select the language you want to use To be able to view the manuals for the Trūper 3210 click the image of the Trūper 3210 scanner Click View Manuals Click the corresponding button for the manual s you wish to view  Note The information contained in the Trūper Advanced Features manual applies to both the Trūper 3210 and Trūper 3610 model ...

Страница 47: ... Utility 2 ISIS TWAIN Driver 3 VRS 4 Application scanning application Optional Utilities View Manuals Trūper Operator Manual 3210 or 3610 depending on scanner model selected Trūper Advanced Features Manual VRS Manuals Driver Interface Manuals Install Adobe Reader Browse CD Contents View Our Website Register Now Contact Us ...

Страница 48: ...Turn on the scanner Press the power switch to the ON position The LED will at first display a flashing orange light The scanner is ready for scanning when the LED displays a steady green light After the scanner s LED light is green turn on the computer 1 2 LED Power switch ON position ...

Страница 49: ...can or scanning in process Green flashing Sleep mode Orange Ready to scan or scanning with warning1 1 The rollers need to be cleaned or replaced Orange flashing Initializing or Sleeping with warning2 2 Check the status of the scanner using the Trūper User Utility included on the CD ROM or by clicking the icon on the computer desktop Red An error occurred2 ...

Страница 50: ...nes for Using the ADF For best results follow these guidelines for documents that will be scanned using the ADF Automatic Document Feeder Caution Prior to scanning with the ADF remove all staples and paper clips from sheets Recommended paper Plain paper with a maximum sheet thickness of 2 0 to 5 9 mils 0 05 to 0 15 mm and weight of 10 6 to 34 pounds 40 to 127 grams meter2 1 mil 1 1000 inch The wei...

Страница 51: ...heets that can be loaded on the feeder tray Sheets that are exceptionally thick or thin should be placed in the ADF manually one sheet at a time or they should be scanned using the flatbed Curled wrinkled or folded documents may not scan properly Check the allowances for curl and fold in the following diagram Paper weight pounds 11 14 17 20 21 24 28 34 Paper weight grams meter2 40 52 64 75 80 90 1...

Страница 52: ...Tracing paper Copying paper such as carbon paper Damaged or wrinkled documents Photographs Coated paper Thick plastic cards such as credit cards or identification cards Torn sheets and documents with notches or holes or punched or perforated sheets Extremely smooth or shiny paper Paper that is highly textured Paper with carbon sheets Carbonless NCR paper If a jam occurs in the document feeder redu...

Страница 53: ...d paper clips from sheets Separate documents that have been stapled or clipped together Remove glued documents and documents that are curled these types of document may cause a paper jam and damage the unit These types of documents should be scanned using the flatbed Carefully align the documents 1 1 Fan the stack of documents to separate all the sheets Be sure the edges of the sheets do not stick...

Страница 54: ... slightly wider than the size of the document They can be width adjusted independently of one another which allows the Operator to left right or center align documents for feeding into the scanner s transport Set the feed selector switch to AUTO 3 Document guides 4 Feed selector AUTO position ...

Страница 55: ...7 inches 432 mm When scanning a document longer than 17 inches 432 mm or A3 size 420 mm fold down the exit stopper so that the longer paper will fit in the exit tray Load the documents on the feeder tray with the side to be scanned facing up Note the directional Face Up icon and the document sizing scale on the ADF door Slowly push the sheets in the direction of the arrow until they stop To scan i...

Страница 56: ... document guide Placing more sheets in the feeder tray may cause a paper jam Do the following to configure the driver Open the Scanner Properties window Select ADF from the Source drop down list and click OK You are now ready to scan Refer to the instructions for your scanning or document management software application Loading Landscape Loading Portrait Paper limit mark 7 ...

Страница 57: ...w to prepare documents for scanning with the ADF see Document Preparation on page 50 If you have difficulty when scanning documents with the ADF use the flatbed If a paper jam occurs remove the jammed sheet or sheets using one or both of the following procedures Removing Paper Jams from the Document Feeder Caution Do not attempt to pull out jammed paper with the ADF door closed This action may dam...

Страница 58: ...ve the jammed paper through either the document feeder or the exit path as described in Removing Paper Jams from the Exit Path on page 59 Close the ADF door When you close the ADF door close it securely until the door is locked Do not slam the ADF door If the jammed paper cannot be removed from the document feeder remove it from the exit path as described in Removing Paper Jams from the Exit Path ...

Страница 59: ...aper Jams from the Exit Path Pull the exit stopper forward and raise the feeder tray in the direction of the arrow until the tray clicks into place Pull the exit door release lever and open the exit door 1 Feeder tray Exit stopper 2 Exit door release ...

Страница 60: ...t door When you close the exit door close it securely until the door is locked Do not slam the exit door If the jammed paper cannot be removed from the exit door remove it from the document feeder as described in Removing Paper Jams from the Document Feeder on page 57 3 Exit door release Exit door 4 ...

Страница 61: ...functions depending on the mode of operation Emergency Stop mode default If the scanner is running and feeding paper press the blue STOP START button to immediately stop the paper in the scanner This is the default mode of operation Follow the Clearing Paper Jams steps to remove the paper jammed in the scanner ...

Страница 62: ... click the Start Batch button or button with similar name in the scanning application to start scanning the batch of documents from the application The scanner paper feed rollers will automatically start and stop to feed the documents in the scanner Manual Feed Use this mode when feeding mixed document types that are difficult to separate and typically cause multifeed problems In this mode the ADF...

Страница 63: ...ation press the STOP START button to stop scanning This is not an emergency stop The scanner will complete scanning of the document and then stop prior to feeding the next document With this setting activated the operator manually controls the scanner start and stop document feed operation Continue steps 2 3 and 4 until you are ready to close your batch with the scanning application Automatic Star...

Страница 64: ...bottom feeder roller is dropped making it easier to scan thicker documents through the ADF To scan a single sheet manually perform the following procedure Set the feed selector switch to MANUAL The feeder will adjust automatically to the manual feed position Adjust the document guides so that the space for the document is slightly wider than the size of the document 1 Feed selector MANUAL position...

Страница 65: ...ng the scanner settings as described on page 62 Feeding Speed When scanning thin paper badly creased paper fragile paper etc use the Slow mode This speed slows the documents that are fed through the ADF Automatic Document Feeder to about one half the speed of Normal mode The image quality in the Slow mode is the same as in the Normal mode  Note At a resolution above 300 dpi the paper is fed at th...

Страница 66: ...ct double feed even when sheets are superimposed exactly on top of each other but it may not be detected properly with some paper thicknesses and when creasing and other factors are present When important documents are to be scanned check the number of document sheets and the number of scanned image sheets When scanning a document containing paper in different sizes double feed can be detected whe...

Страница 67: ... the levels in the Sensitivity drop down list 5 Select one of the following from the Action drop down list High Select this when feeding thin documents Normal This is the standard sensitivity Low Select this when feeding thick documents Beep Signal alert Stop Scanning Stops the scanning process for operator attention This is the default setting ...

Страница 68: ...s in this way is known as scanning with the flatbed Caution Do not place floppy disks or any items containing magnetic media on the flatbed The flatbed sheet contains magnets that may damage data stored on floppy disks or magnetic media Raise the feeder tray in the direction of the arrow until the tray clicks into place Open the document cover in the direction of the arrow In the scanning applicat...

Страница 69: ...horter edge of the document along the left edge of the flatbed glass Match the shorter edge with the standard mark 3 Place the longer edge of the document along the top edge of the flatbed glass Match the longer edge with the standard mark  Note If the document is slanted and not properly aligned along the left and top edges of the flatbed glass the document will not be scanned properly 4 Standar...

Страница 70: ...uring scanning Be sure to close the document cover before scanning and do not look directly at the scanner light You may damage your eyes After scanning open the document cover and remove the document Do the following to configure the driver Open the Scanner Properties window Select Flatbed from the Source drop down list and click OK You are now ready to scan Refer to the instructions for your sca...

Страница 71: ...e document that are not touching the flatbed glass will not be scanned properly If the document moves during scanning the document will not be scanned properly Repeated Use of the Flatbed When using flatbed scanning for a series of documents keep the feeder tray raised You only need to raise and lower the document cover as you scan each document ...

Страница 72: ...e background color may affect the use of other scanning features that need to be resolved within the scanning applications feature settings The default background color has been set to black You can set the background color to white or black To change the background color change the color reference plates and then change the flatbed sheet to match the color selected with the reference plates Follo...

Страница 73: ...ed over and is locked in position Locate reference plate B Using your finger turn over reference plate B and select the color you want for the background Confirm that the reference plate has been turned over and is locked in position The color selected for reference plate B should now match the color selected for reference plate A 3 ADF glass Reference plate A 4 Reference plate B ADF glass ...

Страница 74: ...k on one side and white on the reverse side The flatbed sheet color is initially set to black You can set the color to white or black To change the color of the flatbed sheet perform the following procedure Press the power switch to the OFF position Raise the feeder tray in the direction of the arrow The feeder tray will click into place in the upright position Open the document cover in the direc...

Страница 75: ...in brackets located on the document cover The flatbed sheet is attached to the brackets with magnets embedded in the sheet Turn the flatbed sheet over so that the color you want for the background faces the flatbed glass then re attach the sheet to the document cover by positioning the corners of the sheet in the brackets 4 5 ...

Страница 76: ...y the feeder and feeder tray ADF cover and other surfaces with a soft cloth The insertion and exit slots of the ADF can become soiled with dirt grime and paper dust Clean these areas at least once per month or more often if there is an accumulation dust Use a brush to remove dirt and dust from the exhaust fan vent on the back side of the unit near the power cord connection and from the two vents o...

Страница 77: ...nning with the flatbed if black dots or white patches appear in the scanned results open the document cover and clean the flatbed glass and flatbed sheet using the roller cleaning paper If black or white lines appear on the scanned images clean the ADF glass areas and the reference plates as described in Cleaning the Background Color Reference Plates and ADF Glass on page 85 Clean the flatbed glas...

Страница 78: ...place with temperature over 104o F 40o C Use the roller cleaning paper only to clean the rollers and scanning area If you need more information about the roller cleaning paper please refer to the Material Safety Data Sheet MSDS available upon request from Böwe Bell Howell Scanners Preparation Cut the roller cleaning paper bag on the dotted line and take out the roller cleaning paper Use the roller...

Страница 79: ...he roller cleaning paper to remove any dirt or grime from the surfaces of the paper feed roller and separation roller Hold the roller to prevent it from rotating then wipe the roller from one side to the other in the direction of the arrows shown in the diagram Turn the roller as you continue to wipe and clean all the way around the roller 1 2 ADF door ADF door release 3 Paper feed roller Separati...

Страница 80: ...se the roller cleaning paper to remove the dirt from the surface of the retard roller Hold the roller to prevent it from rotating then wipe the roller from one side to the other in the direction of the arrows shown in the diagram Turn the roller as you continue to wipe and clean all the way around the roller 4 Retard roller Retard cover Indent 5 Retard roller ...

Страница 81: ...am the retard cover Close the ADF door When you close the ADF door close it securely until the door is locked Do not slam the ADF door Proceed to the following section Cleaning the Drive Rollers and Free Rollers in the ADF Cleaning the Drive Rollers and Free Rollers in the ADF Press the power switch to the OFF position Push the ADF door release button to open the ADF door 6 Retard roller Retard co...

Страница 82: ...cleaning paper to remove the dirt from the surfaces of the four 4 free rollers Hold the roller to prevent it from rotating then wipe the roller from one side to the other in the direction of the arrows shown in the diagram Turn the roller as you continue to wipe and clean all the way around the roller Close the ADF door When you close the ADF door close it securely until the door is locked Do not ...

Страница 83: ... Use the roller cleaning paper to remove the dirt from the surfaces of the four 4 drive rollers and the two 2 exit rollers Hold the roller to prevent it from rotating then wipe the roller from one side to the other in the direction of the arrows shown in the diagram Turn the roller as you continue to wipe and clean all the way around the roller 1 2 Exit door release 3 Exit rollers Drive rollers Dr...

Страница 84: ... diagram Turn the roller as you continue to wipe and clean all the way around the roller Close the exit door When you close the exit door close it securely until the door is locked Do not slam the exit door When finished clear the clean roller counter as described in step 6 After cleaning the rollers click the icon to open the Trūper User Utility Select the User Utility option to clear the roller ...

Страница 85: ... Reference Plates and ADF Glass Press the power switch to the OFF position Pull the exit door release lever to open the exit door In the scanner base assembly clean the ADF glass A and reference plate B with the roller cleaning paper 1 2 3 ADF glass A Reference plate B ...

Страница 86: ... exit door assembly clean the reference plate C and ADF glass D with the roller cleaning paper Close the exit door When you close the exit door close it securely until the door is locked Do not slam the exit door 4 Reference plate C ADF glass D 5 ...

Страница 87: ...ower switch to the OFF position Push the ADF door release button to open the ADF door Use the blower accessory to blow off any dirt from the surface of the paper sensor and waiting sensor Also blow off any dirt from the surface of the metal reflector sheet used by the waiting sensor Blower accessory Blower Sensor or detector 1 2 3 Waiting sensor Reflector sheet for waiting sensor Paper sensor ...

Страница 88: ...or close it securely until the door is locked Do not slam the ADF door Cleaning the Starting Skew and Ending Sensors Preparation Locate the blower accessory and remove the brush from the blower Press the power switch to the OFF position Pull the exit door release lever to open the exit door 4 Double feed detector A Double feed detector B 5 Blower accessory Blower Sensor or detector 1 2 ...

Страница 89: ... reflector sheets for the starting sensor skew sensor left skew sensor right and the ending sensor Close the exit door When you close the exit door close it securely until the door is locked Do not slam the exit door 3 Ending sensor Skew sensor left Starting sensor Skew sensor right 4 Reflector sheet for skew sensor right Reflector sheet for ending sensor Reflector sheet for skew sensor left Refle...

Страница 90: ... package of the roller cleaning paper as described in Roller Cleaning Paper on page 78 Press the power switch to the OFF position Raise the feeder tray in the direction of the arrow until the tray clicks into place Open the document cover in the direction of the arrow Roller cleaning paper Blower accessory Dotted line Blower Sensor or detector 1 2 3 Document cover Feeder tray ...

Страница 91: ...he surface of the flatbed sheet Use the blower accessory to blow off any dirt that may have accumulated in the area of the document cover detector Close the document cover Gently close the document cover and do not slam the cover Lower the feeder tray to its original position 4 Flatbed sheet Flatbed glass Document cover detector Feeder tray 5 6 7 ...

Страница 92: ...e after 300 000 scans Replace the roller modules more often if you find that cleaning inside the scanner no longer improves paper jamming slipping multi feeding marking and similar feeding problems Preparation Open the Roller Exchange Kit Roller Exchange Kits are available from the reseller where you purchased your Trūper scanner or our Authorized Spare Parts Resellers See also the Consumable Part...

Страница 93: ...f the roller module and pull down the roller module in the direction of the arrow as shown in the diagram The module will be released from the magnets located in the ADF door assembly 2 Disengage the shaft on the roller module from the brackets in the ADF door assembly as shown in the diagram Carefully disengage the gears on the roller module from the gears in the ADF door assembly 3 ...

Страница 94: ...on the roller module into the brackets in the ADF door assembly 2 Carefully match the gears on the roller module with the gears in the ADF door assembly 3 Push up the roller module in the direction of the arrow shown in the diagram so that it is locked in place by the magnets located in the ADF door assembly Close the ADF door When you close the ADF door close it securely until the door is locked ...

Страница 95: ...pen the Roller Exchange Kit Roller Exchange Kits are available from the reseller where you purchased your Trūper scanner or from one of our Authorized Spare Parts Resellers See also the Consumable Parts List on page 14 Press the power switch to the OFF position Push the ADF door release button to open the ADF door Open the retard roller cover by pulling up the cover from the right side Pull the co...

Страница 96: ... diagram Open the Roller Exchange Kit and take out the new retard roller Install the new retard roller as shown in the steps and diagram 1 Hold the ends of the roller shaft and lower the roller into the metal brackets 2 Match the groove on one side of the roller shaft with the metal bracket that fits the groove When the groove is matched with the bracket the roller shaft slides into the bracket 4 ...

Страница 97: ...o not slam the retard cover After replacing the paper feed and retard roller modules click the icon to open the Trūper User Utility Select the User Utility option to clear the clean roller counter See Scanner Counter on page 104 Close the ADF door When you close the ADF door close it securely until the door is locked Do not slam the ADF door 7 8 ...

Страница 98: ...nd the Trūper User Utility icon on the computer desktop please see Trūper Software Installation on page 34 Starting the User Utility Click the Trūper User Utility icon on the computer desktop or click the Start button on the Windows taskbar and select Programs BBH and then Scanner Tools  Note When starting the Trūper User Utility the Select Scanner dialog box may appear If this dialog box appears...

Страница 99: ... This section displays the status of the connected scanner along with error codes For information about the messages and error codes see User Utility Error Codes on page 107 Scanner Information This section displays the following information Model name and number Firmware Version Memory requirements Interface one of the following STI USB HS USB 2 0 Hi Speed default configuration STI USB FS USB 1 1...

Страница 100: ...ed adjust the minutes in the Waiting Time box then click OK The waiting time can be set from one to 60 minutes in one minute increments If you do not want to change the settings click Cancel Clean Imprinter The Clean Imprinter button is enabled only when the imprinter is installed in the scanner If the imprinter ink cartridge is clogged first close the imprinter door then click the Clean Imprinter...

Страница 101: ...ded with the scanner See also Appendix 3 Shading Adjustment on page 136 1 Click the User Shading button on the User Utility window 2 Click the Start Shading button on the User Shading dialog box The User Shading utility will guide you through the necessary steps 3 Clean the inside of the scanner refer to Cleaning Inside the Scanner on page 77 When finished click OK 4 Turn over both the front and b...

Страница 102: ...eriorate Use only the shading paper supplied with the scanner Using other types of paper for shading adjustment will cause the image quality to deteriorate 6 The scanner reads the shading paper and the shading adjustment sets the reference for the white shading plate Wait until the Now Adjusting message box is cleared from the screen 7 Turn over both the front and back reference plates to the blac...

Страница 103: ...storing Shading to the Default You can restore shading adjustment data to the factory default setting Use this function if the image quality deteriorates or if it has not improved as a result of the shading adjustment process 1 Click the User Shading button on the User Utility window 2 Click the Restore Default option on the User Shading dialog box 3 Click OK to confirm that you want to restore th...

Страница 104: ...er Clean Roller number is greater than the Warning number listed next to the counter the rollers need to be cleaned The Warning number indicates how many pages can be scanned after roller cleaning before the rollers will need to be cleaned again After Replace Roller Displays the number of pages scanned after the rollers were last replaced When the After Replace Roller number is greater than the Wa...

Страница 105: ...canner The User Utility functions and settings will then apply to the selected scanner To select a different scanner 1 Click the Select Scanner X button 2 Click the drop down list and select a different scanner then click OK If you do not want to select a different scanner click Cancel Save Info The Save Info option allows you to save current scanner and computer system information to a log file 1...

Страница 106: ...106 of 144 Check Version Information To check the software version of the User Utility 1 Open the User Utility and right click the title bar at the top of the display window 2 Click the About option to view the version information ...

Страница 107: ...ty Open the ADF and exit doors and remove the paper See page 57 Clean the sensors See page 87 U20 Skew error occurred A skew error has occurred Open the ADF and exit doors and remove the paper See page 57 U23 Double feed occurred Please open the door and remove the paper A double feed error has occurred Open the ADF and exit doors and remove the jammed paper See page 57 Rollers are dirty Clean the...

Страница 108: ...and or scanning sensor need to be replaced It is time to replace the lamp and scanning sensor back Replace the lamp and scanning sensor back by contacting your Authorized Service Provider Warning The front reference plate may need to be cleaned Please clean the front reference plate The front reference plate is dirty Clean the front reference plate See page 85 Warning The back reference plate may ...

Страница 109: ... with power supply Disconnect the scanner from the power outlet and call for service The computer does not recognize the scanner USB connection Scanner is not connected to the computer properly Connect the interface cable properly See page 28 USB Scanner has not been properly configured using the Windows Found New hardware procedure Uninstall the scanner from the computer Reinstall the scanner in ...

Страница 110: ...ve reached their life expectancy Replace the paper feed roller module and the retard roller module See page 92 The document is curled or folded Flatten the document reduce the number of sheets to be scanned and load the document again See page 50 and page 53 An irregular type of document needs to be scanned Use the flatbed scanner See page 68 The document has a length of less than 2 75 in 70 mm Us...

Страница 111: ... distribution of the quantity of light in the scan varies Perform the shading adjustment See page 136 The color of the scanned document is very different from the original document The settings of the computer display or the monitor are not correct Adjust the computer display and monitor settings Dark spots or noise appear on the scanned documents The ADF glass areas reference plates flatbed glass...

Страница 112: ...orizontal position Press the power switch to the OFF position Disconnect the scanner from the electrical outlet and disconnect the interface cable Remove the feeder tray at points 1 and 2 See page 27 Wrap the tray with protective sheets of plastic Seal the plastic with tape Fold down the exit stopper Pack the scanner in the original carton and packing materials Note the packing arrangement in the ...

Страница 113: ...ic Document Feeder mode Opening the exit door allows access to the ADF glass areas background reference plates and rollers Exit tray The output tray of the scanner As the documents are scanned they exit the scanner and are stacked face down in this tray Feed Roller Assembly The roller assembly of the feeder that sits on top of the stack of documents on the feeder tray This is the roller assembly t...

Страница 114: ...lers Rollers spaced along the paper path move the documents to be scanned through the mechanical section of the scanner Separation roller This roller holds back all but the top document in the stack of documents This roller allows the paper feed roller to feed a single document at a time into the scanner Simplex scanner A scanner designed to scan a single side of a document as it passes through th...

Страница 115: ... from the reseller where you purchased your Trūper scanner or from one of our Authorized Spare Parts Resellers See also the Consumable Parts List on page 14 Safety Precautions Caution Keep the ink cartridge out of the reach of children Do not disassemble the imprinter unit and ink cartridge When the ink cartridge is at the end of its useful life do not dispose of it in fire ...

Страница 116: ...cimaging 116 of 144 Component Identification Installing the Imprinter Unit Turn the scanner power switch to the OFF position Ink cartridge Ink cartridge adjusting lever Scale Connector Carriage 1 OFF position Power switch ...

Страница 117: ...imprinter door in the direction of the arrow Connect the imprinter cable to the connector on the scanner  Note Before you insert the connector be sure to match the rib on the imprinter cable connector with the slot on the scanner connector 2 3 Ribs ...

Страница 118: ...ter unit into the guides located on the bracket Match the channels in the pins with the guides Insert the lower pins into the guides located on the bracket Match the channels in the pins with the guides Gently insert the pins until they are locked in place by the springs 4 5 ...

Страница 119: ...ww kodak com go docimaging 119 of 144 Close the imprinter door in the direction of the arrow When you close the imprinter door close it securely until the door is locked Do not slam the imprinter door 6 ...

Страница 120: ...npacking the unit the print quality may be affected Be sure that the storage temperature is between 32 F and 104 F 0 C and 40 C Store the ink cartridge away from direct sunlight Do not clean the ink cartridge with alcohol Warning Do not disassemble the ink cartridge Do not let the ink come into contact with your skin If the ink comes into contact with eyes rinse the area completely with fresh wate...

Страница 121: ... carriage on the imprinter unit to the position for ink cartridge exchange as shown in the diagram Insert the ink cartridge into the carriage as shown in the diagram Lock the cartridge adjusting lever as shown in the diagram 2 Exchange position 3 4 ...

Страница 122: ...the side of the imprinter unit For the imprint to appear on the right side of the page move the carriage to the right side of the scale For the imprint to appear on the left side of the page move the carriage to the left side of the scale The tab on the printer carriage must be aligned with one of the marks on the scale If the carriage is not properly aligned the unit will not print Printing Posit...

Страница 123: ...anning or document management software application  Note With certain types of paper the ink from the imprinter may stain the inside of the scanner For example ink may stain the scanner rollers If this occurs clean the areas affected by using the roller cleaning paper See Roller Cleaning Paper on page 78 ...

Страница 124: ...he Trūper User Utility then click the Imprinter Cleaning button The unit will perform an automatic cleaning function to improve the print quality Cleaning the Print Head Manually Remove the ink cartridge as described in Removing the Ink Cartridge on page 125 Use a moistened tissue paper to gently wipe and clean the print head Do not use the roller cleaning paper to clean the print head Do not use ...

Страница 125: ...g the Ink Cartridge Move the carriage on the imprinter unit to the position for ink cartridge exchange as shown in the diagram Pinch the cartridge adjusting lever 1 and lift the cartridge 2 You can now remove the ink cartridge 1 Exchange position 2 ...

Страница 126: ...e Approximately 4 000 000 characters standard font Approximately 2 000 000 characters bold font Number of Characters VCDemo 62 characters QuickScan 72 characters The numbers of characters will vary according to the application Nozzles 12 Unusable documents Plastic film or coated paper should not be used with the imprinter Storage environment Temperature 32 F to 104 F 0 C to 40 C Humidity 10 to 80 ...

Страница 127: ...re also reflected on the scanned images  Note A Starting Number Automatic Increment function is provided When used the starting number is incremented to the number at the start of scanning number of pages scanned x step number upon completion of scanning 1 In the Imprinter Setting dialog box select the Enable check box The Imprinter String field now appears 2 To print in bold type select the Bold...

Страница 128: ...ber field type in the default value of the counter specified by the imprinter string 5 In the Step Number field type in the step number of the counter specified by the imprinter string 6 Type in the printing offset in the Printing Offset field A 10 mm offset is always added to this value Unit 2 38 mm per increment printing orientation 900 270 1 12 38mm 2 14 76 mm Unit 3 44 mm per increment printin...

Страница 129: ...e or green It is used mostly in OCR Optical Character Reading to dropout the form lines  Note The Single Color Dropout function can be set independently for the front and back of a document The function can be used only with binary images in the Black and White or Binary modes Depending on the scanning conditions and colors it may not be possible to delete the specified colors completely 1 Naviga...

Страница 130: ...list in Advanced Settings dialog box 4 Click the OK button Multicolor Dropout MCD The Multicolor Dropout function can be used to specify and remove up to 6 colors 1 Navigate to your scanning application and select Settings 2 Click the More button in the Settings dialog box 3 Click the Dropout button ...

Страница 131: ...m go docimaging 131 of 144 Selecting Multicolor Dropout 1 Click the Selection 1 radio button 2 Select the Enable check box and then click the Choose button 3 Enter the RGB number or HiZoom values and then click OK ...

Страница 132: ...odified manually 4 If desired do one of the following Adjust the numbers in Hue Saturation and Value text boxes  Note Hue determines the color and can contain values of 0 3601 Saturation defines the intensity of the color and can contain values of 0 1000 Value controls the brightness of the color and can range from 0 1000 Base Color Dropout Color Result Hue Saturation and Value determine Dropout ...

Страница 133: ... intensity to dropout and the Value Range is the level of brightness to dropout 5 To add additional dropout colors click the next Selection radio button and repeat steps 2 through 4 There can be up to 6 dropout colors 6 In the Maximum Replacement Value section do one of the following Select the Automatic check box and adjust the bar accordingly Select the Auto check box to completely dropout the c...

Страница 134: ...utton for the color you want to disable and then clear the Enable check box  Note Any and all of the selections can be active at the same time When setting ranges to the Hue Saturation and Value Ranges the user can always reset the slide bars to the starting recommended default ranges ...

Страница 135: ...age Size Page Layout Feed Dots per inch 300 is a good standard and Paper Source 3 Using your scanning application scan the document that has the colors you want to drop out 4 Using the utility HiZoom point to which color on your scanned document you want to dropout HiZoom is pointing to the color on grid C 5 Â Note The utility HiZoom software can be installed from the Installation Resource CD ...

Страница 136: ...reparation Before performing shading adjustment thoroughly clean the scanner s drive rollers reference plates and ADF glass areas If shading adjustment is carried out while these parts are still dirty it will not be possible to eliminate the lines that form on the scanned images Follow the cleaning procedures beginning on page 81 Click the icon to open the Trūper User Utility Click the User Shadin...

Страница 137: ...IMM Specifications The following DIMM Dual Inline Memory Module specifications are recommended for the Trūper scanner JEDEC Standard 168 pin dual in line memory module DIMM Nonbuffered Single 3 3V 0 3V power supply Frequency CAS Latency 100MHz CL 2 133MHz CL 2 133MHz CL 3 A single 64MB 128MB 256MB or 512MB module may be added The following DIMM brands and modules have been evaluated and approved f...

Страница 138: ...face board Insert the module at an angle as shown in the diagram Push the module until it clicks into place and the white tabs on the module connector close around the DIMM Be sure that the indent on the DIMM module is to the left side when you insert the DIMM as shown in the view in the diagram If the indent is not in this position the DIMM module will not be inserted properly To remove the DIMM ...

Страница 139: ...116 CD ROM Handling 23 Changing the Background Color 72 Changing the Background Color Reference Plates 72 Changing the Background Color with the Flatbed Sheet 74 Check Version Information 106 Checklist 25 Clean Imprinter 100 Cleaning Background Color Reference Plates 85 Drive Rollers 81 83 Feed Roller 79 Flatbed Glass 90 Paper Sensor 87 Print Head Manually 124 Print Head with the User Utility 124 ...

Страница 140: ...tbed sheet 113 Free Rollers 81 83 Front Page Pre Scan Imprinter Installation 115 G Glass ADF glass or flatbed glass 113 Glossary 113 Guidelines for Using the ADF 50 H Help 105 I Image Enhancement 11 Imprinter 113 127 Imprinter Options 12 Initial Setup 28 Ink Cartridge Ink Cartridge Life 126 Nozzles 126 Operating environment 126 Storage environment 126 Unusable documents 126 Ink cartridge 116 Ink c...

Страница 141: ...ard 139 Removing Ink Cartridge 125 Removing Paper Jams Exit path 59 Removing the Interface Board 137 Replacing Consumables 92 Paper Feed Roller Module 92 Retard Roller Module 95 Resolution 114 Flatbed or ADF 11 Restoring Shading to the Default 103 Retard Roller 79 RGB 114 Roller Cleaning Paper 78 Roller cleaning paper 26 Rollers 114 S Safety Precautions 18 115 120 Save Info 105 Scale 116 Scanner C...

Страница 142: ...unter 104 USB Universal Serial Bus 114 USB 2 0 cable 26 USB cable 28 USB connector 28 User Shading 101 User Utility 98 Starting 98 User Utility Error Codes 107 Fxx 107 U11 107 U12 107 U13 107 U14 107 U15 107 U16 107 U17 107 U18 107 U20 107 U23 107 U30 107 U32 107 U34 107 User Utility Main Dialog Window 99 V VirtualReScan 44 VRS 114 W Waiting Sensors 87 ...

Страница 143: ...pt that you may either a make a reasonable quantity of copies of the SOFTWARE solely for backup or archival purposes or b transfer the SOFTWARE to a single hard disk provided that you keep the original solely for backup or archival purposes All other copies of the SOFTWARE are in violation of this Agreement 3 You may not rent or lease the SOFTWARE but you may transfer your right under this License...

Страница 144: ...L S SUPPLIER WARRANTS THAT THE SOFTWARE WILL BE ERROR FREE OR THAT IT WILL MEET YOUR REQUIREMENTS NEITHER BOWE BELL HOWELL NOR BOWE BELL HOWELL S SUPPLIER SHALL BE LIABLE FOR ANY DAMAGE SUFFERED BY YOU INCLUDING BUT NOT LIMITED TO CONSEQUENTIAL INCIDENTAL SPECIAL OR PUNITIVE DAMAGES THE ABOVE LIMITATIONS SHALL APPLY REGARDLESS OF THE FORM OF ACTION WHETHER IN CONTRACT TORT INCLUDING NEGLIGENCE STR...

Отзывы: