


Set Up Menu: DN9344E
55
To change the IP Address Mode
1
With the DN9344E connected to your network, step through the Set Up menus to the ‘IP ADD’
setup page shown below:
2
Use the
UP
and
DOWN
buttons on the right-hand half of the unit (Section 2) to change between
the three available options.
3
Press
SETUP
to confirm (unit will display password menu).
4
Press
SETUP
to exit.
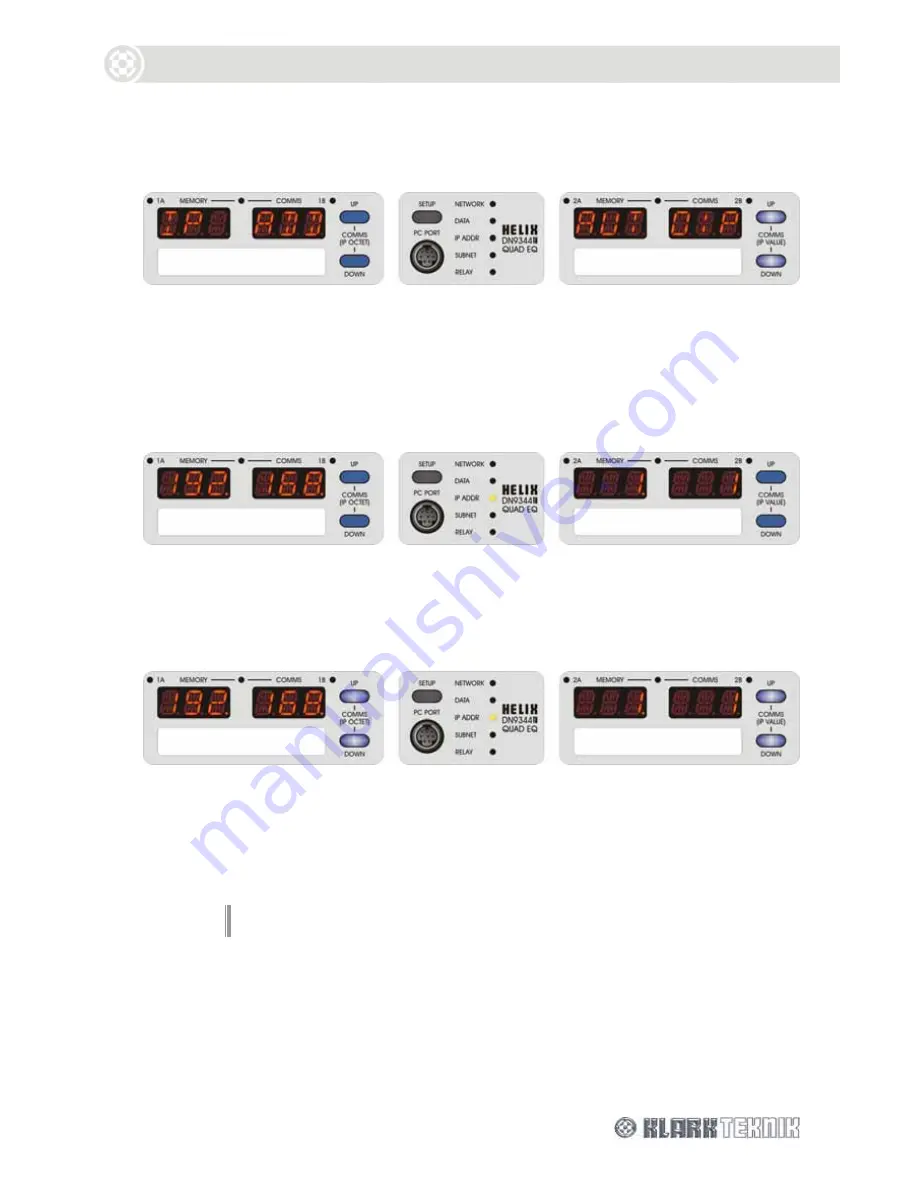
15.6.2
IP Address (Page 8)
This page displays the currently stored IP Address for the DN9344E unit:
If Auto IP or DCHP have been selected
The display is read-only and cannot be modified by the user.
If Manual mode has been selected
1
Use the
UP
and
DOWN
buttons on the left-hand half of the unit (Section 1) to navigate between
each of the four display fields.
2
Now use the
UP
and
DOWN
buttons on the right-hand half of the unit (Section 2) to set a value
between 0-255.
3
Press
SETUP
to confirm (unit will display password menu).
4
Press
SETUP
to exit.
Note
It is important that all units and the controlling PC have a unique IP
Address in order for the network to function correctly.
Содержание HELIX DN9340E
Страница 2: ......
Страница 4: ......
Страница 6: ......
Страница 10: ......
Страница 12: ......
Страница 22: ...Signal Flow DN9340E 12 5 SIGNAL FLOW DN9340E...
Страница 24: ...Operation DN9340E 14 6 1 3 Touchstrip Operation on the Home Page In the home page the touchstrip is inoperative...
Страница 59: ...Signal Flow DN9344 49 13 SIGNAL FLOW DN9344E...