Sending E-mail
Sending an E-mail
1
When the standby screen is displayed, press
j
(hold
down)
→
[E-mail].
The e-mail create screen is displayed.
•
If a screen for initial settings is displayed, follow the on-screen
instructions to complete initial settings. For details, refer to the
section “E-mail Settings” in the Setting Guide.
2
Select the destination entry field
→
k
[Edit].
3
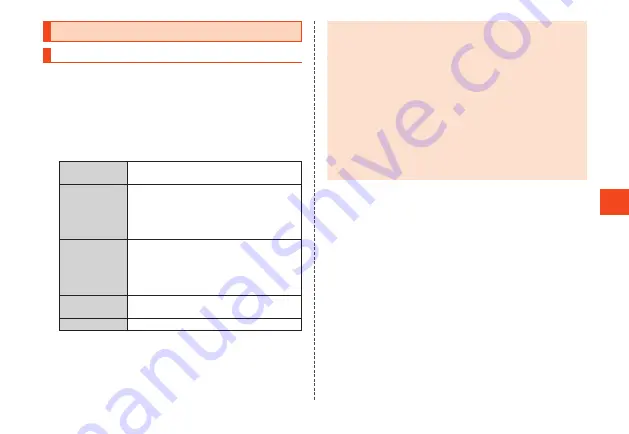
Address Book
Enter an e-mail address from the address
book as the recipient.
Send/Receive
history
Select an e-mail address from the sent or
received history as the recipient.
•
Select
u
(Submenu)
→
[Delete selected]
→
Select e-mail address
→
k
→
o
(Delete)
→
[Yes] to delete history.
Mail Group
Enter all e-mail addresses registered for a
group in the address book as the recipients.
•
If the number of e-mail addresses exceeds
the limit, addresses are entered up to the
limit.
Profile
Enter your own e-mail address as the
recipient.
Direct entry
Enter a recipient directly.
4
Select the subject field
→
k
(Edit)
→
Enter the
subject
→
k
(Done).
5
Select the mail text field
→
k
(Edit)
→
Enter the text
→
k
(Done).
6
o
(Send).
◎
You can save e-mail to the unsent box without sending it by
pressing
u
(Submenu)
→
[Save] before step
6
.
◎ デコレーションアニメ
(decoration anime) is not supported.
◎
Up to 1000 e-mails as the total for all recipients can be sent in
one day.
◎
One e-mail can be sent to up to 30 recipients (including To, Cc,
Bcc, up to 64 1-byte characters per e-mail) at a time.
◎
Emoji sent to an other-brand cell phone, PC, etc. may sometimes
be converted to the other-brand emoji or may not be displayed
properly. Emoji sent to another au phone may sometimes be
converted to an older-version au emoji.
◎
Using “Sending reservation” enables e-mail to be sent on a
specified date at a specified time or when returning from an
out-of-range area where an au phone signal was not possible.
■
Adding Recipients
1
In the e-mail create screen, select the destination
entry field
→
k
(Edit).
2
Select <Enter destination>
→
k
(Edit).
A submenu for selecting the recipient entry method is displayed.
Refer to step
3
of “Sending an E-mail” (
▶
P. 57).
3
o
[Completed].
■
Deleting Recipients/Changing Recipient
Categories
1
In the e-mail create screen, select the recipient entry
field
→
k
(Edit).
2
Select the recipient to delete/change
→
u
(Submenu).
57


