


XL-R5020BK
9
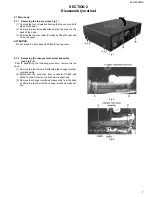
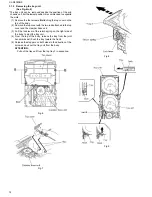
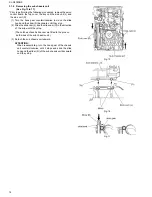
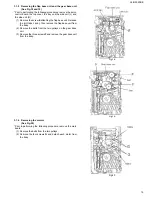
2.1.5
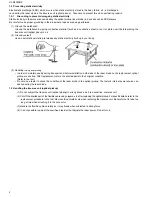
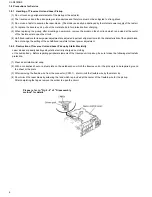
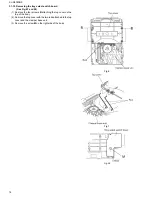
Removing the front panel assembly
(see Fig.9~11)
*Prior to performing the following procedure, remove the top
cover.
*There is no need to remove the changer mechanism assembly
and CD recording mechanism assembly.
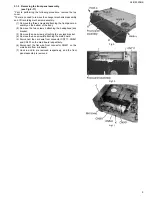
(1) Remove the three screws
H
attaching the front panel as-
sembly on the bottom of the body.
(2) Remove the two screws
I
attaching the headphone jack
bracket.
(3) Remove the one screw
J
attaching the mic jack bracket.
(4) Remove the one screw
K
attaching the main board.
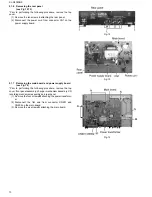
(5) Disconnect the card wire from connector CN711, CN841
and CN501 on the main board respectively.
(6) Disconnect the flat wire from connector CN601 on the
main board from mic board.
(7) Hook
a
and
b
are removed respectively, and the front
panel assembly is removed.
Fig.9
Fig.10
Fig.11
Содержание XL-R5020BK
Страница 5: ...XL R5020BK 5 1 7 Importance admistering point on the safety ...
Страница 28: ...XL R5020BK 28 5 14TC94A02F 005 IC401 MP3 Decoder Block diagram ...
Страница 39: ...XL R5020BK 39 ...
Страница 123: ...0502KTYMDWJEM EN J VC VICTOR COMPANY OF JAPAN LIMITED ...


