


REV
. 10
22-04-2020
INSTALLATION
,
USE AND MAINTENANCE MANUAL
–
PN
17 / 40
Jurop
SpA
Via Crosera n° 50
33082 Azzano Decimo, PN (Italia)
T
EL
. +39 0434 636811 F
AX
. +39 0434 636812
http://www.jurop.it
e-mail: [email protected]
Checking the oil tank level
• Before starting the machine, check the lubricating oil level.
Pic. 6.1
• Do not run the pump with oil level under the minimum level: that
may lead to dry functioning and cause serious damages. (Pic. 6.1).
• Rear mounted tank capacity:
1,2 l (PN 23-33)
and
3,2 l (PN45-58-
84-106)
.
• Side mounted tank capacity:
4 l
.
• Also check that the oil level in the gearbox reaches the side level
hole. Top up through the hole in the upper part.
• Top up with fresh and clean oil only; use the oil required in
paragraph 2.5 or equivalent.
Checking lubrification
• Keep clean the oilers glasses and check dripping into the same
oilers.
• Check dripping in the oilers on a frequent basis during operation.
• Be sure it is regular (about 45-50 drops/min at 1300 rpm) to grant a
correct lubrication of the pump. At lower speeds, the number of drops
must be directly proportional.
Pic. 6.2
If there is no lubrication, the machine overheats
and the internal components deteriorate quickly.
Stop the machine, check the oil level and the
lubrication pump.
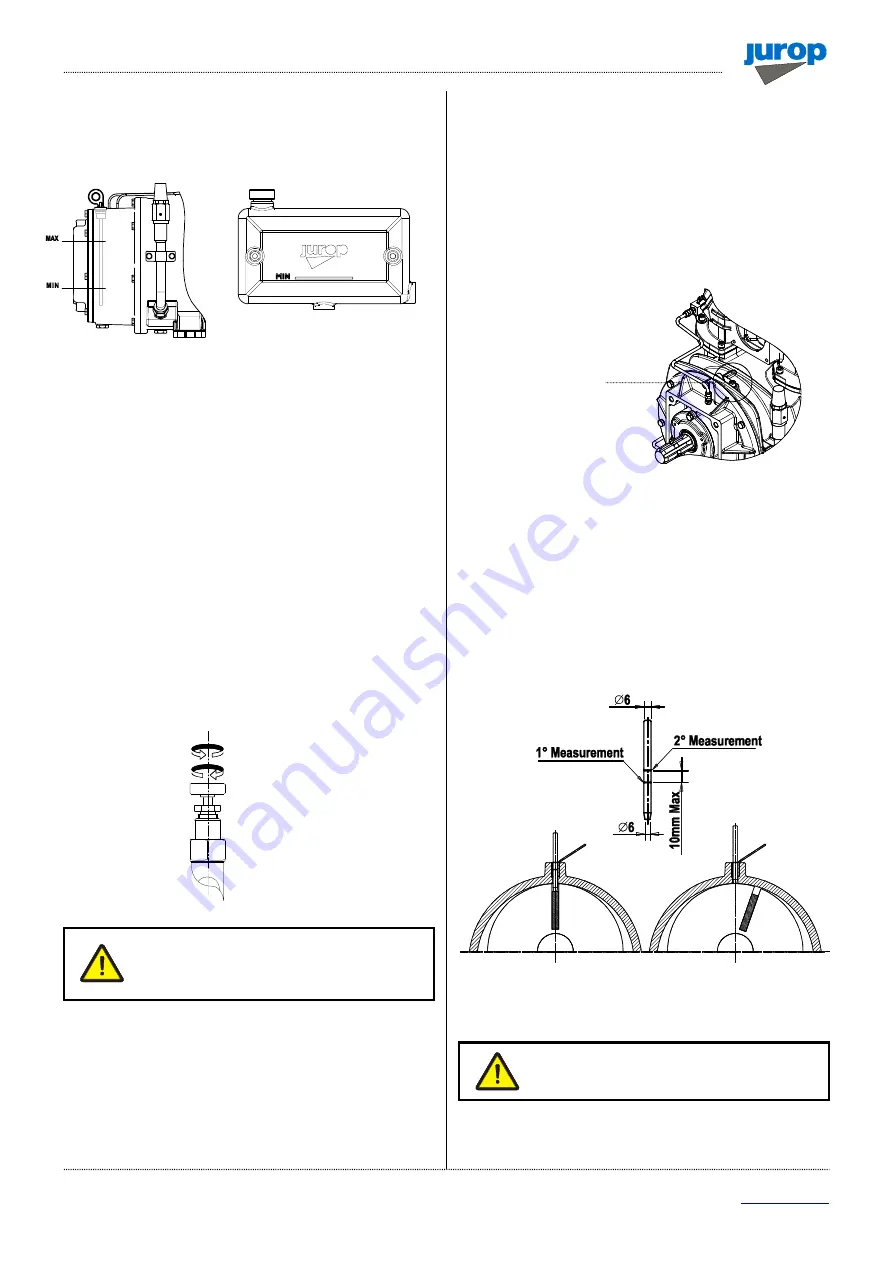
Checking the vanes wear (PN23…58)
• Carry out the inspection by removing the manifold. Insert, near the
outlet/inlet, a 6 mm diameter dipstick with the chamfered end facing
towards the bottom. After resting the dipstick on the rotor, carry out a
first measurement by making a mark on the dipstick.
• Turn the shaft manually and rest the rod on the outer diameter of
the rotor, making a mark on it, turn the shaft again until the rod enters
the vane slot, mark it again and measure the difference between the
two marks.
• Repeat the operation on all the vanes. If the difference exceeds 10
mm, the vanes must be replaced as soon as possible. Replace all the
vanes at the same time.
• At the end of the operation, reassemble the manifold.
Checking the vanes wear (PN84 - PN106)
• Unscrew the vanes wear check-plug on the front flange. See Pic.
6.3.
Pic. 6.3
• Turn the shaft by hand until vanes appearance.
• Vanes usually slip on seat bottom due to gravity. Check their right
entry in the seat.
• Inserire, come in Fig. 6.4, un’astina Ø 6 mm.
• Turn the rotor slowly until the stick touches the vane in idle
position in its seat. The vanes slide to the bottom of the seat due to
gravity: check they really do and mark again on the stick.
• Repeat the same procedure for all the vanes. If wear exceeds 10
mm: replace the vanes as soon as possible.
Pic. 6.4
• Replace all the pump vanes at the same time.
Replace the vanes when their wear exceeds 10
mm (L – L min): they may break. Replace all
vanes at the same time.
• At the end of this checking do not forget to replace the plug on the
port.
VANES
CHECK
-
PLUG
+
OLIO
(
MAX
)
-
OLIO
(
MIN
)
REAR MOUNTED TANK
SIDE MOUNTED TANK