background image

NOTE: Ensure to change the default password after the login. The password must be at least
eight characters long.

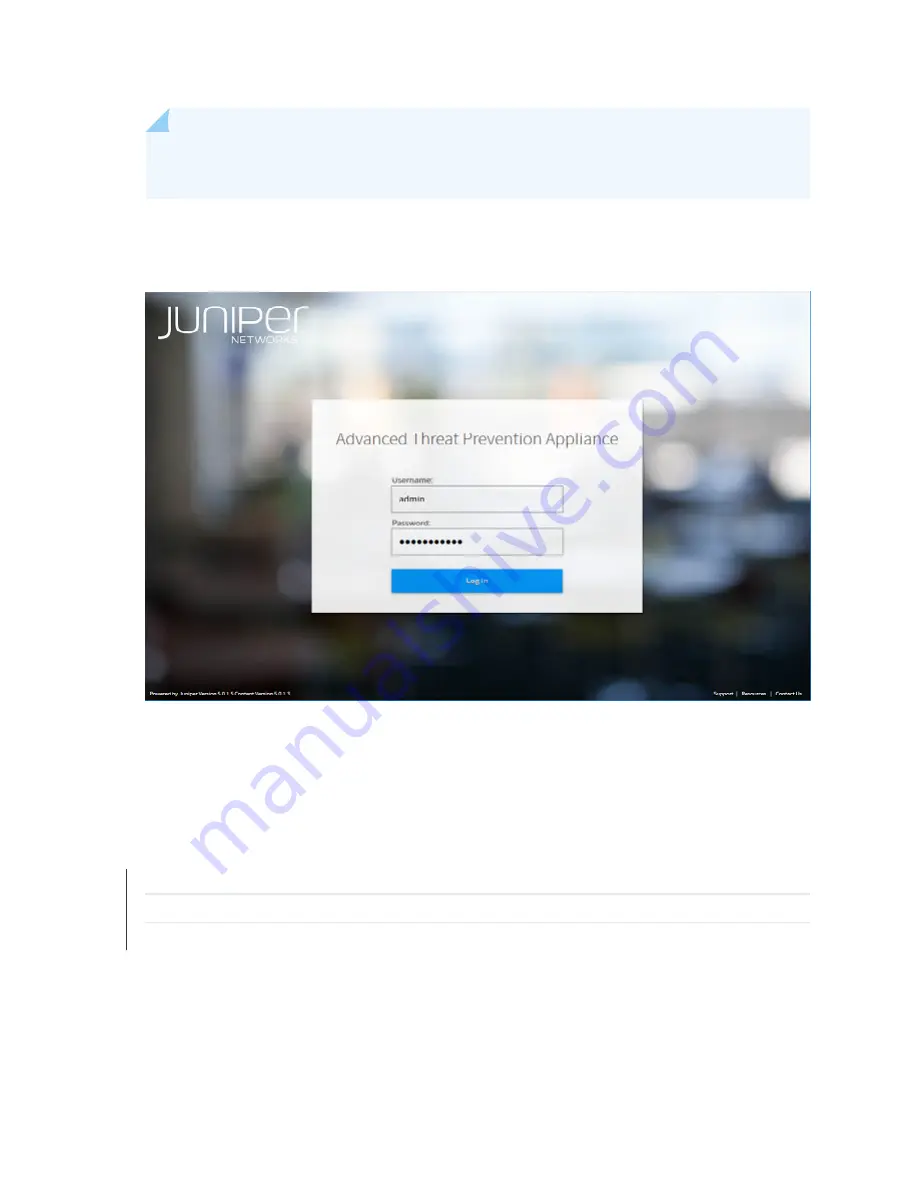
Figure 17: Advanced Threat Prevention Appliance Login Screen

4. Click Log In.

The JATP interface appears.

RELATED DOCUMENTATION

JATP400 Installation Overview  |  25

Connecting the JATP400 to Power  |  35

Connecting the JATP400 Appliance to a Management Device  |  38

45

Содержание JATP400

Страница 1: ...JATP400 Appliance Hardware Guide Published 2021 05 17...

Страница 2: ...Guide Copyright 2021 Juniper Networks Inc All rights reserved The information in this document is current as of the date on the title page YEAR 2000 NOTICE Juniper Networks hardware and software produ...

Страница 3: ...P400 17 JATP400 Site Guidelines and Requirements 17 General Site Installation Guidelines for the JATP400 Appliance 18 JATP400 Appliance Physical Specifications 18 JATP400 Appliance Rack and Clearance...

Страница 4: ...figuring the Device Host Name 41 Configuring the Alternate Exhaust Interface 42 Configuring the Device Basic Attributes 43 Accessing the JATP Interface 44 Configuring IPMI 46 4 Maintaining Components...

Страница 5: ...ning 71 Warning Statement for Norway and Sweden 71 Fire Safety Requirements 72 Installation Instructions Warning 73 Chassis Lifting Guidelines for the JATP400 Appliance 74 Restricted Access Warning 74...

Страница 6: ...ower Wiring Sequence Warning 99 DC Power Wiring Terminations Warning 100 Multiple Power Supplies Disconnection Warning 101 TN Power Warning 102 JATP400 Agency Approvals and Compliance Statements 103 A...

Страница 7: ...ooting for the Juniper Networks Advanced Threat Prevention 400 JATP400 appliance After completing the installation and basic configuration procedures covered in this guide refer to the JATP Software d...

Страница 8: ...1 CHAPTER Overview JATP400 System Overview 2 JATP400 Chassis 4...

Страница 9: ...or as an All In One device The JATP400 appliance is a 1 rack unit 1 U rack mountable chassis with hot swappable dual AC power supplies or optional dual DC power supplies four hot swappable hard disk...

Страница 10: ...l chain Integration with third party devices The JATP400 appliance supports an open API architecture which enables it to integrate with several third party security devices to seamlessly and automatic...

Страница 11: ...ssis IN THIS SECTION JATP400 Appliance Front Panel Description 4 JATP400 Appliance Back Panel Description 10 JATP400 Appliance Front Panel Description Figure 1 on page 4 shows the front panel componen...

Страница 12: ...indicate 4 RESET button Reboots the appliance 5 Power button Powers on or powers off the appliance Use the main power button to apply or remove power from the power supply to the server Turning off sy...

Страница 13: ...e front panel LEDs of the JATP400 appliance Table 3 JATP400 Front Panel LEDs Callout LEDs Description 1 UID Depressing the UID unit identifier button illuminates an LED on both the front and rear of t...

Страница 14: ...an inoperative fan Red slowly blinking Indicates a power failure That is the power is received but the power supply is not functioning Check for a non operational power supply Solid blue Indicates lo...

Страница 15: ...e power supply is plugged in and turned off or the system is off but in an abnormal state For DC power supply Solid green Indicates that the appliance is receiving power Solid amber Indicates that the...

Страница 16: ...A or Non volatile memory express NVMe with Rapid Storage Technology enterprise RSTe support Red blinking At 1 Hz Indicates rebuild drive for SAS SATA with RSTe support Two blinks and one stop at 1 Hz...

Страница 17: ...le 5 JATP400 Back Panel Components Callout Components Description 1 Power supply Provides power to all components 2 USB port Port 1 of USB 2 0 3 Dedicated IPMI LAN port One RJ 45 dedicated Intelligent...

Страница 18: ...hernet copper port 9 1 Gigabit Ethernet LAN port RJ 45 port eth2 alternate exhaust interface Use the alternate exhaust interface for external connectivity in threat detection NOTE You can configure al...

Страница 19: ...ollowing command set traffic monitoring ifc 1gb_ifc After you reboot the appliance the eth4 interface becomes the eth1 interface and this port becomes eth4 13 VGA port One VGA port Use this connection...

Страница 20: ...vity Green blinking Indicates that there is activity on this port Off Indicates no traffic Figure 5 on page 13 shows the back panel 1 Gigabit Ethernet port LEDs of the JATP400 appliance Figure 5 JATP4...

Страница 21: ...LEDs LEDs Description Link left Solid green Indicates that the speed of the connection is 100 Mbps Solid amber Indicates that the speed of the connection is 1 Gbps Activity right Yellow blinking Indic...

Страница 22: ...RELATED DOCUMENTATION JATP400 System Overview 2 JATP400 Site Guidelines and Requirements 17 JATP400 Installation Overview 25 15...

Страница 23: ...2 CHAPTER Site Planning Preparation and Specifications Overview of Preparing the Site for the JATP400 17 JATP400 Site Guidelines and Requirements 17...

Страница 24: ...e plan for power installation meets all electrical safety guidelines 7 Verify that your rack meets the minimum requirements for the installation of the JATP400 appliance 8 Plan to secure the rack to t...

Страница 25: ...procedures to avoid damaging the equipment Static discharge can cause either components to fail completely or intermittently over time NOTE Install the appliance only in restricted areas such as dedi...

Страница 26: ...45 10 Gigabit Ethernet LAN ports Two 10 Gigabit Ethernet SFP LAN ports Four RJ 45 1 Gigabit Ethernet LAN ports One RJ 45 Dedicated IPMI LAN port Two USB 2 0 ports and 2 USB 3 0 ports rear One VGA por...

Страница 27: ...20 provides the requirements for rack size clearance airflow spacing of mounting brackets and flange holes and connecting to the building structure Table 11 Rack and Clearance Requirements for the JAT...

Страница 28: ...onnecting to the building structure Always secure the rack in which you are installing the JATP400 appliance to the structure of the building If your geographical area is subject to earthquakes bolt t...

Страница 29: ...uratio n In 22 TCP SSH command line managemen t Yes No No 443 TCP Secure HTTP HTTPS Used for connecting Web interface and APIs Yes No No Out 22 TCP SSH connection to new managed device Yes Yes No 53 T...

Страница 30: ...s on Configuratio n 123 UDP NTP time synchronizat ion Yes Yes Yes 514 UDP SIEM Syslog CEF server Yes No No 830 TCP Juniper SRX Firewall NOTE For Mitigation through SRX Firewall Yes Yes Yes RELATED DOC...

Страница 31: ...allation Overview 25 Unpacking the JATP400 26 Installing the JATP400 in a Rack 29 Connecting the JATP400 to Power 35 Connecting the JATP400 Appliance to a Management Device 38 Performing the Initial S...

Страница 32: ...arnings on page 68 Unpack the JATP400 and verify the parts received See Unpacking the JATP400 on page 26 Install the JATP400 appliance in a 19 in four post rack See Installing the JATP400 in a Rack on...

Страница 33: ...nding wrist strap Grounding the JATP400 Appliance Phillips screwdriver number 1 Packing and unpacking the JATP400 Appliance Electrostatic bag or antistatic mat ESD grounding wrist strap Unpacking the...

Страница 34: ...ave enough room to remove the components from the chassis 2 Position the cardboard carton with the arrows pointing up 3 Carefully open the top of the cardboard carton 4 Remove the foam covering the to...

Страница 35: ...ipment Table 14 Parts List for a JATP400 Appliance Part Quantity JATP400 appliance 1 End User License Agreement 1 Product registration information 1 Documentation roadmap card 1 Front bezel 1 Ethernet...

Страница 36: ...chassis package includes a pair of rack rail assemblies and mounting screws required to install the chassis in a rack Each rail assembly consists of an inner a middle and an outer rail as shown in Fig...

Страница 37: ...in the inner rails as shown in Figure 7 on page 30 iii Slide the inner rail toward the front of the chassis until the inner rail clicks into the locked position iv Secure the inner rails to the chassi...

Страница 38: ...nt slots of the rack and use the M5 screws to secure the front of the outer rails to the rack as shown in Figure 8 on page 31 Figure 8 Inserting the Front Mounting Rails iii Extend the outer rails and...

Страница 39: ...e the screws to secure the rear of the outer rails to the rack as shown in Figure 9 on page 32 Figure 9 Inserting the Front and Rear Mounting Rails c Slide the middle rails away from the rear of the o...

Страница 40: ...middle rails until the locking tab of the inner rail clicks into the front of the middle rail locking the chassis into the fully extended position g Depress the locking tabs on both sides simultaneous...

Страница 41: ...t cable into the Ethernet port on the back panel When you turn on the power the internal port uses two LEDs to indicate the LAN connection status as described in JATP400 Chassis on page 4 5 Connect th...

Страница 42: ...the appliance to a grounded AC power outlet by using an AC power cord with the grounding pin appropriate for your geographical location Connecting AC Power Source to the JATP400 Appliance Before you...

Страница 43: ...Locate the power cord or cords shipped with the JATP400 appliance 4 Plug the power cord into the AC receptacle on the rear panel as shown in Figure 13 on page 36 If your appliance contains two power s...

Страница 44: ...stripped 12 mm and twisted Phillips screwdriver number 1 CAUTION Before you connect power to the JATP400 appliance ensure it is grounded in one of the below configurations to meet the safety requireme...

Страница 45: ...ce 4 Attach the plastic safety cover 5 Close the input circuit breaker The device powers on as soon as power is provided to the power supply RELATED DOCUMENTATION JATP400 Installation Overview 25 Conn...

Страница 46: ...essing the JATP Interface 44 Selecting the Form Factor To select a form factor 1 At the console prompt log in to JATP with the following default credentials username admin and the password 1JATP234 NO...

Страница 47: ...Advanced Threat Prevention Window 8 Type Yes if you want to change the appliance form factor NOTE If you type No then a Type Yes to confirm that you do not want to change the appliance form factor b...

Страница 48: ...h0 interface 5 Optional Type Yes and enter the secondary DNS server for the eth0 interface 6 Optional Type Yes and enter the search domain for the eth0 interface For example example com NOTE Provide a...

Страница 49: ...ertificate or upload your private key and certificate For more information on the certificates see the Managing Certificates section in the Operator s Guide SSL self signed certificate is regenerated...

Страница 50: ...Secondary Core or an Email Collector type No and enter the Core or All In One IP address Figure 16 Setting Device Basic Attributes 2 Enter the device name 3 Enter the device description 4 Enter the de...

Страница 51: ...a Juniper Advanced Threat Prevention JATP interface Action 1 Open your Web browser 2 Log in to your JATP appliance https IP Address Where IP Address is the IP address of the JATP appliance 3 Enter the...

Страница 52: ...least eight characters long Figure 17 Advanced Threat Prevention Appliance Login Screen 4 Click Log In The JATP interface appears RELATED DOCUMENTATION JATP400 Installation Overview 25 Connecting the...

Страница 53: ...em health and manage the system IPMI operates independently of the operating system OS and allows you to manage a system remotely even in the absence of the OS or the system management software or eve...

Страница 54: ...ter See Figure 19 on page 47 Figure 19 Updating IPMI LAN Configuration 5 Select Static for Configuration Address Source and press Enter See Figure 19 on page 47 6 Assign the values for the following f...

Страница 55: ...Save Exit Save Changes and Reset and press Enter See Figure 20 on page 48 Figure 20 Saving IPMI Settings and Exiting the BIOS Setup 8 Configure your laptop IP address For example see Figure 21 on pag...

Страница 56: ...on the back panel of the JATP400 appliance and the laptop LAN port with a CAT5 Ethernet cable 10 Open your Web browser 11 Log in to your JATP appliance https IP Address Where IP Address is the IP add...

Страница 57: ...ive Figure 22 JATP IPMI Login Screen 13 Click Login The JATP interface appears RELATED DOCUMENTATION JATP400 Chassis 4 Connecting the JATP400 Appliance to a Management Device 38 Performing the Initial...

Страница 58: ...4 CHAPTER Maintaining Components Maintaining JATP400 Power System 52 Maintaining the JATP400 Hard Disk Drive 56...

Страница 59: ...er load NOTE The JATP400 appliance also supports optional DC power supply modules if you need DC power To maintain the power supplies follow these guidelines Ensure that the power and grounding cables...

Страница 60: ...e chassis until the power supply is fully seated in the chassis slot Make sure the tab on the power supply clicks into place c Attach the power cord to the power supply If the power supply is correctl...

Страница 61: ...ch an ESD grounding strap to your bare wrist and connect the strap to one of the ESD points on the chassis c Remove the clear plastic cover protecting the terminal studs on the faceplate d Remove the...

Страница 62: ...and that there is no chance that the cables might become active during the removal process 3 Remove the clear plastic cover over the terminal studs on the faceplate 4 Remove the power cable from the D...

Страница 63: ...ng Split data across more than one disk Error correction Redundant data storage to detect and resolve problems The JATP400 appliance ships with hot swappable hard disks to offer component redundancy T...

Страница 64: ...The hard drive pops partially out of the slot 57...

Страница 65: ...Figure 24 Removing a Drive Carrier g100245 58...

Страница 66: ...e drive in the drive carrier and align the screw holes over the pins on the rails b Secure the drive to the carrier with the screws provided c Push the carrier completely into the drive bay until you...

Страница 67: ...5 CHAPTER Troubleshooting Hardware Contacting Juniper Networks Technical Assistance Center 61...

Страница 68: ...ntacting JTAC by phone enter your 12 digit case number followed by the key if this is an existing case or press the key to be routed to the next available support engineer When requesting support from...

Страница 69: ...6 CHAPTER Returning the Chassis or Components Returning the JATP400 Chassis or Components 63...

Страница 70: ...Materials Authorization RMA See Contacting Customer Support to Obtain Return Material Authorization on page 63 You can also locate the serial number using the following command line interface CLI comm...

Страница 71: ...next available support engineer The support representative validates your request and issues an RMA number for return of the component Packing a JATP400 for Shipping To pack a JATP400 appliance for sh...

Страница 72: ...Maintaining the JATP400 Hard Disk Drive 56 65...

Страница 73: ...ted Access Warning 74 Ramp Warning 76 Rack Mounting and Cabinet Mounting Warnings 76 Grounded Equipment Warning 80 Radiation from Open Port Apertures Warning 81 Laser and LED Safety Guidelines and War...

Страница 74: ...ements and Warning 98 DC Power Wiring Sequence Warning 99 DC Power Wiring Terminations Warning 100 Multiple Power Supplies Disconnection Warning 101 TN Power Warning 102 JATP400 Agency Approvals and C...

Страница 75: ...rd to people or make the equipment unsafe Never attempt to lift an object that is too heavy for one person to handle Never install or manipulate wiring during electrical storms Never install electrica...

Страница 76: ...ote CAUTION You need to observe the specified guidelines to prevent minor injury or discomfort to you or severe damage to the device Attention Veillez respecter les consignes indiqu es pour viter tout...

Страница 77: ...tuazione potrebbe causare infortuni alle persone Prima di lavorare su qualsiasi apparecchiatura occorre conoscere i pericoli relativi ai circuiti elettrici ed essere al corrente delle pratiche standar...

Страница 78: ...to e qualificato deve essere autorizzato ad installare o sostituire questo apparecchio Advarsel Kun kvalifisert personell med riktig oppl ring b r montere eller bytte ut dette utstyret Aviso Este equi...

Страница 79: ...and operate your equipment Fire Suppression In the event of an electrical hazard or an electrical fire you should first turn power off to the equipment at the source Then use a Type C fire extinguish...

Страница 80: ...WARNING Read the installation instructions before you connect the device to a power source Waarschuwing Raadpleeg de installatie aanwijzingen voordat u het systeem met de voeding verbindt Varoitus Lu...

Страница 81: ...solid RELATED DOCUMENTATION General Safety Guidelines and Warnings 68 JATP400 Installation Overview 25 JATP400 Chassis 4 Restricted Access Warning WARNING This unit is intended for installation in res...

Страница 82: ...te un attrezzo speciale lucchetto o altri dispositivi di sicurezza ed controllata dall autorit responsabile della zona Advarsel Denne enheten er laget for installasjon i omr der med begrenset adgang E...

Страница 83: ...ampa inclinada m s de 10 grados Varning Anv nd inte ramp med en lutning p mer n 10 grader Rack Mounting and Cabinet Mounting Warnings Ensure that the rack or cabinet in which the device is installed i...

Страница 84: ...het toestel in het rek monteert of het daar een servicebeurt geeft Varoitus Kun laite asetetaan telineeseen tai huolletaan sen ollessa telineess on noudatettava erityisi varotoimia j rjestelm n vakavu...

Страница 85: ...l ist das Gestell von unten nach oben zu laden wobei das schwerste Bauteil unten im Gestell anzubringen ist Wird das Gestell mit Stabilisierungszubeh r geliefert sind zuerst die Stabilisatoren zu inst...

Страница 86: ...eciais para se certificar de que o sistema possui um suporte est vel As seguintes directrizes ajud lo o a efectuar o seu trabalho com seguran a O Juniper Networks switch dever ser instalado numa prate...

Страница 87: ...st llningen Om denna enhet installeras p en delvis fylld st llning skall st llningen fyllas nedifr n och upp med de tyngsta enheterna l ngst ned p st llningen Om st llningen r f rsedd med stabiliseri...

Страница 88: ...ng LASER WARNING Because invisible radiation might be emitted from the aperture of the port when no fiber cable is connected avoid exposure to radiation and do not stare into open apertures Waarschuwi...

Страница 89: ...to Atenci n Debido a que la apertura del puerto puede emitir radiaci n invisible cuando no existe un cable de fibra conectado evite mirar directamente a las aperturas para no exponerse a la radiaci n...

Страница 90: ...er laser could permanently damage the eye Avertissement Les connecteurs fibre optique sans terminaison peuvent mettre un rayonnement laser invisible Le cristallin de l il humain faisant converger tout...

Страница 91: ...ARNING Do not stare into the laser beam or view it directly with optical instruments Waarschuwing Niet in de straal staren of hem rechtstreeks bekijken met optische instrumenten Varoitus l katso s tee...

Страница 92: ...ing Activity Warning 88 Operating Temperature Warning 89 Product Disposal Warning 90 While performing the maintenance activities for devices observe the following guidelines and warnings Battery Handl...

Страница 93: ...Avvertenza Pericolo di esplosione se la batteria non installata correttamente Sostituire solo con una di tipo uguale o equivalente consigliata dal produttore Eliminare le batterie usate secondo le is...

Страница 94: ...angeschlossen werden und k nnen schwere Verbrennungen verursachen oder an die Anschlu klemmen angeschwei t werden Avvertenza Prima di intervenire su apparecchiature collegate alle linee di alimentazi...

Страница 95: ...ssa l k yhdist tai irrota kaapeleita ukkosilmalla Avertissement Ne pas travailler sur le syst me ni brancher ou d brancher les c bles pendant un orage Warnung Arbeiten Sie nicht am System und schlie e...

Страница 96: ...flot d air constant d gagez un espace d au moins 15 2 cm autour des ouvertures de ventilations Warnung Um einen Router der switch vor berhitzung zu sch tzen darf dieser nicht in einer Gegend betriebe...

Страница 97: ...ent volgens alle landelijke wetten en voorschriften te worden afgedankt Varoitus T m n tuotteen lopullisesta h vitt misest tulee huolehtia kaikkia valtakunnallisia lakeja ja s nn ksi noudattaen Averti...

Страница 98: ...orts pour int rieur ne doivent pas tre raccord s physiquement aux interfaces pr vues pour la connexion l installation ext rieure ou son c blage Les ports pour int rieur de l appareil sont r serv s au...

Страница 99: ...ossible hazards in your work area such as moist floors ungrounded power extension cords and missing safety grounds Operate the device within marked electrical ratings and product usage instructions To...

Страница 100: ...its antistatic bag see Figure 25 on page 94 in one hand and touch the exposed bare metal of the device with the other hand immediately before inserting the component into the device WARNING For safety...

Страница 101: ...To dissipate this charge always ground the cables to a suitable and safe earth ground before connecting them to the system Attention Les c bles ANSI TIA EIA 568 par exemple Cat 5e et Cat 6 peuvent em...

Страница 102: ...cting device for the AC powered device The socket outlet must be near the AC powered device and be easily accessible For devices that have more than one power supply connection you must ensure that al...

Страница 103: ...Antes de manipular el chasis de un equipo o trabajar cerca de una fuente de alimentaci n desenchufar el cable de alimentaci n en los equipos de corriente alterna CA Varning Innan du arbetar med ett ch...

Страница 104: ...e l interruttore automatico sul quadro strumenti che alimenta il circuito CC mettere l interruttore in posizione OFF e fissarlo con nastro adesivo in tale posizione Advarsel F r noen av disse prosedyr...

Страница 105: ...n gemaakt en het laatste worden losgemaakt Varoitus Laitetta asennettaessa on maahan yhdist minen aina teht v ensiksi ja maadoituksen irti kytkeminen viimeiseksi Avertissement Lors de l installation d...

Страница 106: ...le fil de masse devrait toujours tre reli d abord et d branch pour la derni re fois Notez que le fil de masse devrait toujours tre reli d abord et d branch pour la derni re fois Warnung Die Stromzufuh...

Страница 107: ...ING When stranded wiring is required use approved wiring terminations such as closed loop or spade type with upturned lugs These terminations must be the appropriate size for the wires and must clamp...

Страница 108: ...cabo em circuito fechado e planas com terminais de orelha voltados para cima Estas termina es de cabo dever o ser do tamanho apropriado para os respectivos cabos e dever o prender simultaneamente o i...

Страница 109: ...fra enheten Aviso Este dispositivo possui mais do que uma conex o de fonte de alimenta o de energia para poder remover a fonte de alimenta o de energia dever o ser desconectadas todas as conex es exi...

Страница 110: ...CTION Agency Approvals for the JATP400 Appliance 103 Compliance Statements for Acoustic Noise for the JATP400 Appliance 106 Agency Approvals for the JATP400 Appliance JATP400 comply with the following...

Страница 111: ...V1 3 3 2005 Telecom Network Equipment EMC requirements ICES 003 Class A AS NZS CISPR 22 Class A CISPR 22 Class A Immunity EN 61000 3 2 Power Line Harmonics EN 61000 3 3 Voltage Fluctuations and Flick...

Страница 112: ...EMC ICES Class A Network homologation CS 03 Australia Safety Certification AS NZS 60950 1 EMC AS NZS CISPR22 Class A Network homologation AS ACIF S 002 S 016 S 0431 S043 2 New Zealand Safety Certific...

Страница 113: ...nce The maximum emitted sound pressure level is 65 dB A or less per EN ISO 7779 German Translation Maschinenl rminformations Verordnung 3 GPSGV der h chste Schalldruckpegel betr gt 65 dB A oder wenige...

Отзывы: