background image

80

3

Award BIOS Setup Utility

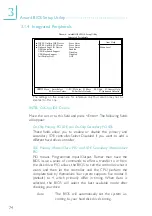
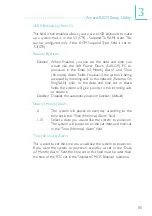
off when AC power failure occurs, it will remain off
when  power  returns.  If  the  system’s  power  is  on
when  AC  power  failure  occurs,  the  system  will
power-on when power returns.

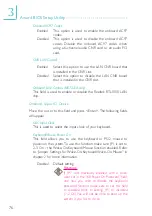
Game  Port Address

This field is used to select the game port’s address.

Midi  Por t Address

This  field  is  used  to  select  the  midi  por t’s  address.  If  you  have
selected  the  midi  port’s  address,  you  may  select  its  IRQ  in  the
“Midi Por t IRQ” field.

Midi Port IRQ

This field is used to select the midi por t’s IRQ.

SCR  Port Address/IRQ

This  field  is  used  to  select  the  SC  por t’s  IRQ. The  number  that
appears before the IRQ selected is the SC port’s address.

MS/SD  Port  Address/IRQ

This field is used to select the MS or SD port’s IRQ. The number
that  appears  before  the  IRQ  selected  is  the  MS/SD  port’s
address.

Important:

IRQs for  Serial Port  1, Serial  Port  2,  Parallel  Port,  SC  Port  and
MS/SD  Port  must  be  appropriately  selected  making  sure
each  port  uses  a  different  IRQ.  For  example,  if  you  selected
“700H/IRQ3”  for  the  SC  port,  “700H”  is  the  port’s  address
and “IRQ3”  is  the  IRQ. Therefore  you  must  not  select  IRQ3
for  the  other  ports.

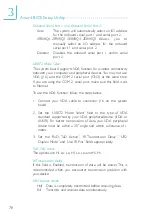
MS/SD  Port  Mode

The  MS/SD  connector  (JP4)  is  an  interface  for  Memory  Stick  or
Secure Digital Memor y Card.

MS Socket

Select  this  option  if  JP4  is  connected  with  a
Memor y Stick card.

SD Socket

Select this option if JP4 is connected with a Secure
Digital Memory Card.

Содержание NB73-EA

Страница 1: ...NB73 EA NB73 ES Rev A System Board User s Manual 58600213...

Страница 2: ...the right to revise this publication and make changes to its contents at any time without obligation to notify any person or entity of such revisions or changes 2002 All Rights Reserved Trademarks Wi...

Страница 3: ...ot installed and used in accordance with the instruction manual may cause harmful interference to radio communications However there is no guarantee that interference will not occur in a particular in...

Страница 4: ...egarded as the most updated version The multilingual manual is included in the system board package To view the user s manual insert the CD into a CD ROM drive The autorun screen Main Board Utility CD...

Страница 5: ...8 Factory Use Jumper 2 9 Ports and Connectors Chapter 3 Award BIOS Setup Utility 3 1 The Basic Input Output System 3 1 1 Standard CMOS Features 3 1 2 Advanced BIOS Features 3 1 3 Advanced Chipset Feat...

Страница 6: ...s 4 5 Audio Drivers and Software Application 4 6 Onboard LAN Drivers for Windows 4 7 USB 2 0 Driver 4 8 Winbond Smart I O Drivers 4 9 Winbond SmartCard Application 4 10 Microsoft DirectX 8 1 Driver 4...

Страница 7: ...ystem data bus System Memory Two 184 pin DDR SDRAM DIMM sockets 2 5V unbuffered PC1600 DDR200 PC2100 DDR266 DDR SDRAM DIMM Supports maximum of 2GB system memory using 64Mbit 128Mbit 256Mbit or 512Mbit...

Страница 8: ...efficiency CNR Communication and Networking Riser is an interface that supports multi channel audio V 90 analog modem phone line based networking or 10 100 Ethernet based networking riser board Onboar...

Страница 9: ...rt 1 mini DIN 6 PS 2 mouse port 1 mini DIN 6 PS 2 keyboard port 3 audio jacks line out line in and mic in Connectors 1 connector for 2 additional external USB 2 0 1 1 ports 1 connector for an external...

Страница 10: ...mputer and a wide range of simultaneously accessible external Plug and Play peripherals BIOS Award BIOS Windows 98SE 2000 ME XP Plug and Play compatible Supports SCSI sequential boot up Flash EPROM fo...

Страница 11: ...r more information 1 1 3 Intelligence Automatic System Fan Off The system fan will automatically turn off once the system enters the Suspend mode Dual Function Power Button Depending on the setting in...

Страница 12: ...Keyboard Mouse Power On Onboard Super IO Device field in the Integrated Peripherals section in chapter 3 for more information Important The power button will not function once a keyboard password has...

Страница 13: ...to implement Power Management and Plug and Play with operating systems that support OS Direct Power Management Currently only Windows 98SE 2000 ME XP supports the ACPI function ACPI when enabled in t...

Страница 14: ...destroy data stored in hard drives The system board is designed to protect the boot sector and partition table of your hard disk drive 1 2 Package Checklist The system board package contains the follo...

Страница 15: ...Power LED AGP Slot PCI 1 Slot PCI 2 Slot PCI 3 Slot PCI 4 Slot PCI 5 Slot CNR Slot Wake On Ring J12 DDR SDRAM DIMM 1 ATXP1 DDR SDRAM DIMM 2 J20 Factory use only J3 CN4 LAN Line out Line in Mic in J6 R...

Страница 16: ...CD in J7 DIMM Standby Power LED AGP Slot PCI 1 Slot PCI 2 Slot PCI 3 Slot PCI 4 Slot PCI 5 Slot CNR Slot Wake On Ring J12 DDR SDRAM DIMM 1 ATXP1 DDR SDRAM DIMM 2 J20 Factory use only J3 CN4 Line out...

Страница 17: ...able establish and maintain contact with the system chassis throughout any procedures requiring ESD protection The system board is equipped with two 184 pin DDR SDRAM DIMM Dual In line Memory Module s...

Страница 18: ...must correspond with Pin 1 of the socket 1 Pull the tabs which are at the ends of the socket to the side 2 Position the DIMM above the socket with the notch in the module aligned with the key on the...

Страница 19: ...system because the processor s ratio clock was incorrectly set in the BIOS you can reconfigure the system with the default values stored in the ROM BIOS To load the default values stored in the ROM B...

Страница 20: ...er the main menu of the BIOS 5 Select the CPU Frequency Voltage Control submenu and press Enter 6 Set the CPU Clock Ratio or Clock By Slight Adjust field to its default setting or an appropriate frequ...

Страница 21: ...wer On Onboard Super IO Device field in the Integrated Peripherals submenu of the BIOS must be set accordingly Refer to chapter 3 for details Warning 1 If JP1 was enabled with a password set in the KB...

Страница 22: ...ion once a keyboard password has been set in the KB Power On Password Onboard Super IO Device field of the Integrated Peripherals submenu You must type the correct password to power on the system 3 Th...

Страница 23: ...8 and Wake On USB Keyboard for USBs 5 and 6 Jumper JP9 The Wake On USB Keyboard function allows you to use a USB keyboard to wake up a system that is in the S3 STR Suspend To RAM state Regardless of t...

Страница 24: ...sing the Wake On USB Keyboard function for 2 USB ports the 5VSB power source of your power supply must support 1 5A If you are using the Wake On USB Keyboard function for 3 or more USB ports the 5VSB...

Страница 25: ...electing the CPU s Front Side Bus CPU Front Side Bus Select Jumper JP2 This jumper is used to select the front side bus of the CPU installed on the system board 1 2 On 100MHz 2 3 On Auto default All O...

Страница 26: ...J22 default 2 3 On USB 6 on CNR USB 6 Select Jumpers J20 and J21 These jumpers are used to select USB 6 s location Set pins 1 and 2 to On if you want USB 6 on J18 J22 Set pins 2 and 3 to On if you wan...

Страница 27: ...on 27 2 8 Factory Use Jumper 1 2 3 1 2 On Default Factory Use Only Jumper J3 This jumper is for factory use only Please leave it in its default setting Reconfiguring the jumper may cause problems Fact...

Страница 28: ...s ATX Double Deck Ports on NB73 EA ATX Double Deck Ports on NB73 ES PS 2 Mouse PS 2 K B COM 1 RJ45 LAN USB 4 3 Parallel USB 1 USB 2 COM 2 Line out Line in Mic in PS 2 Mouse PS 2 K B COM 1 USB 3 Parall...

Страница 29: ...m will reserve IRQ12 for other expansion cards The Wake On Keyboard Wake On Mouse function allows you to use the keyboard or PS 2 mouse to power on the system Refer to Jumper Settings for Wake On Keyb...

Страница 30: ...s of the board These ports are RS 232C asynchronous communication ports with 16C550A compatible UARTs that can be used with modems serial printers remote display terminals and other serial devices You...

Страница 31: ...t CN2 Burgundy located at the ATX double deck ports of the board for interfacing your PC to a parallel printer It supports SPP ECP and EPP modes You can select the port s mode in the Integrated Periph...

Страница 32: ...bilities Port EPP Enhanced Parallel Port Function Allows normal speed operation but in one direction only Allows parallel port to operate in bidirectional mode and at a speed faster than the SPP s dat...

Страница 33: ...tion VCC UP5 UP5 Ground Key Pin 6 7 8 9 10 Function VCC UP6 UP6 Ground N C Pin 11 12 13 14 15 Function Ground Ground UP5 UP5 VCC Onboard USB Ports USB 1 2 3 4 Additional USB Ports USB 5 6 J5 USB 1 Bla...

Страница 34: ...edge bracket will be provided as an option If you wish to use the optional USB ports install the card edge bracket to the system chassis then insert the connector that is attached to the USB port cabl...

Страница 35: ...e ATX double deck ports It allows the system board to connect to a local area network by means of a network hub The Realtek RTL8100 chip that controls this port can be enabled or disabled in the Integ...

Страница 36: ...9 6 Audio Jacks Front Audio J13 Pin 1 3 5 7 9 Function Mic Vbias AuD_R_Out N C AuD_L_Out Function Ground AuD_Vcc Avcc N C Key N C Pin 2 4 6 8 10 CN4 Line In Light Blue Line Out Lime Mic In Pink Front...

Страница 37: ...io output from the system board Line in Jack Light Blue This jack can be connected to the line out jack of any external audio devices such as Hi fi set CD player AM FM radio tuner synthesizer etc Conn...

Страница 38: ...he system chassis then connect the game MIDI port cable to connector J15 Make sure the colored stripe on the ribbon cable is aligned with pin 1 of connector J15 The Game MIDI port is identical to that...

Страница 39: ...AD TAD is a connector for telephony audio devices such as voice modem cards By installing a PCI voice modem card that is also equipped with a TAD connector connect one end of the cable that came with...

Страница 40: ...o signal from degrading whenever it is converted to analog One card edge bracket mounted with 1 S PDIF in connector and 1 S PDIF out connector will be provided as an option Install the card edge brack...

Страница 41: ...2 Hardware Installation 41 The Card Edge Bracket Mounted with S PDIF in and S PDIF out Connectors S PDIF OUT S PDIF IN...

Страница 42: ...t Connector Pin 1 3 5 7 Function SL Ground SR Ground Function Center out Ground LFE Out Key Pin 2 4 6 8 The 4 channel audio connector J25 supports 4 audio output signals center channel subwoofer rear...

Страница 43: ...he extent and type of security will depend on the settings built into the card Memory Stick is an IC memory media that has a large storage capacity It can store any format of digital data as well as t...

Страница 44: ...2 44 Hardware Installation The optional Smart I O Drive Smart Card Memory Stick Secure Digital Memory Card...

Страница 45: ...SCAPSNT Pin 6 7 8 9 10 Smart Card Interface Pin 1 2 3 4 5 Function Ground MSA1 VCC3 MSA2 MSA3 Function MSA4 MSA5 MSACLK MSAPWC MSALED Pin 6 7 8 9 10 Memory Stick Interface Pin 1 2 3 4 5 Function Grou...

Страница 46: ...may enable or disable this function in the Integrated Peripherals submenu Onboard Super IO Device field of the BIOS Connecting the Floppy Disk Drive Cable 1 Install the 34 pin header connector of the...

Страница 47: ...controller in the Integrated Peripherals submenu INTEL OnChip IDE Device field of the BIOS Connecting the IDE Disk Drive Cable 1 If you are connecting two IDE drives install the 40 pin connector of t...

Страница 48: ...A 2 ATA 33 ATA 66 or ATA 100 hard drives We recommend that you use hard drives from the same manufacturer In a few cases drives from two different manufacturers will not function properly when used to...

Страница 49: ...ector J16 on the system board Set UART2 Mode Select Onboard Super IO Device field in the Integrated Peripherals submenu of the BIOS to the type of IrDA standard supported by your device You must have...

Страница 50: ...Pin 1 2 3 Function Ground Power Sense The CPU must be kept cool by using a fan with heatsink Connect the CPU fan to the 3 pin fan connector at location J1 on the system board The system is capable of...

Страница 51: ...ystem unit connect the fan s connector to location J4 on the system board The fan will provide adequate airflow throughout the chassis to prevent overheating the CPU The system is capable of controlli...

Страница 52: ...ou are installing a second fan in the system unit connect the fan s connector to location J23 on the system board The system is capable of monitoring and controlling the speed of the system fan The sy...

Страница 53: ...MA interrupt To use the Wake On LAN function you must enable the Resume on LAN field in the Power Management Setup of the BIOS Your LAN card package should include a cable Connect one end of the cable...

Страница 54: ...ternal modem card To use this function connect one end of the cable that came with the card to the card s wake on ring connector and the other end to location J12 on the system board You must also ena...

Страница 55: ...ion Ground Chassis signal N C 5V The chassis open function when enabled will alert you that the system chassis is open To use this function connect the chassis sensor cable that is attached on your sy...

Страница 56: ...ype of AGP card is used the AGP Warning LED will not light However if no AGP card is installed in the slot or you installed a 3 3V AGP card the LED will light indicating that a non 1 5V card was used...

Страница 57: ...nitializing JEDEC of current DRAM row Checking CMOS checksum and battery Initializing the clock generator Initializing USB Testing all memory cleared all extended memory to 0 Initializing the onboard...

Страница 58: ...rocessor s Voltage Regulator Module VRM The 6 pin auxiliary power connector provides additional current for the board s 3 3VDC and 5VDC Using a power supply that does not have this connector will stil...

Страница 59: ...PW OK 5VSB 12V Pin 11 12 13 14 15 16 17 18 19 20 Function 3 3V 12V Ground PS ON Ground Ground Ground 5V 5V 5V Pin 1 2 3 Function Ground Ground Ground Function 3 3V 3 3V 5V Pin 4 5 6 Pin 1 2 3 4 ATX M...

Страница 60: ...etting in the BIOS setup this switch is a dual function power button that will allow your system to enter the Soft Off or Suspend mode Refer to Soft Off By PWR BTTN in the Power Management Setup Chapt...

Страница 61: ...as powered on it may indicate that the CPU or memory module was not installed properly Please make sure they are properly inserted into their corresponding socket Pin 3 5 14 16 8 10 18 20 7 9 13 15 17...

Страница 62: ...espond restart the system or press the Reset button You may also restart the system by pressing the Ctrl Alt and Del keys simultaneously When you press Del the main menu screen will appear 3 1 1 Stand...

Страница 63: ...ter or IDE Secondary Slave field then press Enter IDE HDD Auto Detection Detects the parameters of the drive The parameters will automatically be shown on the screen The settings on the screen are for...

Страница 64: ...erating system s manual or Help desk on which one to select Drive A and Drive B These fields identify the types of floppy disk drives installed None No floppy drive is installed 360K 5 25 in 5 1 4 in...

Страница 65: ...system boot will not stop for a disk error it will stop for all other errors All But Disk Key The system boot will not stop for a disk or keyboard error it will stop for all other errors Base Memory...

Страница 66: ...atures Item Help Menu Level Allows you to choose the VIRUS warning feature for IDE Hard Disk boot sector protection If this function is enabled and someone attempt to write data into this area BIOS wi...

Страница 67: ...dows 98SE 2000 ME XP or the operating system may not install nor work CPU L1 L2 Cache This field speeds up the memory access Quick Power On Self Test This field speeds up Power On SelfTest POST after...

Страница 68: ...not be any warning message if the drive installed is 360KB Boot Up NumLock Status This allows you to determine the default state of the numeric keypad By default the system boots up with NumLock on w...

Страница 69: ...r only when you enter the BIOS setup Set the password in the Set Supervisor User Password submenu System The system will not boot and access to Setup will be denied unless the correct password is ente...

Страница 70: ...re The default is Disabled If you are using hard drives that support S M A R T set this field to Enabled SMART is supported in ATA 33 or later hard drives Full Screen Logo Show This field is applicabl...

Страница 71: ...ese two fields CAS Latency Time This field is used to select the local memory clock periods Active to Precharge Delay The options are 5 6 and 7 The settings on the screen are for reference only Your v...

Страница 72: ...AM the higher the efficiency of the system Video BIOS Cacheable As with caching the system BIOS enabling the Video BIOS cache will allow access to video BIOS addresssed at C0000H to C7FFFH to be cache...

Страница 73: ...s data of the AGP card installed in your system Leave this in its default setting AGP 4X Mode This field is used to enable the AGP 4x interface which transfers video data at 1066MB sec bandwidth thus...

Страница 74: ...BIOS to tell the controller what it wants and then let the controller and the CPU perform the complete task by themselves Your system supports five modes 0 default to 4 which primarily differ in timi...

Страница 75: ...DD Block Mode Enabled The IDE HDD uses the block mode The system BIOS will check the hard disk drive for the maximum block size the system can transfer The block size will depend on the type of hard d...

Страница 76: ...O Device Move the cursor to this field and press Enter The following fields will appear KBC Input Clock This is used to select the input clock of your keyboard Keyboard Mouse Power On This field allow...

Страница 77: ...k before powering on the system Hot Key When this option is selected move the cursor to the KB Power On Hot Key field to select a function key you would like to use to power on the system The options...

Страница 78: ...sure this field is set to Normal To use the IrDA function follow the steps below 1 Connect your IrDA cable to connector J16 on the system board 2 Set the UART2 Mode Select field to the type of IrDA st...

Страница 79: ...r rate EPP Enhanced Parallel Port Allows bidirectional parallel port operation at maximum speed If you selected EPP the EPP Mode Select field is configurable If you selected ECP the ECP Mode Use DMA f...

Страница 80: ...t appears before the IRQ selected is the SC port s address MS SD Port Address IRQ This field is used to select the MS or SD port s IRQ The number that appears before the IRQ selected is the MS SD port...

Страница 81: ...ured only if the USB Controller field is enabled USB Mouse Support This field is used to enable or disable the USB mouse It can be configured only if the USB Controller field is enabled Init Display F...

Страница 82: ...en select S3 STR in the field below ACPI Suspend Type This field is used to select the type of Suspend mode S1 POS Enables the Power On Suspend function S3 STR Enables the Suspend to RAM function X X...

Страница 83: ...em to turn off the vertical and horizontal synchronization ports and write blanks to the video buffer Blank Screen This option only writes blanks to the video buffer DPMS Initializes display power man...

Страница 84: ...system Resume on PCI Event Enabled Access to the onboard LAN or a PCI card such as a modem or LAN card will cause the system to wake up The PCI card must support the wake up function Disabled The syst...

Страница 85: ...Ring LAN prior to the date and time set in these fields the system will give priority to the incoming calls or network Disabled Disables the automatic power on function default Date of Month Alarm 0...

Страница 86: ...ll automatically detect the settings for you Manual Choose the specific IRQ in the IRQ Resources field The settings on the screen are for reference only Your version may not be identical to this one X...

Страница 87: ...I VGA or not Enabled MPEG ISA VESA VGA cards work with PCI VGA Disabled MPEG ISA VESA VGA cards does not work with PCI VGA PCI IRQ Assignment By default an IRQ is automatically assigned to the PCI dev...

Страница 88: ...AT V and 5VSB V These fields show the output voltage of the power supply The settings on the screen are for reference only Your version may not be identical to this one Phoenix AwardBIOS CMOS Setup Ut...

Страница 89: ...nboard hardware monitor function is capable of detecting system health conditions but if you want a warning message to pop up or a warning alarm to sound when an abnormal condition occurs you must ins...

Страница 90: ...CPU Clock Ratio This field is used to select the frequency ratio of the processor Important The frequency ratio of some processors may have been locked by the manufacturer If you are using this kind o...

Страница 91: ...rmance If you selected an option other than the default setting and is unable to boot up the system there are 2 methods of booting up the system and going back to its default setting Method 1 Clear th...

Страница 92: ...turn off all high performance features You should use these values only if you have hardware problems Highlight this option in the main menu and press Enter The message below will appear Load Fail Saf...

Страница 93: ...in exactly the same password If you type in a wrong password you will be prompted to enter the correct password again To delete or disable the password function highlight Set Supervisor Password and p...

Страница 94: ...tics on the screen If you wish to make additional changes to the setup press Ctrl Alt Esc simultaneously or Del after memory testing is done 3 1 14 Exit Without Saving When you do not want to save the...

Страница 95: ...umbers of hardware installed etc are automatically detected and stored in the DMI pool which is a part of the system board s Plug and Play BIOS Additional information such as ISA based peripherals whi...

Страница 96: ...or arrow keys then press Enter 3 The cursor will move to the screen you select allowing you to edit information The screen will also display the auto detected information 4 Press F10 to update the ed...

Страница 97: ...or arrow keys to select the Load DMI File menu 2 The following message will appear Press Enter to select DMI file for load Press Enter 3 The DMI files will appear on the screen Select the file you wou...

Страница 98: ...ME operating system To install the utility insert the CD included in the system board package into a CD ROM drive The autorun screen Main Board Utility CD will appear Click the Hardware Doctor for Wi...

Страница 99: ...he utility insert the CD included in the system board package into a CD ROM drive The autorun screen Main Board Utility CD will appear Click the Intel Application Accelerator for Windows button to ins...

Страница 100: ...readme file for instructions on using the driver 4 9 Winbond SmartCard Application If you are using a Smart Card install the Winbond SmartCard Application to configure the the card for system security...

Страница 101: ...Main Board Utility CD screen did not appear please go directly to the root directory of the CD and double click Setup 2 Please go to DFI s web site at http www dfi com support1 download2 asp for the l...

Страница 102: ...e consists of a single long beep A 2 Error Messages One or more of the following messages may be displayed if the BIOS detects an error during the POST This list indicates the error messages for all A...

Страница 103: ...fixed disk Hard Disk s fail 08 Sector Verify failed Keyboard is locked out Unlock the key The BIOS detects that the keyboard is locked Keyboard controller is pulled low Keyboard error or no keyboard...

Страница 104: ...st the outlet by plugging in a lamp or other electrical device 4 The monitor is turned on 5 The display s brightness and contrast controls are adjusted properly 6 All add in boards in the expansion sl...

Страница 105: ...hing happens 1 Check that one end of the AC power cord is plugged into a live outlet and the other end properly plugged into the back of the system 2 Make sure that the voltage selection switch on the...

Страница 106: ...a cable connection problem However if your hard drive has a large capacity it will take a longer time to format Parallel Port The parallel printer doesn t respond when you try to print 1 Make sure tha...

Страница 107: ...onfigured correctly Keyboard Nothing happens when a key on the keyboard was pressed 1 Make sure the keyboard is properly connected 2 Make sure there are no objects resting on the keyboard and that no...

Отзывы: