
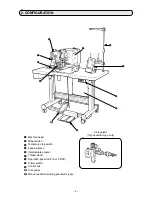


– 4 –
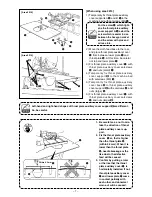
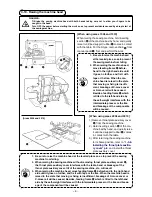
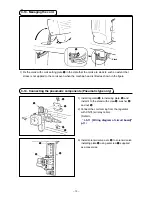
(2) Connectng the power source cord
Voltage specifications at the time of delivery from the factory are indicated on the voltage indication
seal. Connect the cord in accordance with the specifications.
Voltage indication seal (3-phase type only)
Voltage caution seal
rating label
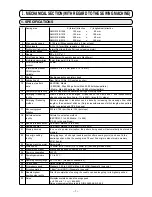
table
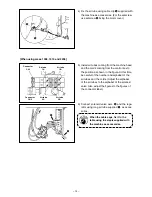
Brown
Brown
Brown
light blue
light blue
light
blue
Green/Yellow
Green/
Yellow
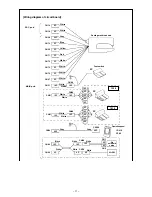
control box
Green/Yellow
Plug
Power source cord
Power switch
GnD
ac200 V
ac220 V
ac230 V
ac240 V
• connecting single phase 200V, 220V, 230V and 240V
White
Power source cord
Power switch
GnD
ac200 V
ac220 V
ac240 V
• connecting three phase 200V, 220V and 240V
red
White
Black
Green/
Yellow
red
Black
White
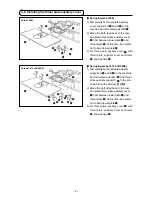
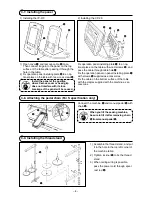
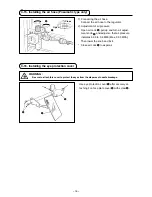
1) Ft the holes of hnges
A
to the holes of table
and fix as shown in the figure.
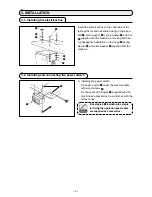
3-3. Installation of the sewing machine head
In case of the pneumatic type, fix
solenoid valve installing plate
1
as
well.
WarnInG :
to prevent possible accidents caused by the full of the sewing machine, perform the work by two
persons or more when the machine is moved.
A
1
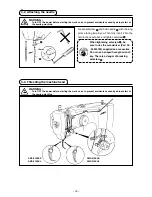
1. never use under the wrong volt-
age and phase.
2. When changing the voltage,
refer to the item of
"
#
-1-11. changing the voltage
of 100
,/
200V" p.127
.
table
control box
Green/Yellow
Black
red
Green/Yellow
Plug


