Page 16
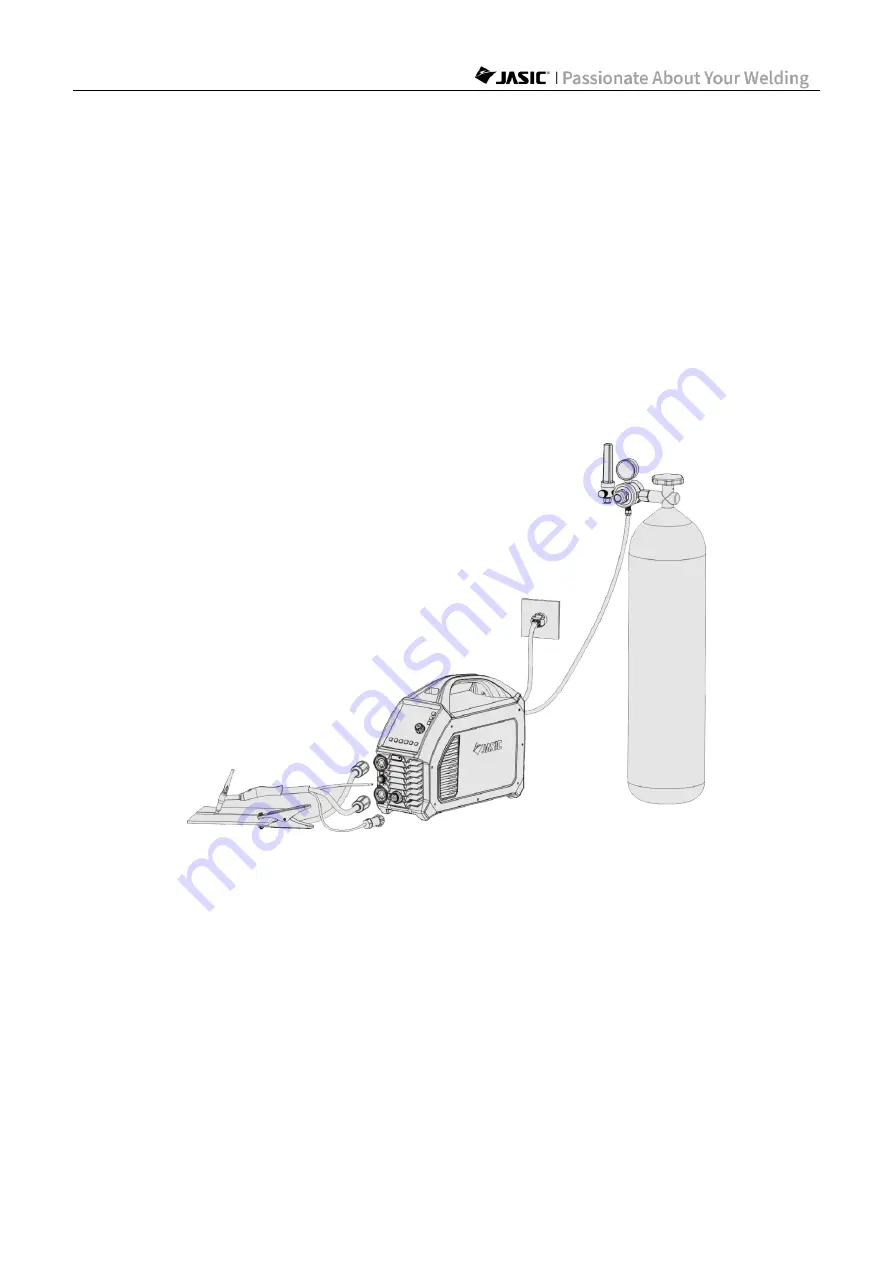
5.4. TIG welding torch and earth cable connection
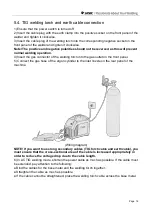
1) Ensure that the power switch is turned off.
2) Insert the cable plug with the earth clamp into the positive socket on the front panel of the
welder and tighten it clockwise.
3) Insert the cable plug of the welding torch into the corresponding negative socket on the
front panel of the welder and tighten it clockwise.
Note!
The positive and negative polarities should not be reversed as this will prevent
normal welding operation.
4) Insert the gas connector of the welding torch into the gas outlet on the front panel.
5) Connect the gas hose of the argon cylinder to the inlet nozzle on the rear panel of the
machine.
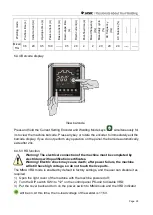
(Wiring diagram)
NOTE!
If you want to use long secondary cables (TIG torch cable and earth cable), you
must ensure that the cross-sectional area of the cable is increased appropriately in
order to reduce the voltage drop due to the cable length.
6) In AC TIG welding mode, shorten the power cable as much as possible. If the cable must
be extended, pay attention to the following:
● Bind the cables for the base metal and the welding torch together.
● Straighten the cable as much as possible.
● If the cable cannot be straightened, place the welding torch cable across the base metal.


